Trekking Pole Tarp Height Calculator
Estimate A-frame ridge height, trekking pole length, side clearance, guyline reach, and weather pitch margin from tarp width, stake spread, sag, pole lean, and ground slope.
🏕Tarp Pitch Presets
📐Tarp Geometry Inputs
Flat fabric width from one side edge to the other across the ridge.
Used for ridgeline sag, pole spacing, and guyline planning.
Wider pitches create more floor room but lower the ridge unless poles rise.
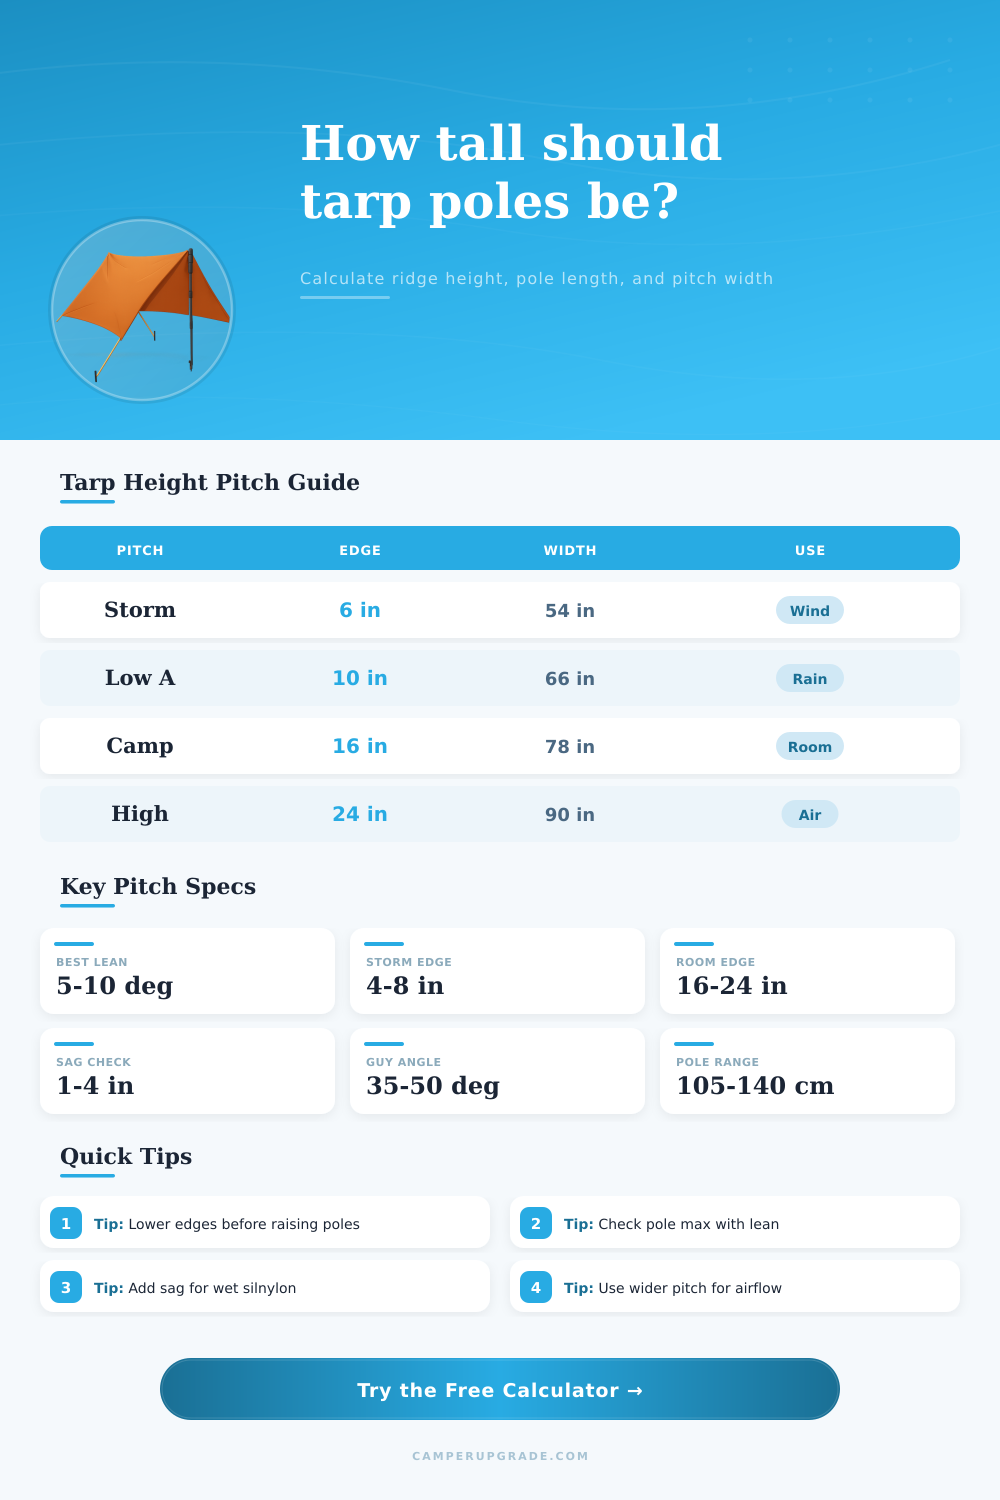
Storm pitches often use 4 to 8 inches; airy pitches use 16 inches or more.
Mode changes front height bias and guyline reach assumptions.
Wet stretch and catenary cuts change the practical pole setting.
Add more for wet silnylon, long spans, soft ground, or elastic tie-outs.
Leaning poles need more pole length for the same vertical ridge height.
Use your pole's real locked length, not the printed marketing range.
Positive means pole tip sits above the ridge tie point; negative means recessed.
Positive means front pole stands uphill and must be set shorter.
Lower angles improve hold but need farther stake placement.
This calculator estimates tarp geometry. Final pitch depends on soil hold, wind direction, fabric tension, pole locks, and local site limits.
Tarp Height Results
🧭Tarp Geometry Spec Grid
📊Common Tarp Pitch Height Table
| Pitch Style | Side Edge Height | Ground Width | Typical Use |
|---|---|---|---|
| Storm A-frame | 4 to 8 in | 50 to 60 in | Wind, cold rain, exposed camps |
| Low three-season A-frame | 8 to 12 in | 60 to 72 in | Rain coverage with usable floor width |
| Balanced camp pitch | 12 to 18 in | 70 to 84 in | General backpacking and fair weather |
| High ventilation pitch | 20 to 30 in | 82 to 96 in | Warm nights, condensation control |
| Porch front pitch | Front high, rear low | Varies by door | Cooking shelter edge or lunch stop shade |
🧵Fabric Sag And Cut Reference
| Fabric or Cut | Typical Sag | Height Adjustment | Pitch Note |
|---|---|---|---|
| Silpoly flat tarp | Low | 1 to 2 in | Stable when wet, easy to tension |
| Silnylon flat tarp | Moderate to high | 2 to 5 in | Retension after rain or humidity |
| DCF flat tarp | Very low | 0 to 1 in | Less stretch, watch sharp pole tips |
| Catenary-cut tarp | Low center sag | Subtract about 1 in | Clean pitch but less shape flexibility |
| Heavy poly or canvas | Variable | 2 to 4 in | Needs stronger anchors and larger poles |
📏Pole Length And Lean Conversion Table
| Vertical Ridge Height | 0 Degree Pole | 8 Degree Lean | 12 Degree Lean |
|---|---|---|---|
| 36 in / 91 cm | 91 cm | 92 cm | 93 cm |
| 42 in / 107 cm | 107 cm | 108 cm | 109 cm |
| 48 in / 122 cm | 122 cm | 123 cm | 125 cm |
| 54 in / 137 cm | 137 cm | 139 cm | 140 cm |
| 60 in / 152 cm | 152 cm | 154 cm | 156 cm |
⛰Field Scenario Reference
| Scenario | Primary Constraint | Height Choice | Stake Choice |
|---|---|---|---|
| Alpine wind above treeline | Side gusts and loose soil | Lower ridge, low side edge | Long guylines with rock backup |
| Humid forest night | Condensation and splash | Moderate ridge, wider side gap | Angle guylines for airflow |
| Small tent platform | Limited stake reach | Use steeper guylines and shorter poles | Tie to platform anchors |
| Wet silnylon in rain | Fabric stretch after dark | Add sag allowance before bed | Retension after fabric relaxes |
| Lunch shade pitch | Headroom and access | Raise front pole or porch side | Use compact high-angle guys |
💡Pitching Notes From the Numbers
How tall should a tarp be? It’s a question of inches. But it’s also the difference between waking up wet and warm, versus finding your sleeping bag drenched after the rain came down and the tarp dipped lower then expected.
That result stems from a geometric relationship: the width of your tarp and how far apart the stakes sits on the ground. How wide a tarp is splayed open to the sky. And all the rest flows from there.
How to Set Up Your Tarp Correctly
It seems most people just guess at their setup, then wonder why they have no room left on one side or why wind gets under the end. The problem is that when you stretch out the sides, you are also stretching amount of fabric available for height. Pull the stakes too far apart and ridge drops; pinch them together to increase headroom and now you lack usable floor space.
Use the calculator above to input your tarp width and distance between your stakes. The calculator will do the math so you don’t have to guess if there is enough fabric to get the height you want.
Most backpackers don’t think about fabric types very much. But type of fabric impacts things more than you’d think. If you have silnylon, then your ridge will sag even farther than it was at sundown because this fabric tend to stretch when wet. With DCF, it doesn’t stretch as much, but the tightness is going to punish any sharp pole tip. This way, with the sag input on the tool, you can adjust for that beforehand so you don’t get that nasty shock of a sagging roof that’s suddenly too close to your head. A small bit of extra allowance there go a long way.
There are a few other subtle variables such as pole lean. The ridge ends don’t always get pitched so that you’re good with the poles standing perfectly vertically. There’s a slight angle which require a bit longer of a pole to reach exact same vertical height. This accounts for the lean setting and what it tells you is whether you should pitch down or not since you might still be able to use your longest trekking pole. Lots of folks find out they’ve been pushing their poles to the very maximum all along, and just didn’t know it.
The other factor is how ground slopes along the ridge. Sometimes there’s only a couple inches difference between front and back, but that can require different poles on either end. You won’t fight an uneven pitch all night; the tool will split that difference for you and let you know what pole goes where. It will also indicate how far out the front guyline stake should go, important if you’re working around rocks and roots and are squeezed onto a small platform.
The numbers are translated to real situations in tables accompanying the calculator and it’s worth a quick look. They show how much sag reserve different fabrics requires. They also show why a ventilation pitch creates raised sides, while a storm pitch does the opposite by keeping edges low. It gives you the reference points without making you have to remember formulas.
The numbers eventually provide you with a means of making deliberate tradeoffs: Do I want greater wind protection at the expense of less head room? Can I place my stakes widely or must they be closer together due to site constraints? Will my poles reach as far into space once leaning and sagging is accounted for?
When you know those relationships, setting up ceases to be guesswork and becomes an option that you can repeat when you next set out with another tarp. You should of used this tool before. It makes livig much easier. If you want a luxurius setup, it helps.