Timelapse Interval Calculator
Plan the capture interval, frame count, finished clip length, storage load, and battery coverage before leaving a camera running at camp.
Timelapse Plan
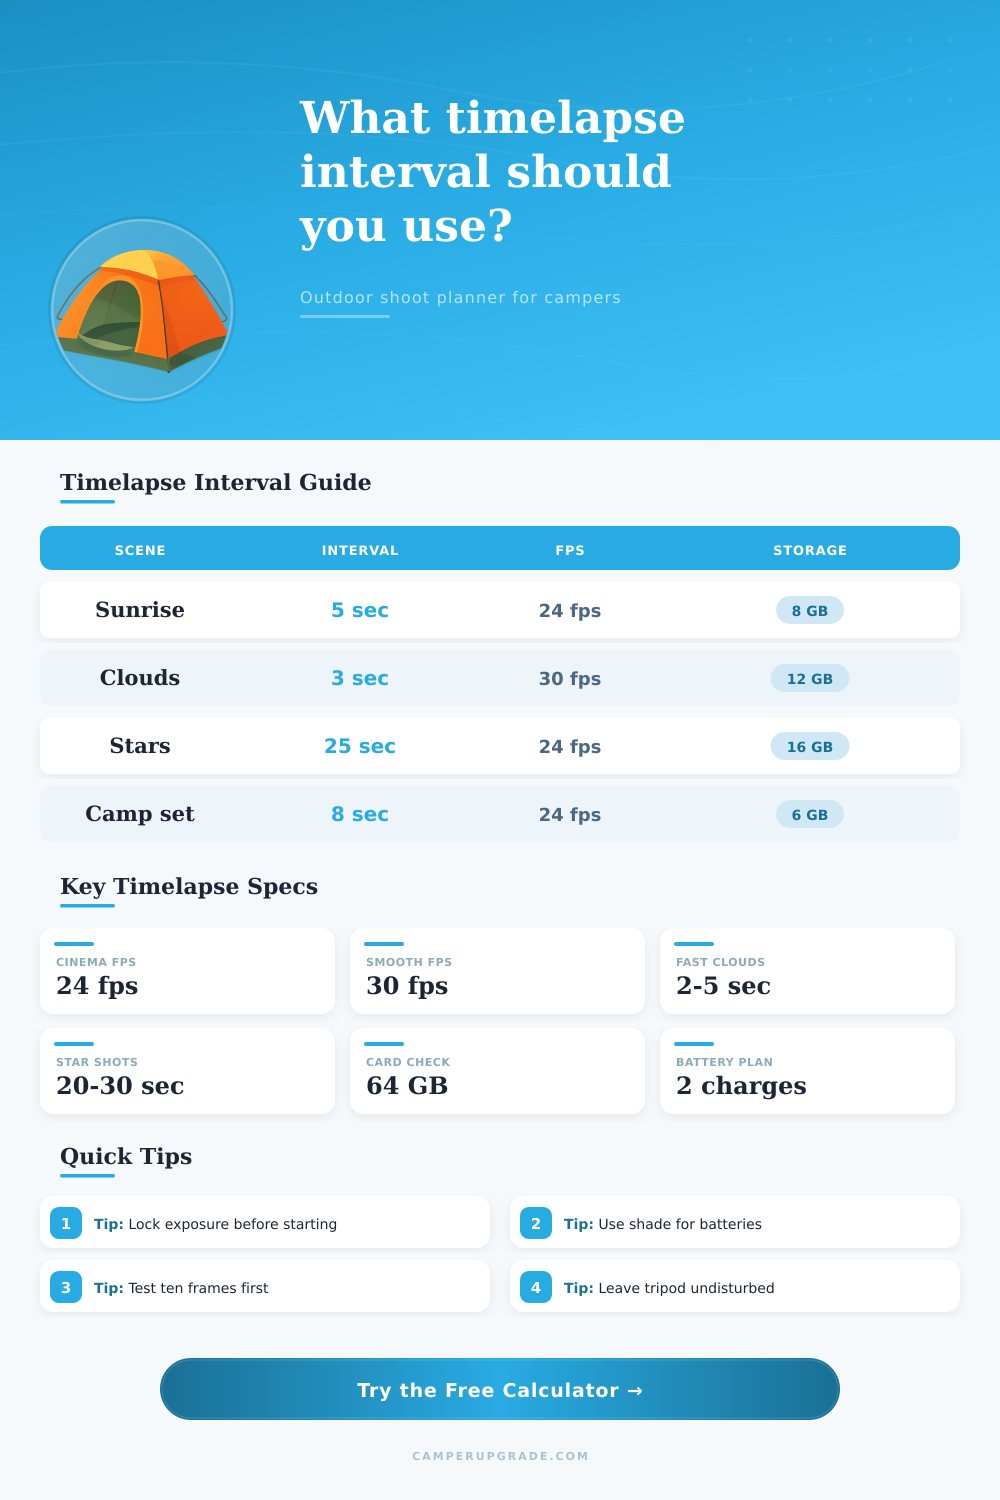
| Outdoor Scene | Typical Interval | Why It Works | Field Check |
|---|---|---|---|
| Fast clouds or storm front | 1-3 sec | Preserves shape changes without jumpy motion. | Watch wind speed and tripod shake. |
| Sunrise or sunset color shift | 3-8 sec | Balances smooth light changes with manageable frames. | Lock white balance or ramp carefully. |
| Campsite setup or teardown | 5-15 sec | Human movement stays readable without excessive files. | Keep the whole work area in frame. |
| Awning shadow or shade path | 15-60 sec | Slow shadow movement needs fewer captures. | Avoid bumping the tripod around camp. |
| Milky Way or star trail sequence | 20-35 sec | Interval is driven by exposure length and write time. | Leave 1-3 sec for camera write delay. |
| Frame Rate | Best Use | Frames For 20 sec | Motion Feel |
|---|---|---|---|
| 24 fps | Trip films and cinematic edits | 480 frames | Natural film cadence |
| 25 fps | PAL-region video timelines | 500 frames | Clean for 25p projects |
| 30 fps | Web clips and action cameras | 600 frames | Smoother motion |
| 60 fps | Very smooth playback or slow edits | 1200 frames | Needs many more photos |
| Capture Type | Typical Photo Size | Photos On 64 GB | Planning Note |
|---|---|---|---|
| 1080p JPEG still sequence | 3-5 MB | 13000-21000 | Good for long low-risk camp views. |
| 4K JPEG still sequence | 6-12 MB | 5400-10900 | Common balance for outdoor editing. |
| High-res JPEG | 12-20 MB | 3200-5400 | Allows more crop room in post. |
| RAW sequence | 25-50 MB | 1300-2600 | Use larger cards for night scenes. |
| Shoot Situation | Runtime Factor | Suggested Buffer | Reason |
|---|---|---|---|
| Warm afternoon at camp | 1.0x stated life | 10% | Low stress and easy access. |
| Sunset into cool evening | 1.2x stated life | 20% | Temperature and review use add drain. |
| Cold overnight sequence | 1.5-2.0x stated life | 35-50% | Cold batteries sag faster. |
| USB bank or dummy battery | Check watt-hours | 20% | Cable losses and standby load matter. |
| Project | Shoot Time | Interval | Approx Result At 24 fps |
|---|---|---|---|
| Sunrise color from camp | 90 min | 5 sec | 45 sec, 1080 photos |
| Storm clouds crossing valley | 45 min | 2 sec | 56 sec, 1350 photos |
| Campsite setup from empty pad | 60 min | 10 sec | 15 sec, 360 photos |
| Star trail over camper | 4 hr | 25 sec | 24 sec, 576 photos |
This fast-motion video of a storm rolling through a valley look magical, but it’s just math. It works by capturing photos at timed intervals.
Guess wrong and you’ll have more photos (too many) then can play smoothly, or worse: a stuttery video. Why? Light move fast outside, particularly at sunrise where color shifts every few seconds. To figure out the proper interval, use the calculator on page. Simply input the length of your final clip and the length of your shoot. If you are making a twenty second clip shot at twenty-four frames per second then you simply require forty-eight frames. Regardless of whether your shoot lasts an hour or ten it will still take exactly forty eight frames. Divide your total amount of shooting time by that frame count. That will tell you the exact number of seconds for the interval between photos.
Easy Tips for Good Time-Lapse Videos
Beginners often miss this step, as they gets caught up in what’s happening around them, rather than the interval. Another significant issue when doing timelapse photography are space for storing the footage. For example, if you shoot for two hours at three-second intervals, that’s more than twenty-four hundred shots. Each one might be an eight-megabyte file. That’s nearly twenty gigabytes of information, which eat through a sixty-four-gigabyte card quickly.
Use the chart found on this page as a guide to determining interval vs. This refers to how fast the subject moves. To achieve a smooth appearance, shortening the gap between frames require faster cloud movement. More photographs taken = greater use of your storage capacity. Conversely, longer intervals work for slower moving objects like shadows, thereby saving room in your hard drive.
Another factor that can be problematic is battery life. Batteries won’t last as long when it’s cold compared to when it’s warm. In freezing weather, expect only half of what the advertised battery life would show. You don’t want the sequence dying halfway through because you forgot to account for things like LCD staying on or the internal heater kicking in. That’s why you’ll want to make sure you has more. The internal heater consumes additional power. So does the LCD screen.
Before you shoot anything, lock in your exposure settings. Locking your exposure settings before you start prevents the histogram from jumping around. When the camera adjust brightness with each image, your video will appear jittery. Before you leave the tripod in place, though, go through the first 10 frames. View them on little screen. Are they properly exposed? Sharp? If so then continue. Otherwise, tweak the settings and try again.
After the tripod’s been set up, don’t touch it. A bump will change the angle of the shot. That creates a wobble which can’t be entirely fixed by editing software. You want the viewer to see the movement of nature, not instability of your equipment.
The rest, balancing the interval, making sure you’ve got plenty of storage space, making sure there’s still some juice left… Is the technical part. Once that’s done, all that’s left is the passing of time. And you’ve got that down pat. You should of checked everything twice.