Spray Foam Kit Coverage for Van Calculator
Estimate board feet, kit count, finished foam volume, pass count, R-value, and overage for insulating a camper van shell with spray foam.
The calculator estimates sprayable surface area from the van shell, then converts foam depth to board feet. One board foot equals 1 square foot at 1 inch thick.
Formula: sprayable area × thickness in inches = board feet. Adjusted board feet adds the selected buffer, while usable kit yield applies the real-world derating factor.
| Finished thickness | Area from 210 bd ft | Area from 600 bd ft | Approx metric depth |
|---|---|---|---|
| 0.5 in skin coat | 420 sq ft | 1,200 sq ft | 13 mm |
| 1.0 in condensation layer | 210 sq ft | 600 sq ft | 25 mm |
| 1.5 in common van shell | 140 sq ft | 400 sq ft | 38 mm |
| 2.0 in cold wall build | 105 sq ft | 300 sq ft | 51 mm |
| 2.5 in deep cavities | 84 sq ft | 240 sq ft | 64 mm |
| 3.0 in maximum-fill zones | 70 sq ft | 200 sq ft | 76 mm |
| Rated kit size | Usable at 100% | Usable at 92% | Usable at 78% |
|---|---|---|---|
| 105 board-foot kit | 105 bd ft | 97 bd ft | 82 bd ft |
| 210 board-foot kit | 210 bd ft | 193 bd ft | 164 bd ft |
| 450 board-foot kit | 450 bd ft | 414 bd ft | 351 bd ft |
| 600 board-foot kit | 600 bd ft | 552 bd ft | 468 bd ft |
| 602 board-foot kit | 602 bd ft | 554 bd ft | 470 bd ft |
| 1200 board-foot bundle | 1200 bd ft | 1104 bd ft | 936 bd ft |
| Foam type | Density used | R-value per inch | Van coverage note |
|---|---|---|---|
| Closed-cell 2.0 lb | 2.0 lb/ft³ | R-6.5 | Common van shell choice |
| Closed-cell 1.7 lb | 1.7 lb/ft³ | R-6.2 | Slightly lighter closed foam |
| High-density closed-cell | 3.0 lb/ft³ | R-6.8 | Heavier, stiffer fill zones |
| Open-cell 0.5 lb | 0.5 lb/ft³ | R-3.7 | More volume, less vapor resistance |
| Open-cell 0.7 lb | 0.7 lb/ft³ | R-3.9 | Lightweight acoustic cavities |
| Hybrid average | 1.3 lb/ft³ | R-5.4 | Mixed closed and open areas |
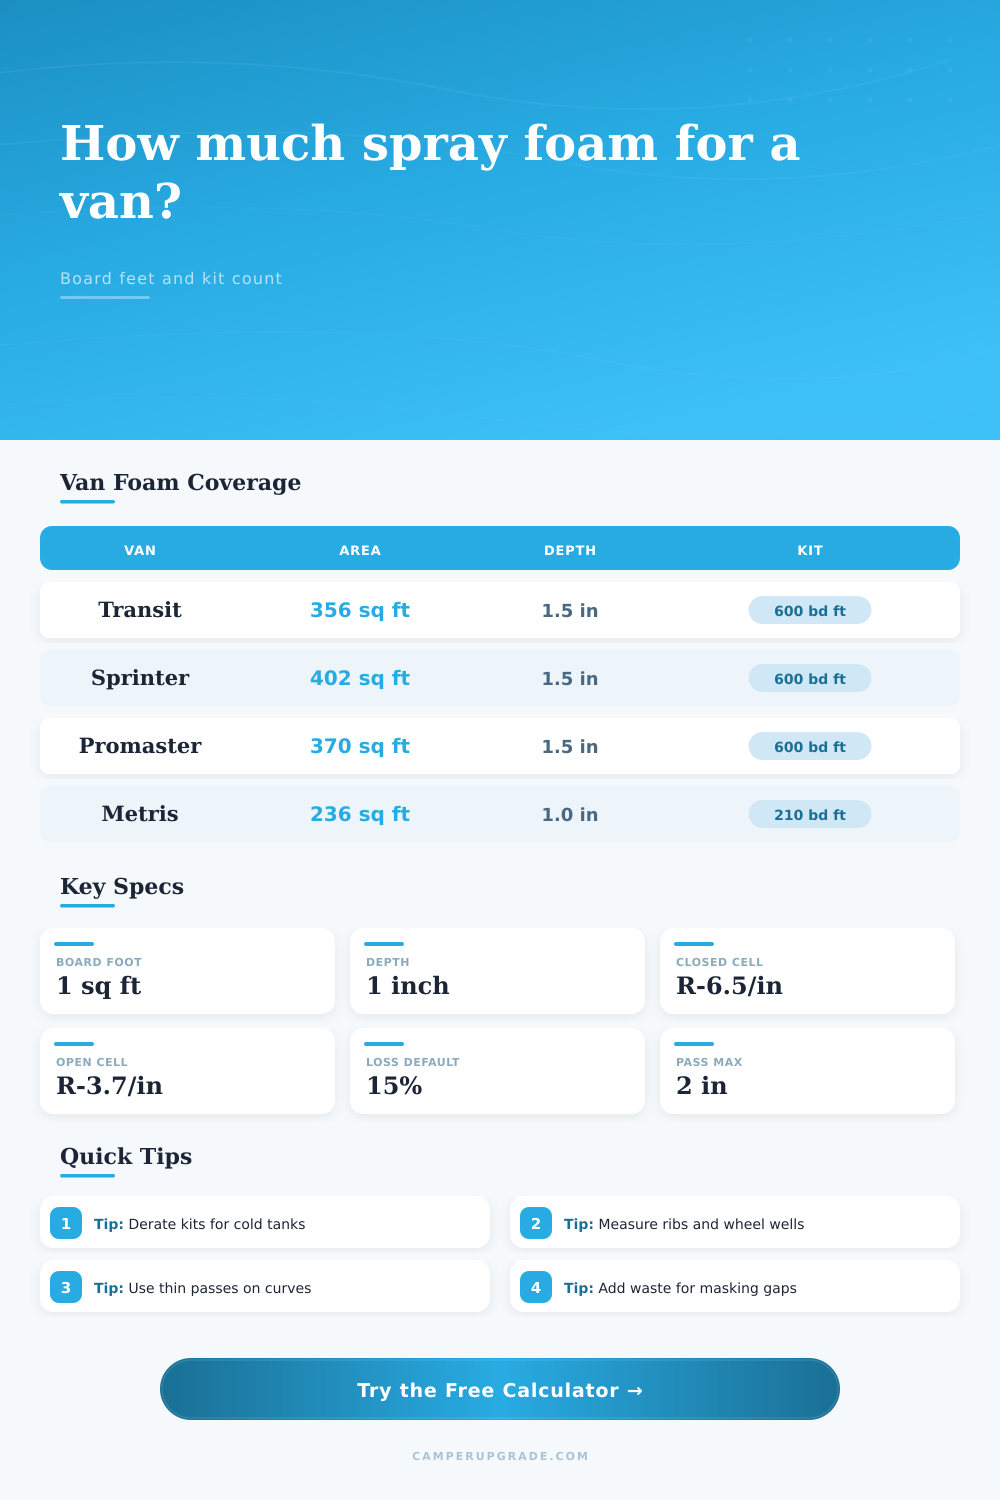
| Van project | Typical spray area | 1.5 in board feet | 600 bd ft kits at 92% |
|---|---|---|---|
| Transit 148 high roof shell | 340 to 375 sq ft | 510 to 563 bd ft | 1.0 to 2.0 kits |
| Sprinter 170 extended shell | 390 to 430 sq ft | 585 to 645 bd ft | 2.0 kits |
| Promaster 159 high roof shell | 355 to 395 sq ft | 533 to 593 bd ft | 1.0 to 2.0 kits |
| Chevy Express standard roof | 235 to 275 sq ft | 353 to 413 bd ft | 1.0 kit |
| Metris or midsize cargo van | 205 to 245 sq ft | 308 to 368 bd ft | 1.0 kit |
| Roof-only condensation layer | 70 to 95 sq ft | 70 to 143 bd ft | Small kit range |
There’s also this thing people say on most van life forums: one spray foam kit; good. If you use one spray foam kit and get too excited, you will end up with spray foam everywhere and only half a roof done. $300 later you’re looking at the second kit which was never budgeted, and now you’ve got a half-sprayed roof and half an insulation job. On paper the math seem straightforward, but when you’re not working inside a cardboard box things get crazy.
A van shell have wheel wells, curves, irregular gaps, and ribs. That’s where the calculator comes into play. It turns all of that weird van shell geometry into real numbers for thermal value, kit count, and board feet. This way, you won’t embarrass yourself by running out before you can finish.
How to Use the Spray Foam Calculator
A board foot is the core unit here: it’s one square foot of surface covered by one inch of material. That’s both an area AND a volume measurement. Why does that matter? Adding thickness increases your material requirement in a direct way. A one-inch layer require x amount of foam, but a one-and-a-half-inch layer requires 50% more foam for improved thermal performance.
After entering your van’s interior measurements into the tool, it will do all of this calculation for you; if you’re using a popular van (like the Transit or Sprinter), you’ll be able to select from their presets. Otherwise, you can enter your custom measurement (cargo length/width/height).
The real-world yield factor is also one of the most important inputs. Manufacturer ratings assume ideal conditions such as flat surfaces and warm tanks, but vans are none of those things. When spraying in vans, none of those conditions are true. The hose runs is long. The metal skin remains cold, which can impact expansion. To reflect this reality, the calculator has a derating factor. Ninety-two percent is a good place for experienced sprayers to start and beginners may wish to go down to seventy percent. That’s not being pessimistic; that’s insurance against running out with just two square feet left to spray on a wall.
The secret volume sinks are those curves and ribs. The structural ribs that run up the roof and down the sides adds additional surface area that a simple rectangular formula doesn’t account for. That’s where the curve factor comes in. The deeper the ribs and more recesses, the larger the surface area become. What was supposed to be three hundred square feet might actualy be more like three hundred and twenty. By selecting how much of an allowance you want added, the tool tacks that onto your number so that the board foot count matches what shell actually looks like in real life.
The second big decision is whether to use open-cell or closed-cell foam. Closed-cell has more thermal resistance (R-value) per inch; it’s also a vapor barrier, critical in a metal shell like this to avoid condensation inside the metal walls. Closed-cell foam is thicker and heavier so you’ll get fewer inches of volume in each kit. Open-cell foam is cheaper and lighter. But it’s not a vapor barrier, and doesn’t provides as much thermal resistance. You can choose one or the other on the calculator, which will adjust R-values and weight estimates to match. In general, closed-cell is used when insulating your whole van. It seals your van from moisture while insulating it at the same time.
Then there’s waste. There’s always waste with this stuff. You’ll make mistakes the first time or two. The overspray collects in weird places. And then there are those messy edges left by the masking tape. It’s good practice to plan for about 15-20% waste. Better to end up with some extra foam for touch ups than to run out in the middle of your door frame.
And that’s where reference table on the page comes into play. By looking at the table, you can start to see the trade offs between thickness. A half inch skin coat doesn’t do much for insulation, but it sure does cover a lot of area. Two inches of build has awesome thermal performance but uses a bunch more material.
You now have a clear picture of what to purchase. How much foam do you need? What are the weights of all that foam? How many kits should I get? With those answers, you know exactly how much to budget and how to plan out logistics. Because spray foam is heavy, you must be careful when handling it. With this knowledge, there’s no more going back to hardware store because you didn’t think ahead.
In the end, the calculator helps to simplify a hard insulation job. It doesn’t replace experience though. You’ll still have to learn your craft. You’ll need to put on your safety equipment and prep surface area properly. However, with a realistic expectation of yields and measurements, you can break down an intimidating insulation task into a simple sequence of tasks.
The end result is a quiet, dry, warm van. Get the math right, and you’re well on your way to feeling comfortabley.