Splitboard Skin Length Calculator
Estimate touring skin cut length, adhesive contact, clip range, pair weight, and trim allowances from your board length, tip and tail hardware, and skin material.
⛷Real Splitboard Presets
📏Board, Clip, and Skin Inputs
🧵Material and Spec Comparison
📊Reference Tables
| Board length | Typical plush length | Cut length with clips | Tail adjust range |
|---|---|---|---|
| 145 cm short split | 132-136 cm | 145-150 cm | 5-8 cm |
| 150 cm powder split | 138-142 cm | 151-156 cm | 6-9 cm |
| 156 cm all-mountain split | 144-148 cm | 157-162 cm | 6-10 cm |
| 162 cm freeride split | 149-153 cm | 163-169 cm | 7-11 cm |
| 168 cm expedition split | 154-158 cm | 169-176 cm | 8-12 cm |
| Clip system | Tip allowance | Tail allowance | Best use |
|---|---|---|---|
| Wire tip loop | 2.5-4 cm | 0 cm | Fast setup, simple nose fit |
| Rivet tip bracket | 3-5 cm | 0 cm | Durable splitboard kits |
| Fixed tail clip | 0 cm | 5-7 cm | Consistent board shape |
| Adjustable tail strap | 0 cm | 8-11 cm | Most splitboard touring |
| Long expedition strap | 0 cm | 11-15 cm | Cold hands and bulky gloves |
| Skin material | Weight factor | Stretch allowance | Touring feel |
|---|---|---|---|
| Nylon plush | 255 g/m² | 0-0.5% | Maximum grip, slower glide |
| Mohair nylon mix | 215 g/m² | 0.5-1% | Balanced grip and glide |
| Pure mohair | 185 g/m² | 1-1.5% | Fast glide, lighter pack |
| Hybrid adhesive | 225 g/m² | 0.5-1% | Easy handling in transitions |
| Deep-winter plush | 270 g/m² | 0-0.5% | Cold snow traction |
| Board waist | Skin width to buy | Edge reveal after trim | Notes |
|---|---|---|---|
| 240-250 mm | 120-125 mm | 2-3 mm each edge | Common narrow split |
| 251-260 mm | 130 mm | 2-4 mm each edge | Standard all-mountain |
| 261-270 mm | 135-140 mm | 2-4 mm each edge | Wide freeride board |
| 271-285 mm | 145-150 mm | 3-5 mm each edge | Powder and volume shapes |
| 286 mm plus | 150-160 mm | 3-5 mm each edge | Very wide swallow or pow shape |
💡Skin Length Tips
All estimates use standard metric conversions: 1 inch equals 2.54 cm, 1 m² equals 10,000 cm², and pair weight is calculated from two matching skin halves.
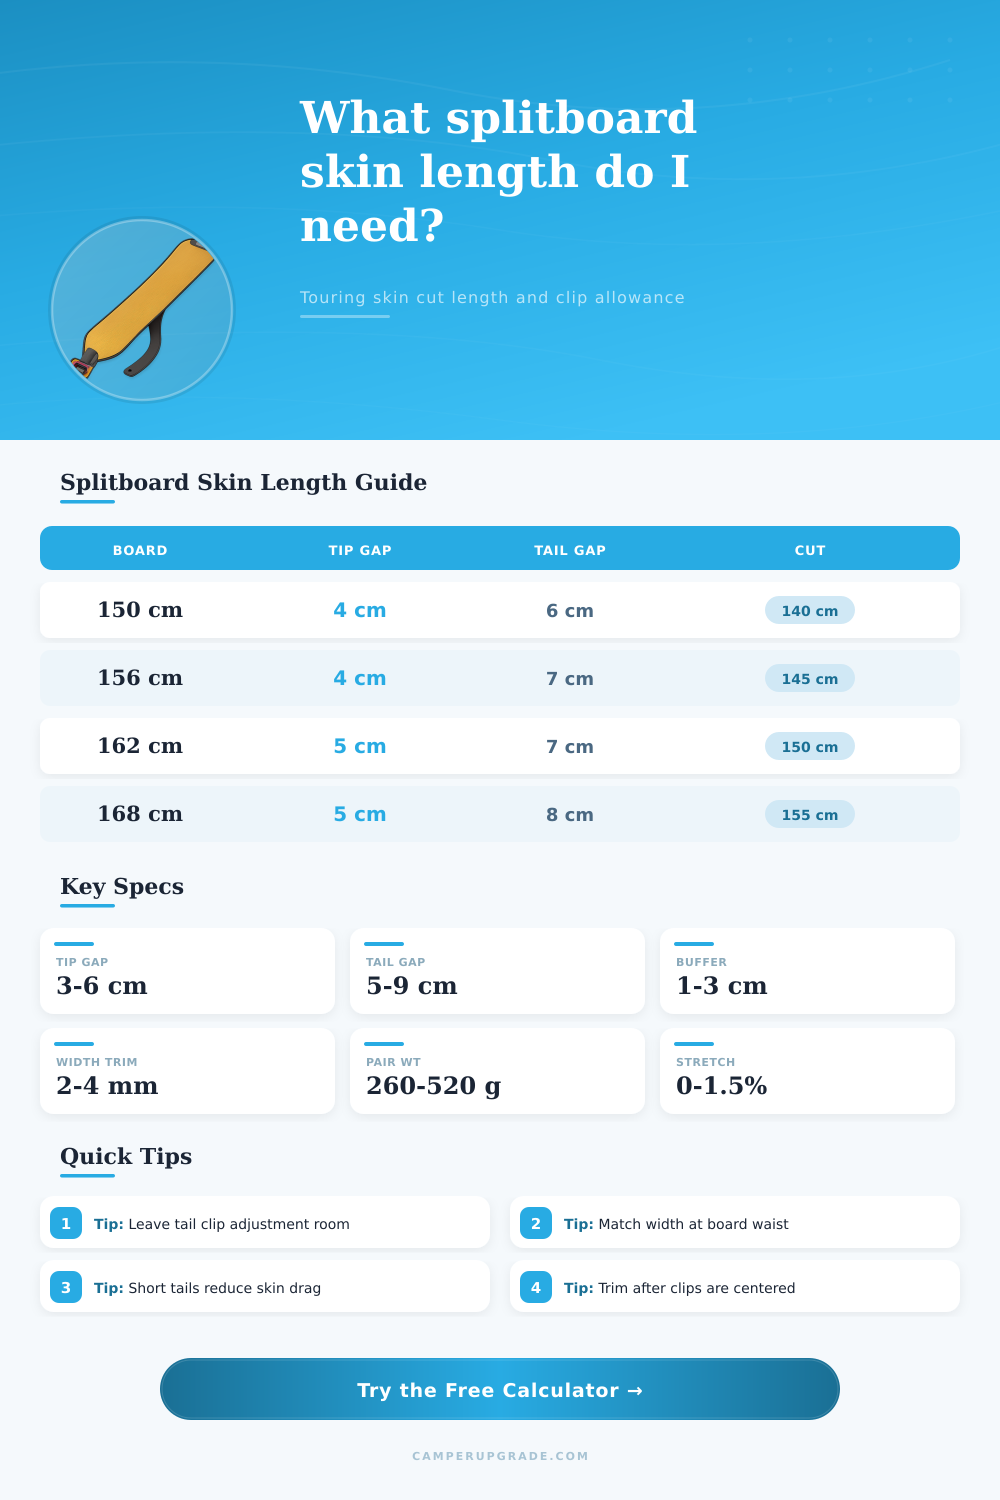
The variables is different when sizing touring skins for a splitboard, which most don’t consider. This happens until you get to the first steep pitch of the day when you find yourself dragging, slipping, or just not feeling right about it.
Enter your board and hardware specs, and calculator will do the rest. Knowing what the numbers mean is the difference between ascending smoothly vs. Getting frustrated.
How to Size Your Splitboard Skins
But a splitboard isn’t a ski and can’t be measured end-to-end. Typicaly there’s some sort of raised part on the nose of the splitboard that juts out over the base. Adding adhesive will create extra drag that fight you with every step. Ideally, you’ll want to make sure the adhesive doesn’t go too far onto the board. You don’t want it to cause the board to lift off the snow before skin ends.
The tail is trickier due to the clip system. A lot of people uses adjustable straps as opposed to fixed clips. In this case, extra material beyond the bottom coverage must feed into the adjuster. If you cut right to the board’s edge, then there’s no wiggle room when tightening the strap in gusty weather. This is why you must allow extra space for tail hardware.
A big difference comes based off the material selection. Nylon skins hold well on ice and are heavier; however, nylon doesn’t stretch. The pure mohair packs down and glides very nicely while feeling more twitchy on hard snow. In addition, the mohair stretch out a bit over time. Many people don’t account for this material characteristic in determining how long to make a skin. When purchasing pure mohair for a long tour, we recommend adding a little stretch allowance to your calculation so that skin won’t get too short after several weeks of cold weather tours. You’ll avoid having the skin peel at the tail.
The other common problem is width. Traditional alpine skis are typically narrower than splitboards. When buying skins, be aware of how much edge is exposed. Snow will sneak into that area and freeze the skin to your board. Ideally, they should be wide enough to cut flush with your sidewalls, but not expose bottom of your base edge. The chart on this page provides recommended widths based off your board’s waist measurements. For example, if you ride a wide powder shape, 70mm skins will never fit correctly. You must factor in the additional material needed to fully cover that surface area.
You need a sharp knife and some patience. Never trim when the skin is still stiff and cold. Trim in a warm area where the glue is soft and flexible. The first thing I would of do is mount the tip attachment. Make sure it’s snugly positioned behind the rise of the nose without affecting profile of the board. Smooth the skin down towards the tail to eliminate air bubbles. Air bubbles will cause it to peel off too soon. Once everything is taut and centered, then trim away excess length. If you’re not sure how well the clips will fit leave yourself a centimeter or two of buffer. It’s far easier to cut more material off than to try and glue a new piece on in the backcountry.
The numbers make a difference in touring Having all of this dialed in makes for a vastly different tour. You no longer think about drag, only about dropping. You can forget about your skin when it’s fit properly; it simply vanishes underfoot. Every time you take a kick turn, you get the reward from the time spent double-checking clearance and range on clips. This translates into working with versus against your gear.