Solar Panel Roof Fit Calculator
Test how many solar panels fit on an RV, camper van, trailer, truck camper, or motorhome roof after vents, AC units, skylights, walkways, edge gaps, and panel orientation are counted.
Detailed fit breakdown
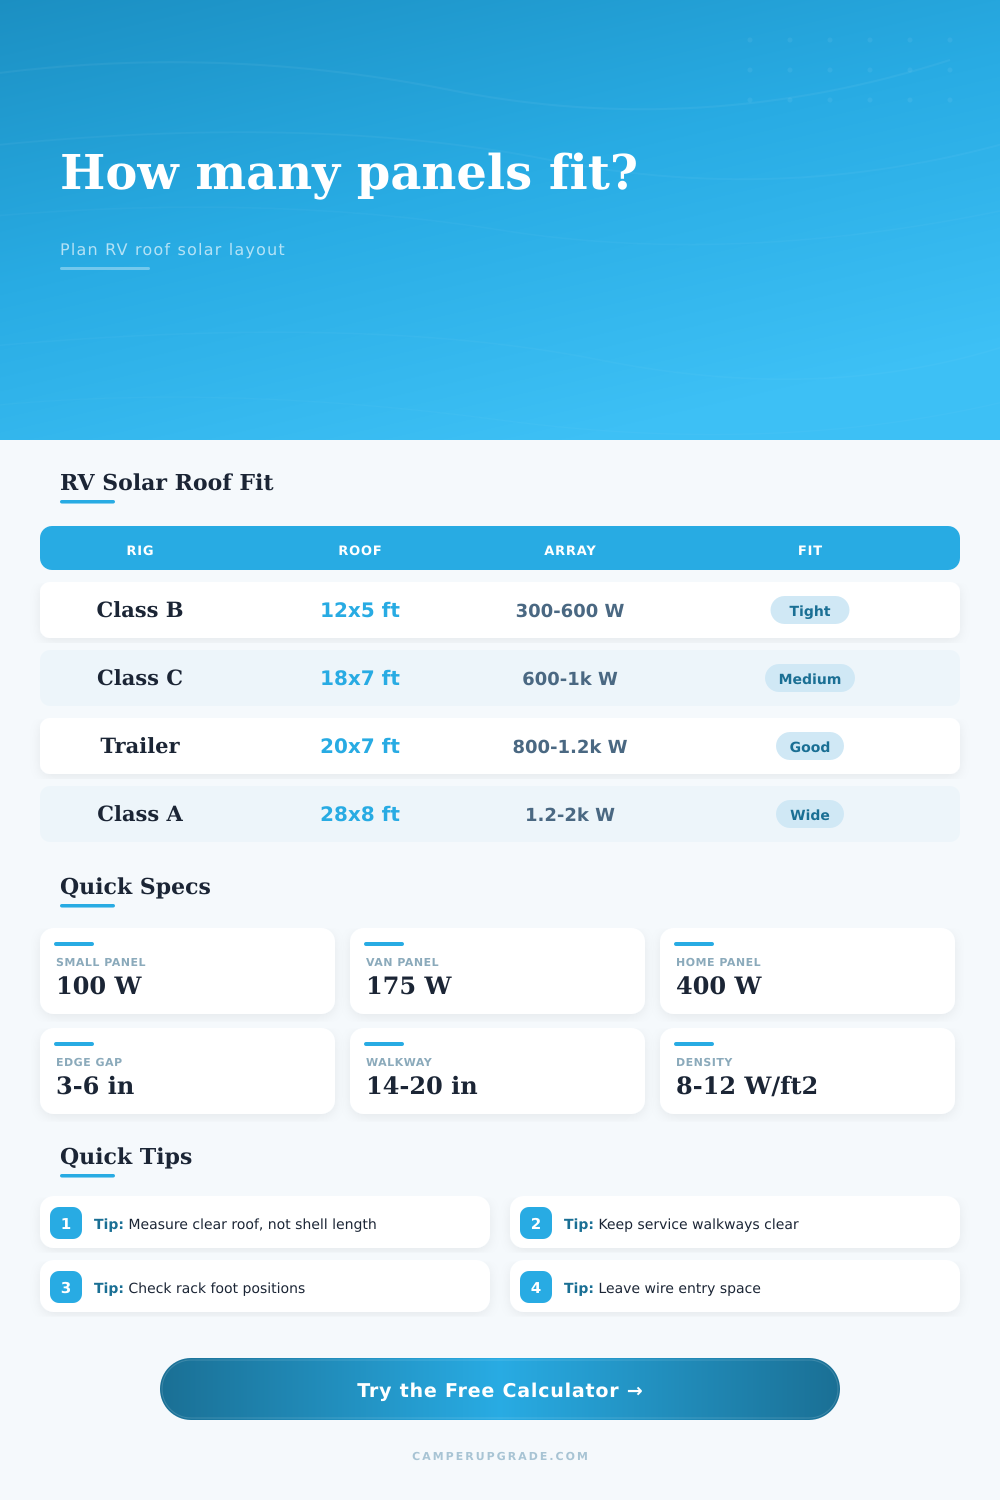
| Vehicle style | Typical clear roof | Common roof objects | Solar fit note |
|---|---|---|---|
| Teardrop trailer | 5 to 8 ft by 4 to 5 ft | One fan, rear hatch curve | Usually better with compact 100 W or 120 W panels. |
| Class B van | 10 to 15 ft by 4.5 to 5.8 ft | Fans, AC, antenna, rack rails | Panel orientation often changes capacity by one full panel. |
| Travel trailer | 14 to 25 ft by 6.5 to 8 ft | AC, vents, skylight, plumbing caps | Side walkways and AC shadows usually set the limit. |
| Class A motorhome | 24 to 34 ft by 7.5 to 8.5 ft | Two AC units, vents, satellite dome | Large arrays are possible if service lanes stay open. |
| Roof item | Typical measured box | Practical reserve | Why it matters |
|---|---|---|---|
| 14 inch vent or fan | 16 to 19 in square | 20 to 24 in square | Lids open wider than the framed hole and need sealant access. |
| Roof AC shroud | 38 to 44 in by 28 to 34 in | 44 to 52 in by 34 to 40 in | Airflow, service screws, and shadow lines can block panel placement. |
| Skylight or escape hatch | 18 to 30 in by 18 to 30 in | 24 to 36 in by 24 to 36 in | Keep opening paths and inspection edges reachable. |
| Wire entry gland | 4 to 8 in by 4 to 8 in | 8 to 12 in square | Leave space for cable bend radius and future resealing. |
| Panel class | Typical dimensions | Roof density | Best use |
|---|---|---|---|
| Compact 100 W | 42 by 21 in | 16.3 W/sq ft panel face | Small trailers, cab-over gaps, and narrow van lanes. |
| RV 175 to 220 W | 58 by 27 in | 18.4 W/sq ft panel face | Most vans, truck campers, and mid-size trailers. |
| Residential 370 to 430 W | 68 by 45 in | 18.8 W/sq ft panel face | Wide motorhomes and trailers with long open lanes. |
| Narrow marine panel | 48 by 22 in | 14.8 W/sq ft panel face | Rails, roof baskets, and tight service walkways. |
| Array density result | W/sq ft roof | What it suggests | Layout check |
|---|---|---|---|
| Low density | Under 5 | Roof objects or walkways are taking much of the usable area. | Try smaller panels or a different rectangle split. |
| Moderate density | 5 to 9 | Typical for mixed RV roofs with vents and one AC unit. | Confirm shade from tall shrouds before mounting. |
| High density | 9 to 13 | Strong use of the roof without filling every service path. | Check rack feet, wire entry, and panel removal clearance. |
| Very high density | Over 13 | Roof may be packed tightly or using high-output panels. | Recheck measured gaps and future maintenance access. |
clear rectangle = roof length and width minus front, rear, side, edge, and walkway clearances.panel count = smaller of grid-fit panels and area-cap panels after vent, AC, skylight, gap, and service-buffer reserves.
Here’s what most people do when they begin an RV solar project: They look at their roof. Then they guess at how many panels can fit there. They pull out a tape measure. They eyeball the length of their rig. They mentally crunch some numbers, and they always end up being optimistic.
But here’s the deal: Your guess is almost always wrong; tight. Roofs has stuff on them, and that stuff doesn’t care about your watts-per-dreams. Air conditioners put up long shadows. Roof vents require clearance so their lids can open without cracking glass. Skylights requires escape routes.
Why Your Solar Guess Is Wrong
That’s why the calculator above calculate it all for you as soon as you enter your true clear space. It eliminates the guesswork around all those coefficients and conversions.
The worst mistake is measuring the shell. Your 32-foot Class A motorhome sounds spacious enough. And it is… until you factor in side awning hardware. You also has to consider the ladder bracket at the rear and the nosed-in cap on the nose. Those perimeters consume inches (which equals square feet). Clearly define an area where the panel can reside.
The tool allows you to cut out side, front and rear clearances based off this real world fact. It may not seem important but it is. Lay out your space with the rounded fiberglass as part of your useable area and you’ll be screwed from the beginning.
Another silent killer of efficiency are orientation. A solar panel isn’t a rectangle. It has a short side and a long side. If you switch the panel from crosswise to lengthwise you may gain (or lose) a whole row. To help with this, the calculator will run both orientations and show which gives you more watts.
Maybe the difference is negligible. But on a narrow van roof, every lost panel is two hundred watts that could be powering something. That is enough to run your mini-fridge for half a night or charge a laptop twice. You can see this in the reference table on the page; depending on your vehicle type, Class B vans can change significantly different than just a few inches of layout choice.
Obstacles matter. An air conditioner is more than a footprint: It’s an exclusion zone. Its shroud casts both shadow lines and heat, which will drag down performance of any panel touching its edge. The tool requests the size and number of AC unit and provides a buffer to protect your array. Better to err on the side of leaving space and having full output rather than packing them in tightly and suffering shading losses.
The same applies to vents. A 14-inch fan may look small, but once you know its lid swings out and must clear the panel frame, a gap makes sense.
Then check the wattage density. That’s the number that indicates how densely packed with power your roof is. A high density figure show you are using the area well; a low density figure usually means you have overly wide walkways or too much extra gear on your roof. If your density exceeds 13 watts per square foot, you’re packing ‘em in. But you should of also be sure that you’ve checked your service lanes… Since in five years you’ll want to go up and repair a wire, or clean the panels.
The point of solar on an RV isn’t necessarily about maxing out capacity but rather how much will really fit practically. An array should not shade itself. It shouldn’t block your AC. It should leave enough space for you to walk around. Your eyes tells you whether something has a good feel or not. The hard numbers are provided by the calculator.
But measure that flat plane, be respectful of what can get in the way, and pick the orientation which wins the most space. The sun doesn’t care how long your vehicle is on the outside. It only matters how much glass is realy facing up.