Snow Bollard Diameter Calculator
Estimate a practical snow bollard diameter from rope load, snow bearing strength, trench depth, wrap angle, edge distance, and safety factor.
| Snow condition | Planning strength | Field sign | Diameter guidance |
|---|---|---|---|
| Very soft facets | 2 psi / 13.8 kPa | Fist easily penetrates | Use very large diameter or avoid |
| Soft storm snow | 4 psi / 27.6 kPa | Boot sinks deeply | Deep trench, 3x to 4x safety |
| Settled powder | 7 psi / 48.3 kPa | Boot compresses but holds | Normal camp bollard sizing |
| Firm wind pack | 11 psi / 75.8 kPa | Kick steps hold shape | Good for monitored rope loads |
| Hard consolidated snow | 16 psi / 110.3 kPa | Axe shaft resists push | Smaller, smooth-radius bollard |
| Bonded ice crust | 22 psi / 151.7 kPa | Thick crust bonded below | Verify depth below the crust |
| Wrap angle | Contact factor | Rope path | Typical use |
|---|---|---|---|
| 120 degrees | 0.67 | Open shallow U | Light tarp or marker lines |
| 150 degrees | 0.83 | Open U around front | Camp anchors in firm snow |
| 180 degrees | 1.00 | Half circumference | Default bollard assumption |
| 210 degrees | 1.17 | Deep wrap | Low-angle haul or belay |
| 240 degrees | 1.33 | Maximum practical wrap | Rescue load with clean groove |
| Rope diameter | 8x bend diameter | 10x bend diameter | Use note |
|---|---|---|---|
| 5 mm accessory cord | 1.6 in / 4.0 cm | 2.0 in / 5.0 cm | Marker or light utility loads |
| 7 mm cord | 2.2 in / 5.6 cm | 2.8 in / 7.0 cm | Camp lashings and sled lines |
| 9 mm rope | 2.8 in / 7.2 cm | 3.5 in / 9.0 cm | Light glacier rope systems |
| 10 mm rope | 3.1 in / 8.0 cm | 3.9 in / 10.0 cm | Common anchor planning size |
| 12 mm rope | 3.8 in / 9.6 cm | 4.7 in / 12.0 cm | Rescue or utility haul ropes |
| Scenario | Line load | Snow / depth | Starting diameter |
|---|---|---|---|
| Tent guyline storm | 80 lb / 36 kgf | Settled, 10 in | 18 to 24 in |
| Tarp ridge anchor | 120 lb / 54 kgf | Soft, 12 in | 30 to 38 in |
| Loaded sled haul | 220 lb / 100 kgf | Settled, 14 in | 30 to 42 in |
| Ski belay stance | 300 lb / 136 kgf | Firm, 14 in | 28 to 38 in |
| Crevasse backup | 450 lb / 204 kgf | Firm, 16 in | 34 to 48 in |
| Heavy rescue line | 700 lb / 318 kgf | Hard, 18 in | 36 to 54 in |
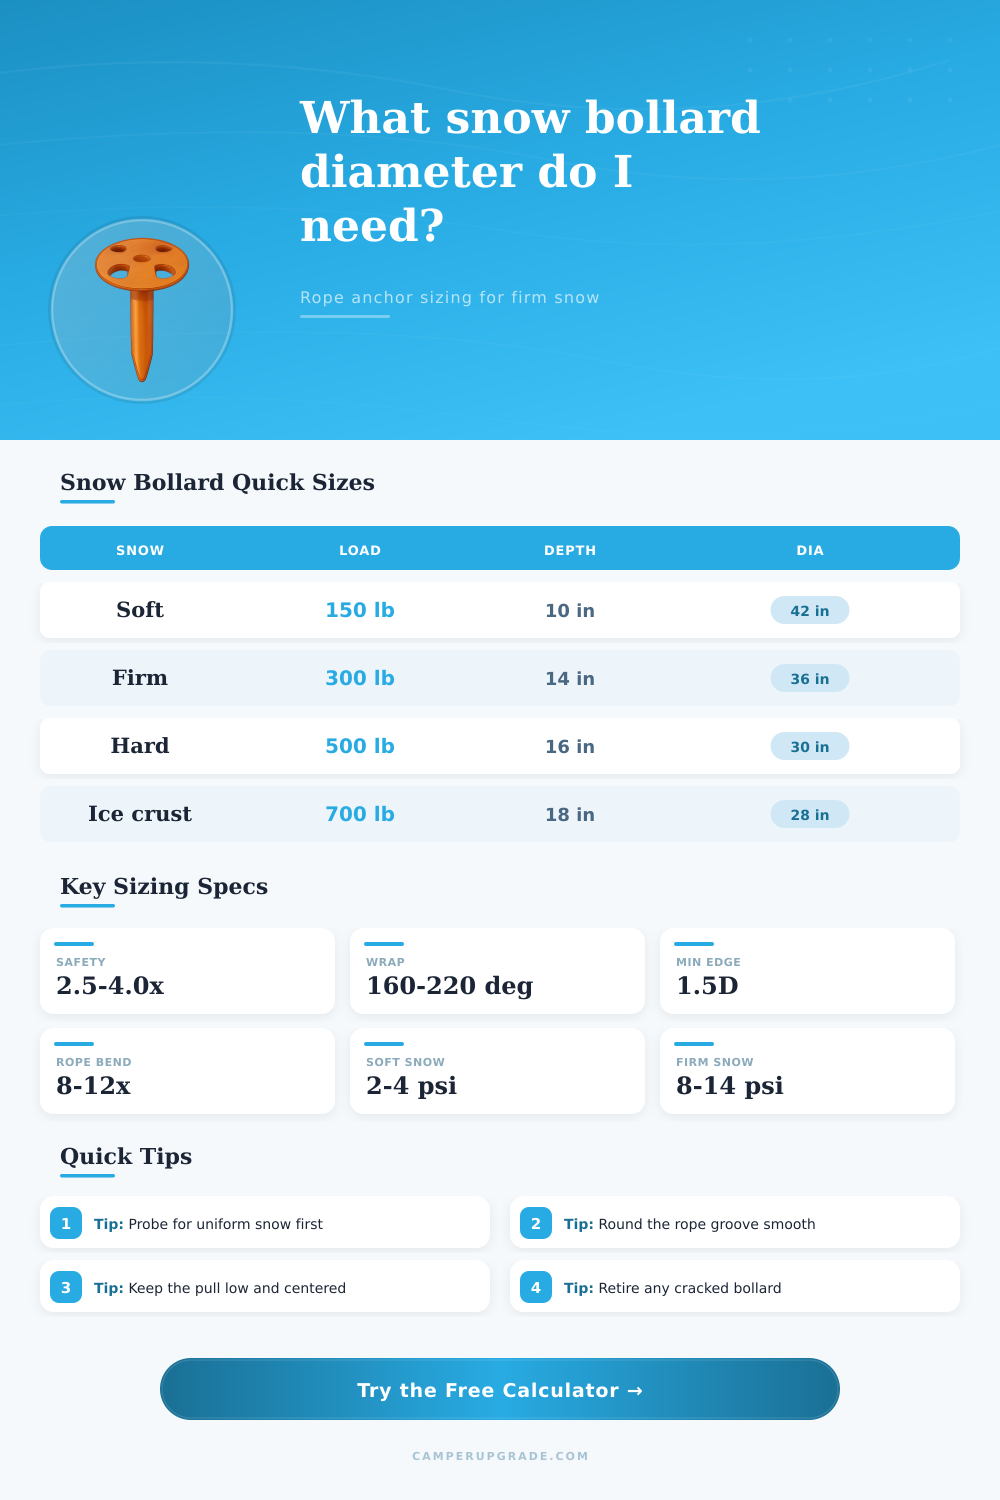
In winter, wind pulls on a loose snow anchor, something that depends on material strength and geometry. To prevent this, bury a cylinder called a snow bollard. Shear resistance and friction between a rope inside the bollard hold it in place. Are you guessing at what size to use? Don’t; just input your expected load and snow conditions into the calculator, which tell you the right size to keep the thing standing up to high winds.
Snow bearing strength is the single most important input. Not all hard snow are created equal. Bonded ice crust resists forces greater than 20 pounds per square inch, while soft facets resist just two pounds per square inch. That’s a difference of more than half the necessary diameter, so get out there and probe your snow before digging. Is it soft? Did the footprint from your kick fall apart immediately? Then you’re probably on soft storm snow. Is it settled? Does your boot sink deep, then re-form after a couple minutes? Then you’re dealing with powder.
How to Make Your Snow Anchor Stronger
Pick the weakest layer that your rope groove can compress into the snow, because that’s what will be right. Hard cap over weak parts still makes for weak snow unless the whole bollard structure bond onto some solid underlying surface.
Also, depth is important; a shallow trench in firm snow often fail faster than a deep one in softer material because there is less surface area for friction to do its job. Less surface area means there is less area for friction to act on. The effective trench depth required from the tool is the vertical amount of snow that the rope groove pick up and holds down. So, think of it this way: It’s not about digging down from the surface. It’s about how high that curved wall of snow is where the rope contacts it. Ideally, it should be sufficient to spread the load across a wider area of snow instead of bearing down on a narrow edge. Bearing down leads to pullouts.
The other complicating factor here is the rope wrap angle, as it gets much tighter when wrapped around the bollard different than in a basic U-shape. For example, the standard starting place for most anchors is an eighteen degree wrap. You can increase it to two hundred and ten or two hundred and forty, but you don’t need to increases the diameter so much. But you also can’t just willy-nilly whip your rope around. It has to bend smoothly through the groove. Abrasion will happen at the sharper turns and the force will be concentrated into small areas of snow.
Safety also matters because planning relates to reality, in large part through its safety factors. For example, for normal camp anchors, we use a factor of two and five; this factor include the dynamic load from sudden jerks, gusts, etc. In rescue scenarios, where failure is not an option because someone’s life depends on the anchor, this factor can be increased to four. This “buffer” is included in the calculator and used to determine the ultimate diameter recommended. Basically: How big must the snow cylinder become to eat up those loads without collapsing under your conditions?
The other thing folks often overlook till their anchor collapses is edge distance. If your bollard is at least 1 1/2 diameters away from any cornice or lip, the snow can’t shear off at the top. Give the thing some breathing space when loaded up. Consider where it will fail. Where does that rope want to cut through the snow? Where do you want to pull the entire block out? Changing the depth and diameter makes that balance point more stable.
In winter, it’s all about the geometry, and less so about sheer muscle. When you know something about depth and friction, for example, you don’t need to pile up a huge snow fort. Properly sized and shaped, a bollard will hold in reasonably good snow like a champ. It’s largely knowing what you’re actualy measuring before the wind whips into a howl. Smooth that groove, check your layers and go by the numbers.