Slackline Sag Calculator
Estimate midline sag, walking height, clearance margin, and anchor-height adjustment from span, rider weight, line material, stretch behavior, pretension feel, and bounce allowance.
🏕Slackline sag presets
⚙Line, rider, and clearance inputs
Sag-first model: this planner estimates how far the line drops and whether the loaded line clears the ground. It is not a rigging strength, anchor rating, or maximum tension calculator.
Slackline sag result
🧵Material and stretch comparison grid
📊Slackline sag reference tables
| Span length | Low-sag setup | Beginner-friendly setup | Deep-sag setup |
|---|---|---|---|
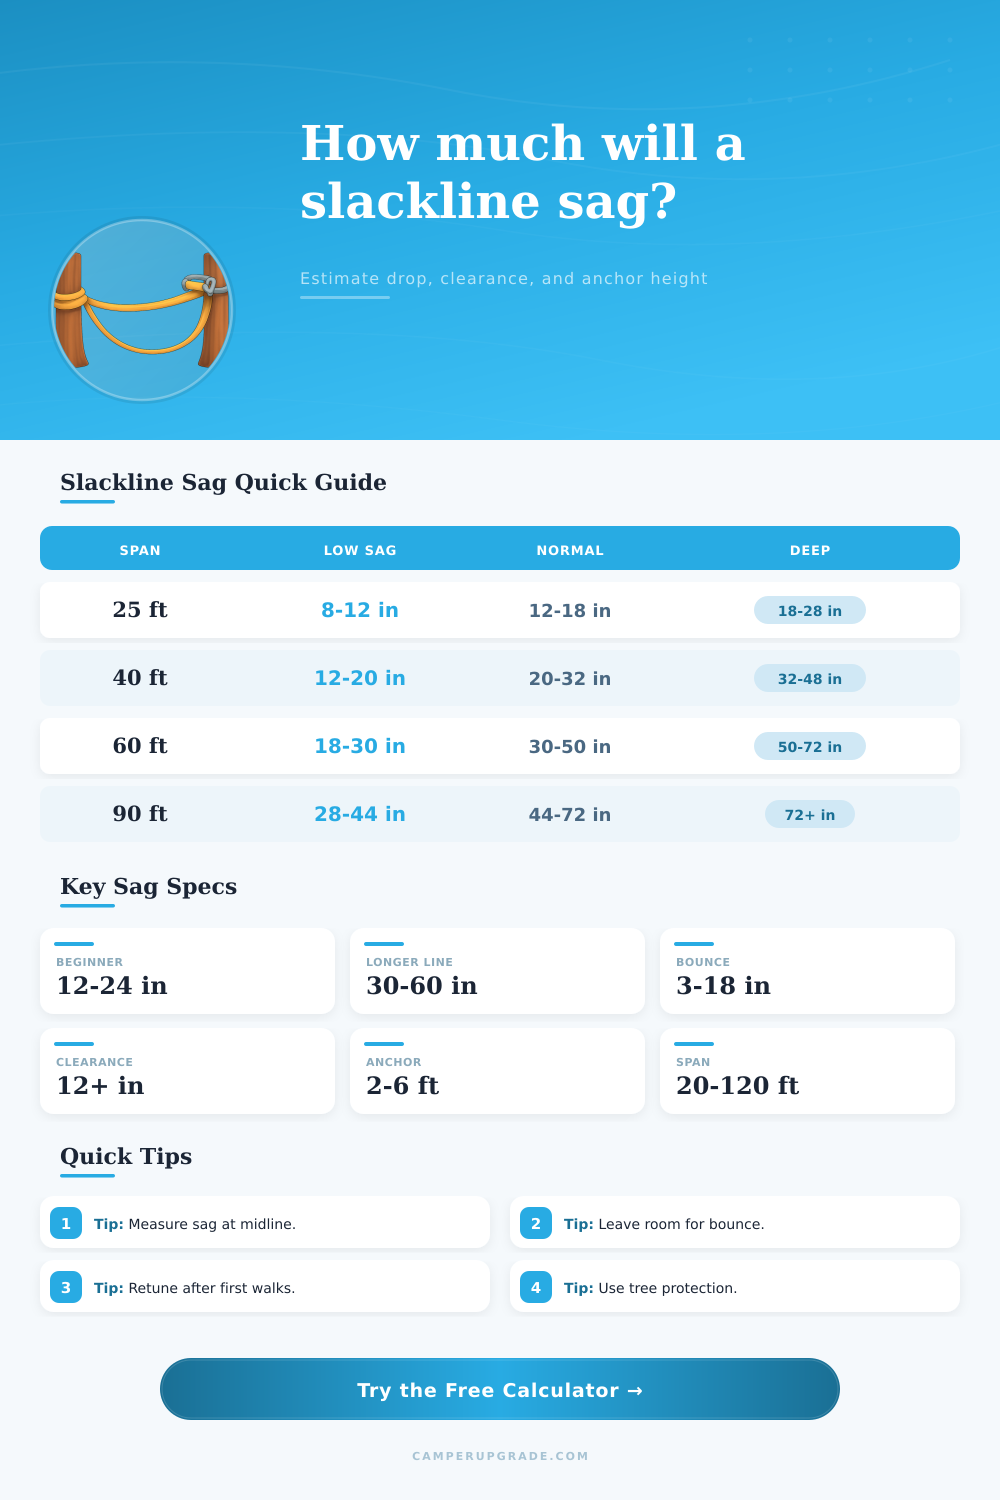
| 20 to 30 ft | 6 to 12 in loaded sag | 12 to 20 in loaded sag | 20 to 32 in loaded sag |
| 30 to 45 ft | 10 to 18 in loaded sag | 18 to 32 in loaded sag | 32 to 48 in loaded sag |
| 45 to 70 ft | 16 to 30 in loaded sag | 30 to 50 in loaded sag | 50 to 72 in loaded sag |
| 70 to 100 ft | 28 to 44 in loaded sag | 44 to 72 in loaded sag | 72 in or more loaded sag |
| Anchor height | Best span use | Likely walking height | Clearance note |
|---|---|---|---|
| 18 to 24 in | Kids or first steps under 20 ft | Very low | Keep bounce small and ground smooth. |
| 30 to 42 in | Common beginner spans near 25 to 40 ft | Low to moderate | Good for learning if sag stays controlled. |
| 48 to 72 in | Longer park lines around 45 to 70 ft | Moderate | Check fall zone before raising anchors. |
| 72 in plus | Long spans or deep-sag style | Higher exposure | Use appropriate spotting and setup judgment. |
| Material | Stretch feel | Sag tendency | Setup takeaway |
|---|---|---|---|
| 1 in nylon tubular | Soft and springy | High | Plan extra anchor height and retune after walking. |
| 2 in polyester ratchet | Firm and direct | Low to medium | Works well for short park lines with less settling. |
| Hybrid park webbing | Balanced | Medium | Good all-around choice for camp and backyard sessions. |
| Trickline webbing | Bouncy | Medium to high | Add dynamic dip allowance before judging clearance. |
| Longline webbing | Controlled | Low per foot | Span length still creates large absolute sag. |
| Wet or older webbing | Relaxed | High | Expect additional creep and inspect the whole setup. |
| Use case | Typical span | Common target sag | Planning detail |
|---|---|---|---|
| Backyard first line | 20 to 30 ft | 12 to 20 in | Low anchors are fine if the ground is flat and soft. |
| Camp tree line | 30 to 50 ft | 18 to 36 in | Tree pads can compress and add settling sag. |
| Park practice line | 40 to 70 ft | 28 to 54 in | Measure clearance at midline after a full walk. |
| Light trick practice | 35 to 60 ft | 24 to 48 in plus bounce | Dynamic dip can exceed the still sag by a lot. |
💡Practical sag tips
The reason most people fall off a slackline is because they look at it from the ground, where all the slack is and think they need it to be as tight as possible. When the line are perfectly flat, there’s no wiggle room for micro-corrections with your balance. You want to have just enough give when you step onto the line, to let you use the dynamic rebound of the line to keep your balance. That sag in middle isn’t a flaw. It’s how the sport works. Figuring out what level of sag to anticipate before you set foot on the webbing make the difference between an enjoyable afternoon and a session of bruised shins.
So how do we know? Well, the calculator up top does all the complicated math on our end (no need to work out equations on one foot). All you do is enter weight of largest person you expect to walk on it, the height of your anchor points, and the distance apart they are. Then it figures out the sag in the middle based off the stretch of the webbing, any settling of knots, and the additional sag that occurs as you attempt to correct a wobble or jump around.
How to Set Up Your Slackline
It’s not so much about getting the exact number as it is determining whether your set-up has enough clearance off the ground that you feel comfortabley. There’s one reason this is all driven by material selection: different types of webbing act like totally different things under tension. For instance, one-inch nylon tubular webbing is super forgiving and stretchy (ideal for beginner use (very soft catch as you fall)). However, it will also sag much more than something stiffer after you step onto it. A polyester ratchet line will be flatter and tighter. It feels crisp and responsive under foot, but it lacks some cushion if you slip off. The calculator use your material selection to account for how thirty feet of nylon under load differs from thirty feet of polyester under load.
Most backyard rigs go down in flames before ever taking their first step: They lack enough anchor height given the amount of sag the line naturaly takes. You might ratchet until your arms feel like jelly, but it won’t matter because your feet will still scrape along the ground. The calculator factors in a bounce allowance and tells you how low your line will go. That’s essential for those learning tricks and those wanting more confidence. If you don’t factor in dynamic weight shifting, you’ll scrape your toes along rocks and roots the second you move around. Four or five inches of additional clearance buffer in the inputs removes that annoyance.
Of course, the weather will change all that, sometimes literally seconds after you get the line dialed in just right. Warmer sun softens the nylon webbing, allowing it to sag deeper and get even more stretchy. Older lines also stretch more from rain; it is a big difference than before. Wet or settled are options on the calculator, and I think that’s a good approach to planning your outing versus playing catch up. You rig out your line on a cool dry morning and walk it for the rest of the day. You might find yourself in a much different place at the end of the day than when you started.
How does humidity affect your clearance margin? Do you need to move those anchors up another notch? Simple geometry demands respect on long spans. When the distance from tree to tree is great, the angle of the line coming off the anchor gets shallower and shallower. That diminish the vertical component of tension that pulls the line up. So the increase in sag is disproportionately related to line length. Twice as long a line will not just be twice as much but actually way more saggy, like fifty foot versus twenty five feet. The line reference table on the page makes the non-linear relationship clear. Don’t expect it to behave like it did up close.
In the end, it’s all about finding the sweet spot. You need enough forgiveness to balance without needing to correct every tiny foot movement. However, it shouldn’t of be so forgiving that you spend more energy correcting your balance than maintaining it. Start with the estimates, tie the anchors, step onto it, walk a bit. Allow the pads to compress and the knots to seat. Check the midline height one last time. You can use the numbers as a starting point, but it will be your body that lets you know when it feels just right. Every minute spent planning will be worth that first confident stride from end to end on a line that holds true beneath you.