Shear Leg Spread Calculator
Estimate the geometry and forces in a two-leg A-frame lift before you choose a spread, pads, guys, and rigging hardware.
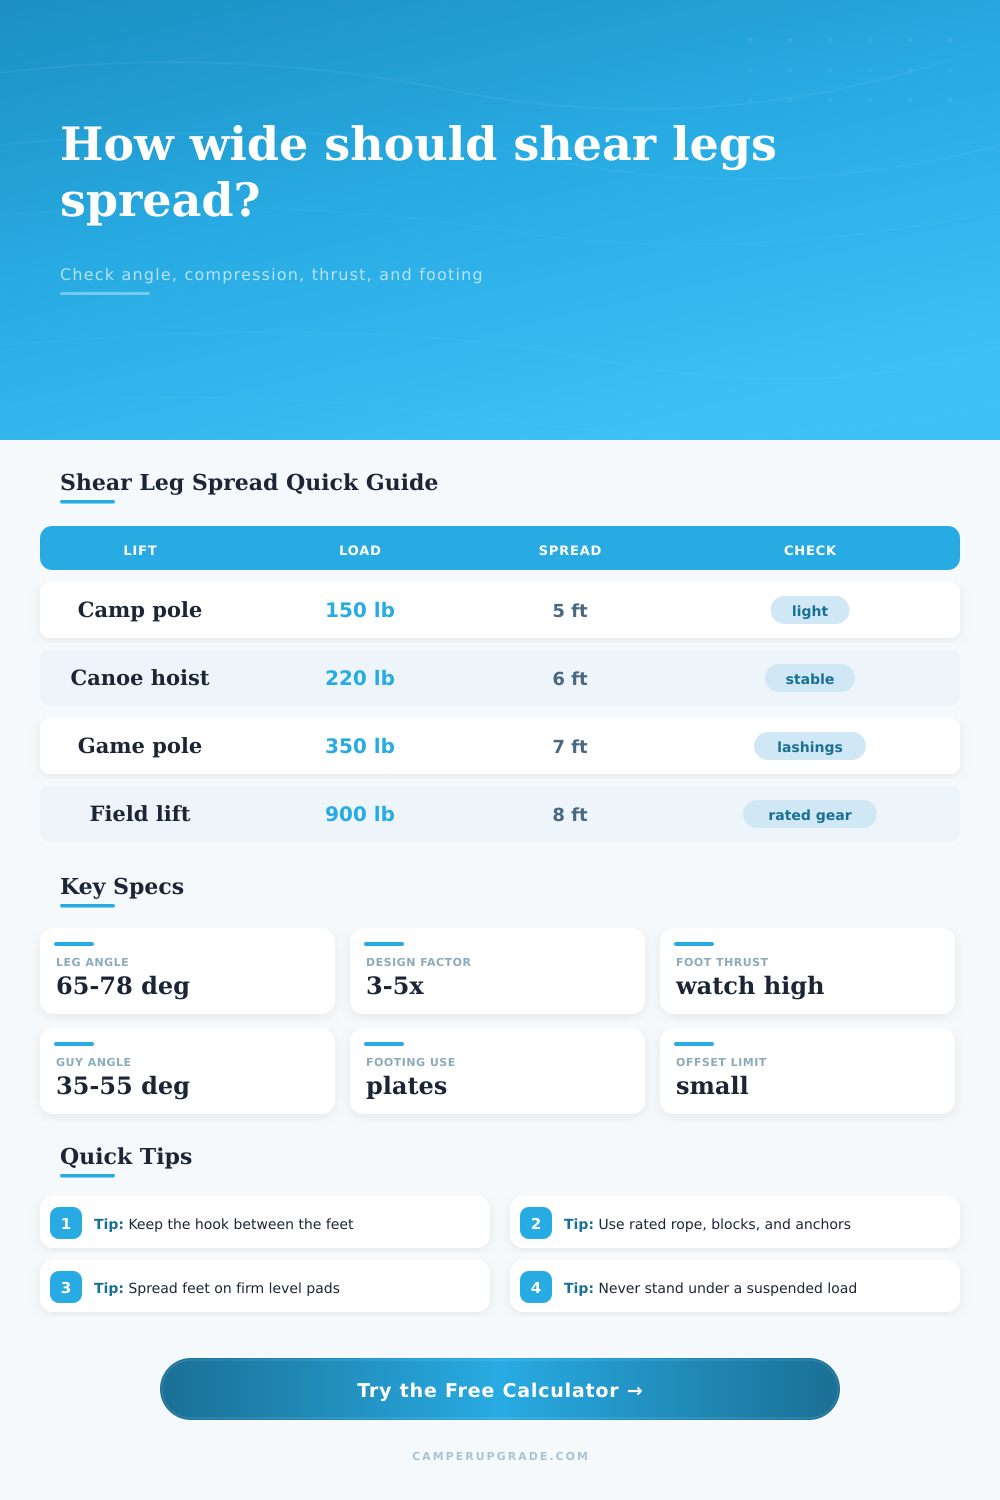
| Leg length | Conservative spread | Balanced spread | Wide practical spread | Typical use |
|---|---|---|---|---|
| 8 ft / 2.4 m | 3.3 ft / 1.0 m | 4.5 ft / 1.4 m | 5.7 ft / 1.7 m | Small camp hoists and light gear lifts |
| 10 ft / 3.0 m | 4.1 ft / 1.2 m | 5.6 ft / 1.7 m | 7.1 ft / 2.2 m | Canoes, small boats, game poles |
| 12 ft / 3.7 m | 5.0 ft / 1.5 m | 6.7 ft / 2.0 m | 8.5 ft / 2.6 m | Field maintenance and medium loads |
| 16 ft / 4.9 m | 6.6 ft / 2.0 m | 9.0 ft / 2.7 m | 11.4 ft / 3.5 m | Tall headroom lifts with stronger guys |
| Leg angle from ground | Geometry meaning | Force trend | Practical note |
|---|---|---|---|
| 80 to 85 deg | Very narrow feet, tall head | Low foot thrust, less lateral base | Needs excellent guying and load centering |
| 70 to 78 deg | Common working range | Moderate compression and thrust | Good first target for temporary shear legs |
| 60 to 69 deg | Wide stance | Higher compression and foot thrust | Needs strong foot tie and footing pads |
| Below 60 deg | Very wide and low | Compression and sliding forces rise fast | Usually a warning zone for field rigs |
| Item | Useful range | Too little | Too much | Field check |
|---|---|---|---|---|
| Back guy angle | 35 to 55 deg | Rope tension climbs sharply | Anchor may pull upward | Guy line should oppose the lift and offset |
| Foot tie | Taut before loading | Feet spread under load | Can preload weak lashings | Mark feet and watch for movement |
| Foot pad | Timber, plate, crib, or sill | Leg punches into soil | Pad can rock if uneven | Keep full contact under each foot |
| Hook centering | Near A-frame centerline | One leg overloads | Complex side guys needed | Plumb bob the hook before lift |
There is a load, two strong poles lashed together at the top, and something that want to be lifted off the ground. The instinct is to plant those feet wide for some semblance of stability, right? Uh huh, well, geometry has this nasty habit of playing tricks on our best-laid plans.
Shear legs seem so easy; like an A-frame with a pile of weight on it, but they’re deceptively treacherous if you don’t pay attention to all the forces pushing sideways at the base. Not the vertical weight; that’s not what crushes toes or flips camps. It’s the outward thrust, and that’s where the lateral force calculators saves us from guessing how much we might invite underfoot in the form of sideways force. Plug in your spread and load and let the calculator do the math for you.
Understanding Shear Leg Safety
That’s the problem with the angle of the legs on the ground. When you have a narrow stance, the legs is almost vertical, and that forces the compression load directly downward through the soil. That’s efficient for wood or metal members, which are primarily under direct compression, not bending. But the tradeoff is a small footprint. A slip of an inch of footing, and the entire frame will topple as if it were made of playing cards. To make this narrow base steady, you want some serious guy lines, anchored secure behind where the lift points.
A wider spread will also give you some lateral stability, which means you don’t have to rely as heavily based off the guy lines to keep your balance. Yes, the legs will catch more air this way too, but when you shift your load a little bit out of center, those legs will fight harder against tipping. This is great if you’re trying to stay upright, but it is not so good if you’re trying to reduce mechanical stress on all components of the system. So when you make the angle shallower, the force vector get split more horizontally. You could easily double the amount of compression force on your legs for only a couple more inches of stand width. It is a small thing, but it is a big deal when you’re dealing with naturaly wood that has knots and unknown grain strength.
The problem with most field rigs is folks don’t understand that the feet are moving weight points, not fixed anchors. That’s why we include the PSI (pounds per square inch) on our pad calculators; so you can determine if your 8 by 8 foot block will be sitting solid on gravel, or sinking into mud. Soft ground demand wider pads, not narrower spreads. Concentrated weight compresses the soil until it fails. As soon as the feet begin to slip out during lift, the head drop. The load begins to swing, and the lashings gets hit harder than they were designed for. Always mark where your feet are positioned prior to hoisting. Whenever those marks shift while the load is hanging, shut down right then and there and reset the frame to bigger pads or firmer footing.
Another variable that gets novices off track is hook placement. Entering a distance from the centerline models what occurs if the load isn’t dead-center between the legs. You can imagine one leg taking much of the vertical load while the other struggle against being pushed out and pulled in. That’s different than the tension required on each guy. This depends on the size of the load and exactly where it hangs relative to your base of support. Unevenness brings in bending moments that aren’t always caught by a straight compression calculation. When in doubt keep the hook dead center.
The last quiet assassin is dynamic loading. Shock loads from dropping a winch to banging gear against a rock can be two or three times the static weight. The calculator include an allowance for this, but remember it’s a percentage. In the real world, we need margin beyond what pure physics says is enough. Inspect every wrap of rope; use rated hardware; don’t stand under the load. Think of the numbers as guidance for rigging, not a promise.
A bigger spread looks safe because it is stable-looking; but if your foot tie has insufficient holding power or your soil won’t bear the foot thrust, then you’re constructing a more flashy failure mode. You should of considered both the geometry and the ground truth; always honor the forces you cannot yet witness in action.