What do you feel underneath your feet when you’re sitting in your car? Is it solid like metal or pliable like rubber? It’s probably the latter because most cars come with a padded floor.
The mat comprises three layers—an anti-slip base to hold it in place, a shock-absorbent and waterproof middle layer, and a polyester carpet on top. However, if you press your feet harder, you will feel the solid metal plate underneath the padding.
When you are in a recreational vehicle, it feels different. Even if you press down harder, you won’t immediately sense the metal plating. Instead, it will feel like a layer of timber lies under the carpet.
Do you know why? That’s because an RV’s floor is not made of the same padding your car has. You may cover it with the same material, but the subfloor is mainly wood.
In this article, you will learn what material this subfloor consists of and how thick it should be. As a bonus, you’ll also learn other essential information about RV floors, including installation.
What is an RV floor made of?
A closer look at an RV’s entire floor cross-section helps you determine the ideal thickness of its subfloor. Like the floor mat in a sedan, the floor in a motorhome also consists of three main layers.
- Insulation
Unlike a typical house (not a stilt one, which is raised on piles), your motorhome is slightly elevated from the ground, exposing the undercarriage to the elements.
Since a car’s framework is metal, heat and cold can easily seep through the floor. Consequently, you must insulate the base, and the thickness of the insulating material depends on what type of battens you choose.
Sometimes, sound dampening is added to block outside noise coming from below.
- Subfloor
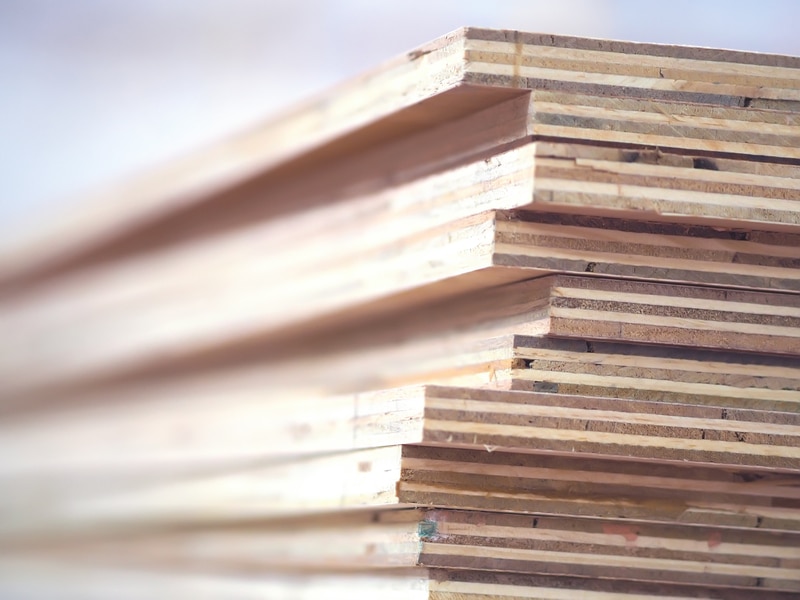
Next to the battens and insulation is the subfloor, typically made of plywood. One of the purposes of a wooden subfloor is to allow the installation of different top layers.
Unlike the factory floor, plywood is thicker and more stable. Of course, you can use other materials, but you have to factor in overall weight, customizability, and manner of installation. Plywood excels in all of these aspects.
- Top Layer
Once you finish laying out the subfloor, you can install the top layer. There’s a vast selection of materials to choose from – vinyl, linoleum, tiles, carpet, synthetic wood, etc. It all depends on what you think suits your style and underfoot comfort.
RV Subfloor Thickness
There’s no universal standard for constructing or renovating a motorhome’s floor. Some states have regulations for designing, using, and maintaining an RV, but they don’t cover construction specifics.
As a result, the general rule manufacturers and custom builders follow when deciding the thickness of an RV’s subfloor is based mainly on common sense and real-life experience.
For instance, for floors with a sufficient base support, like an RV’s floor, the subfloor material should ideally be at least 1/5 inch thick. While it sounds thin, half an inch is already rigid and stable.
Most people doubt it because they presume wood is softer than metal and concrete. This presumption is similar to how one would feel about standing on a 5-inch thick frozen lake.
It may seem unsafe, but the minimum thickness of solid ice that can support an average person’s weight is just 4 inches.
In other words, 1/5 inch is already enough. Some even use 1/4-inch plywood and still come up with excellent output. However, there’s an apparent benefit to a thicker subfloor. For one, it’s more stable; it won’t squeak or buckle over time.
Also, your RV can keep out the elements with a thicker plywood subfloor since wood is an excellent insulator. Then again, it’s best not to go beyond an inch to make the most of your limited vertical space.
How to Install an RV Floor
The installation process is the same whether replacing a floor on an RV or converting a non-RV. It will involve dismantling an existing floor, cleaning up, and installing a new one.
An RV, however, may require more work since the floor was fitted using standard connectors. Here’s a simplified procedure for installing an RV floor.
- Prepare your tools
Treat RV floor installation as proper remodeling work, meaning you will need a complete set of power tools and materials, including:
- Screwdrivers
- Sealant gun
- Circular saw
- Marine-grade plywood
- Rigid foam boards
- Treated wood battens
- Angle edging
- Spray glue adhesive
- Waterproof silicone
- Top cover (your choice)
- Coir matting
- Stanley knife
2. Remove the existing floor
If you’re replacing an existing RV floor, you will have to remove the top cover first, followed by the subfloor. But if it’s a regular vehicle, you’ll have to remove the original floor.
Remember not to throw away the original floor components yet. You can use them as a pattern for the new floor.
3. Clean up.
Once the plywood boards are gone, you’ll have to remove the insulation and battens. This will reveal the corrugated metal plate that separates your vehicle’s interior from the undercarriage.
After years of neglect, dust and grime will have covered this area, and parts where moisture freely leaks in and out will have corrosion on them. Clean these areas immediately and seal them with an anti-rust coat to prevent further deterioration.
4. Set up the battens.
Check underneath your vehicle for areas you should be careful not to screw into, such as tubing, connectors, and tanks. Treated wood battens are ideal because they are cut precisely to the thickness of most insulation boards and are more resilient than raw wood.
Secure these battens with adhesive underneath each batten before driving screws or nails into them. The adhesive also absorbs some of the vibrations.
5. Place the insulation
Once you’ve secured all the battens, it’s time to infill the gaps with the insulation board. When choosing a brand of insulation, always check the K-value (thermal conductivity or the time it takes heat to pass through a material).
The higher the K-value, the better the insulation the material provides. Cut the board nicely and tight so that it fits in each gap. If they’re loose, cold will seep through the crevices around them even if you foil-tape all the joints.
6. Put down the plywood flooring
Depending on your motorhome’s size, you might need to cut several pieces of 0.5-inch plywood. As previously mentioned, you can use the original flooring as a template to avoid the tedious process of measuring all the irregular corners.
Also, notice how the original floor was secured to the metal base with tie-down bolts. You might want to do the same on the new floor. Also, to prevent the plywood boards from flexing, reinforce joints with plywood biscuits.
Install the top layer.
The process of overlaying the subfloor depends on the type of top layer you prefer. We won’t be discussing each of them in this article. But just a piece of advice: choose a material that is durable and easy to maintain.
Wrap-Up: It’s All About Stability
The subfloor isn’t the only functioning element of RV flooring. The other layers are essential, too. However, a well-installed subfloor could mean the difference between a stable surface and a shaky one.
Of course, the subfloor must not be tightly fitted to the walls to compensate for vibrations. Like tiles snapping violently due to lack of proper spacing, an inadequately spaced RV subfloor can also buckle and break when subjected to blunt force.
It takes years of carpentry experience to perfect the art of RV conversion. So while DIY may save you several hundred dollars upfront, it might cost you thousands more in the long run if you do a poor job.


