RV Bridge Clearance Margin Calculator
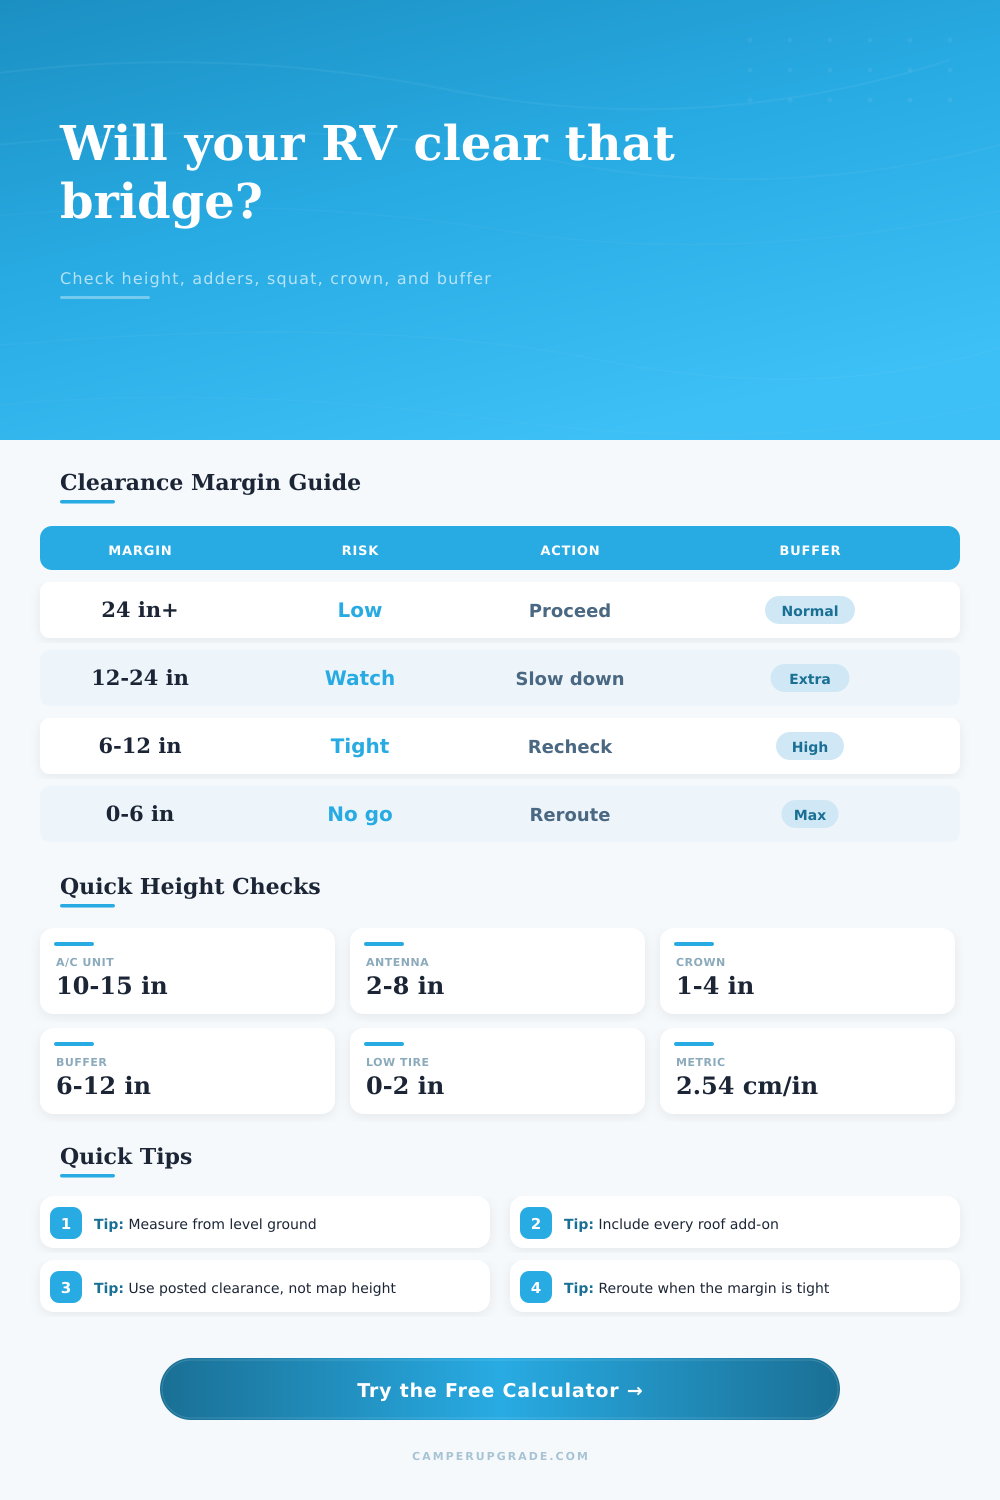
Compare your measured RV height, roof add-ons, road crown, suspension squat, tire pressure change, posted bridge clearance, and safety buffer before committing to a low crossing.
Measure from level ground to the tallest fixed roofline before loose antennas or added accessories.
Enter the amount the rig sits lower when loaded or hitched.
Use positive if aired up raises the rig; use negative if low pressure lowers it.
| Component | Typical Height Add | Metric Add | Calculation Note |
|---|---|---|---|
| Low-profile roof A/C | 9 to 11 in | 23 to 28 cm | Add if not included in measured height |
| Standard roof A/C | 12 to 15 in | 30 to 38 cm | Use the tallest unit on the roof |
| Flexible antenna | 2 to 6 in | 5 to 15 cm | Fold down when possible, but still verify |
| Roof rack or solar rail | 2 to 8 in | 5 to 20 cm | Include crossbars and clamps |
| Satellite dome | 12 to 18 in | 30 to 46 cm | Often becomes the true highest point |
| Road Condition | Allowance | Metric | When To Use |
|---|---|---|---|
| Flat paved approach | 0 to 1 in | 0 to 3 cm | Level road and centered lane |
| Moderate road crown | 2 to 3 in | 5 to 8 cm | Two-lane road with visible crown |
| Steep driveway style ramp | 3 to 6 in | 8 to 15 cm | Bridge after a dip or sharp grade change |
| Uneven construction surface | 4 to 8 in | 10 to 20 cm | Temporary pavement, plates, or gravel transitions |
| Final Margin | Interpretation | Suggested Move | Practical Check |
|---|---|---|---|
| Over 24 in | Comfortable | Proceed normally | Confirm sign and lane position |
| 12 to 24 in | Manageable | Slow down and stay centered | Watch for crown and overhead fixtures |
| 6 to 12 in | Tight | Stop and re-measure if possible | Use a spotter only where safe |
| 0 to 6 in | Very tight | Choose another route | Bridge signs may be conservative or outdated |
| Below 0 in | No clearance | Do not enter | Back out only if traffic control is safe |
| Conversion | Formula | Example | Use In Calculator |
|---|---|---|---|
| Feet to inches | ft × 12 | 13.5 ft = 162 in | Posted clearance comparison |
| Inches to centimeters | in × 2.54 | 6 in = 15.2 cm | Margin and buffer display |
| Feet to meters | ft × 0.3048 | 12 ft = 3.66 m | Bridge and rig height display |
| Meters to feet | m × 3.28084 | 4 m = 13.12 ft | Metric entry conversion |
This calculator estimates clearance margin only. Always obey posted signs, local restrictions, spotter safety rules, and road authority guidance.
When your RV reaches a low bridge, you’re confronted by a certain sort of panic. It begins with the posted sign (worn), hopelessly optimistic in its own way. The sign says a clearance number that seem dangerously near your measured height. You do the mental math. Subtract what you assume will be a safe margin. Ask yourself whether all that new air conditioning might have tacked on an inch or two. And then you hesatate; and that’s when good trips turns into insurance claims. Understanding the dynamic realities of mechanical variance, road geometry and weight is often the dividing line between scraped roof and a smooth crossing.
Most folks begin with their rig’s height from the brochure. It is a good number if you want to compare rigs, but it is deadly when it comes to actualy driving the vehicle. It is static, meaning it is the shell sitting on a flat factory floor. The rig are empty and level. That doesn’t describe your rig; yours isn’t empty nor is it level. It is full of gear, tools, food and water. All of that loads the suspension, causing it to squat. The squat can drops the roof line as much as an inch or more, making it invisible in your side mirror. Once you consider this loaded condition, the calculator above do the math for you. It converts the act of sinking into a specific height adjustment. And why? Because static specs are marketing tools while dynamic heights is data points for survival.
How to Measure Your RV Height Correctly
But then there’s the thing that sits atop that shell: the vertical addition. An ordinary rooftop air conditioner alone add enough height (anywhere from twelve to fifteen inches), depending on the model. Throw in a satellite dish, an antenna or even solar panels and you’re starting to stack inches, which soon eats away at available space. That page has a helpful table laying all this out. How these common accessories compounds. It’s not simply the base vehicle. It’s about total space taken up by the highest point. A few inches for a missing vent pipe can translate into a catastrophic collision with concrete.
There’s also another subtle factor in this equation: Road conditions. A bridge isn’t necessarily a perfect platform. Often, bridges has a slight crown to them with their middle elevated more than the sides as you approach. When you’re driving down the middle of the lane (where you want to be for stability), your rig sits up higher off the ground then it would if it were on a perfectly flat surface. And then we have the bridge clearance signs themselves. They may be faded, outdated, or based off measurements taken before the road was repaved. Fresh asphalt can increase the height of the road deck several inches, lowering the space under the bridge. The number painted on the sign alone is a gamble.
The solution? The safety buffer is non-negotiable. The unknowns, errors, and extras requires a comfort zone with at least 24 inches (or more). If your safety buffer dips to fewer than six inches, it’s critical. Your risk of striking the structure exceeds the convenience gain. Failure to reroute isn’t failure; it’s an informed choice using good data. However, once you start calculating the margin, it becomes clear.
Measure the rig on a flat surface. Add up all the roof component. Subtract the amount the suspension squats. Account for road crown. Compare the resulting total (effective height) with the signposted clearance minus your safety buffer. Go forward, go slow, go home: That’s the answer. It’s no longer a guessing game.
It’s also because RV driving is as much science as adventure. You learn how the road affects your headroom and how weight compress the suspension. No more guessing if it’ll work. You’re in control. Next time you encounter a low bridge, it won’t be a case of hoping for the best, or even a vague sign telling you so. It will be the math. And that changes everything.