Projector Throw Distance Camp Calculator
Plan an outdoor movie setup by matching screen size, throw ratio, campsite depth, brightness, viewing angle, and lens height before you unpack the projector.
Camp Projection Results
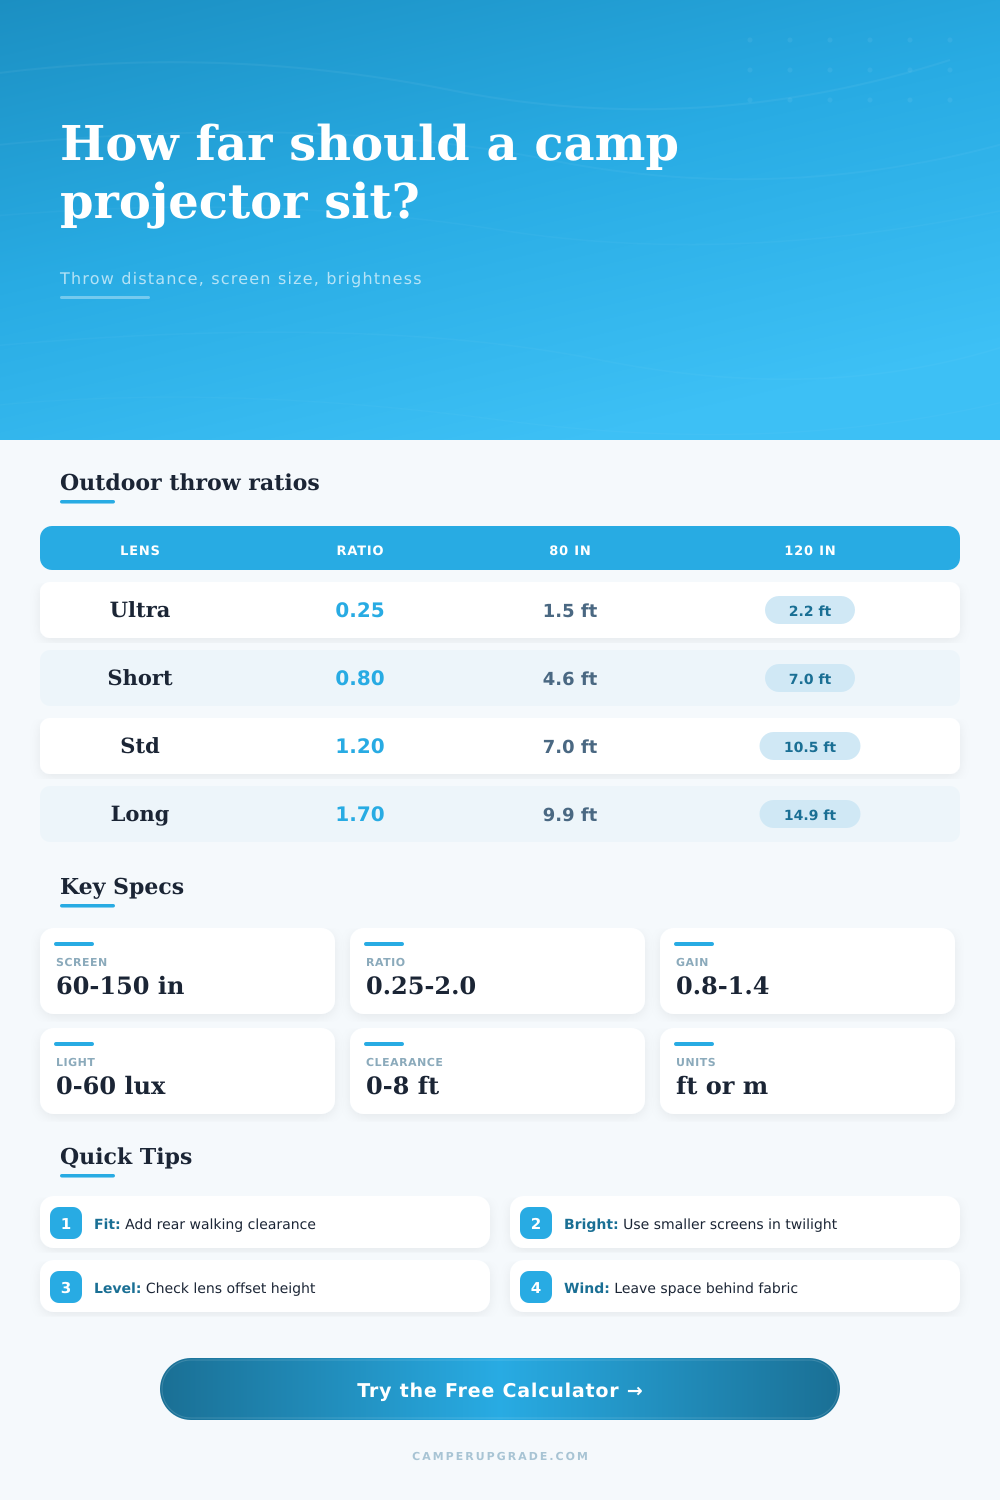
| Lens class | Typical ratio | 80 in 16:9 distance | 120 in 16:9 distance |
|---|---|---|---|
| Ultra short throw | 0.20 to 0.40 | 1.2 to 2.3 ft | 1.7 to 3.5 ft |
| Short throw | 0.50 to 0.90 | 2.9 to 5.2 ft | 4.4 to 7.8 ft |
| Portable standard | 1.00 to 1.30 | 5.8 to 7.6 ft | 8.7 to 11.3 ft |
| Home theater standard | 1.30 to 1.70 | 7.6 to 9.9 ft | 11.3 to 14.8 ft |
| Long throw | 1.70 to 2.00 | 9.9 to 11.6 ft | 14.8 to 17.4 ft |
| Diagonal | 16:9 width | 16:9 height | Image area |
|---|---|---|---|
| 60 in | 52.3 in / 4.36 ft | 29.4 in / 2.45 ft | 10.7 sq ft |
| 80 in | 69.7 in / 5.81 ft | 39.2 in / 3.27 ft | 19.0 sq ft |
| 100 in | 87.2 in / 7.26 ft | 49.0 in / 4.08 ft | 29.6 sq ft |
| 120 in | 104.6 in / 8.72 ft | 58.8 in / 4.90 ft | 42.7 sq ft |
| 150 in | 130.7 in / 10.89 ft | 73.5 in / 6.13 ft | 66.7 sq ft |
| Outdoor condition | Ambient light | Useful target | Planning note |
|---|---|---|---|
| Dark camp after dusk | 0 to 5 lux | 12 to 16 fL | Comfortable movie viewing |
| Dim lanterns nearby | 10 lux | 16 to 22 fL | Good with modest screen size |
| Lit picnic shelter | 25 lux | 22 to 30 fL | Use a brighter projector or smaller image |
| Late twilight | 60 lux | 30 fL or higher | Image will wash out quickly |
| Setup | Screen diagonal | Typical throw | Suggested site depth |
|---|---|---|---|
| Tent wall movie | 60 to 75 in | 5 to 8 ft | 10 to 12 ft |
| Awning screen | 80 to 100 in | 7 to 11 ft | 13 to 16 ft |
| RV pad screen | 100 to 120 in | 9 to 14 ft | 16 to 20 ft |
| Group campsite | 120 to 150 in | 11 to 18 ft | 20 to 26 ft |
| Result | Formula | Imperial factor | Metric factor |
|---|---|---|---|
| Screen width | Diagonal x aspect width / aspect diagonal | 12 in = 1 ft | 1 in = 2.54 cm |
| Throw distance | Screen width x throw ratio | 1 ft = 12 in | 1 ft = 0.3048 m |
| Brightness | ANSI lumens x gain / screen area | 1 fL = 3.426 nits | Area uses m² equivalent |
| Viewing angle | 2 x arctan(width / 2 / seating distance) | Radians converted to degrees | Same geometry |
Your second error: You think a projector functions like a flashlight. It doesn’t. Projectors emit light that casts in cone shape; the closer you are to the lens and the farther you are from the screen, the bigger the image. Is it too near? The image will be no larger than a dinner plate. Back it up too much? You’ll see the picture bleed past the edges of your fabric onto nearby trees.
It’s a geometry lesson, throw distance is arguably most important spec for outdoors. You can plug those into the calculator above and let it do the math, but understanding what they mean will help you build out a rig that works for your campsite.
How to Set Up Your Projector
The first number is the diagonal of the screen. Anywhere from eighty to one hundred twenty inches are typical for portable screens since any bigger gets unwieldy trying to secure it in the wind. From there, the throw ratio tell you the distance from the projector to the screen. For a typical 1.2 throw ratio, the projector should sits about 1.2 times the width of the screen away. That’s not too bad on many campsites or RV pads.
There is short throw lenses available, although they tend not to be used much in mobile units due to costly optics. In that case, you’ll set up the projector no more than a few feet from the screen (the shorter the throw ratio, the closer). For example, this could be helpful where your site area are small and/or full of equipment. The closer the projector goes to the screen, the smaller the number of folks who can sit behind the projector without blocking the beam. You can enter what’s known as walking clearance in the back, which is a practical measure of whether anyone can pass behind the device without stepping into the beam.
That’s something people mess up, they obsess over the picture and miss the fact that you have to think about humans passing through the area.
The other silent killer for outdoor movie night is brightness. At a campsite, ambient light is inevitable. Moonlight, lanterns, fire pits, all add lux to the environment that washes out contrast. To estimate foot-lamberts, the calculator uses your projector’s lumen rating and the screen gain (screens has a gain, which is a measure of how much light they reflect back to you). Standard white fabric has a gain of 1.0. Some higher gain screens can be as high as 1.2 or 1.3 but tend to narrow the viewing angle. Even though the image may look bright in the center, it might appear dimmer to you if you are sitting off to the side.
Twelve to sixteen foot-lamberts is all that’s necessary for comfortabley viewing after dark in a dark camp. If you’re doing it at twilight, however, or have lanterns strung around your campsite, you’ll want far more light on the image. That’s where this tool comes into play: by allowing you to change the level of ambient light present, it can help you determine whether you want a brighter picture (requiring shrinking the screen) or a beefier projector. A smaller screen concentrates the image and makes it stand out more against light from camp lamps.
Another little detail that will save you trouble is lens offset. Most projectors’ lenses sits above dead-center in the projector’s body. That means you can put the projector on a lower cooler and the bottom of the picture could be below the bottom of the screen. This little feature allows you to adjust the vertical positioning and the calculator takes care of the rest so the picture is centered correctly. Small details, but important if you’re trying to paint a bullseye into the darkness.
What it really comes down to is the size of the screen you want, its brightness and available physical space. How big do you go? That depends on whether you’re willing to sacrifice clarity or distance, which in turn depends off available surrounding light and site depth. Just plug that data into the calculator along with your desired seat distance and you’ll know if your dream rig is feasible (or not). A reference table on the page shows this as a visual comparison of how different lens classes perform across several screen sizes. This helps turn what would of guesswork into something you can measure and use to make a plan. No one wants to be fiddling with the tripod in the dark when it’s time to get the movie going.
By having the numbers ahead of time, you’ll feel confident putting out the chairs, setting up the screen and positioning the projector. The geometry is fixed, you just create the experience that works for you. With a bit of planning, all you’ll care about is what to watch, not if the picture fits.