Percolator Grounds Ratio Calculator
Calculate coffee grounds, scoops, finished yield, and brew strength for stovetop, RV, and campfire percolator pots.
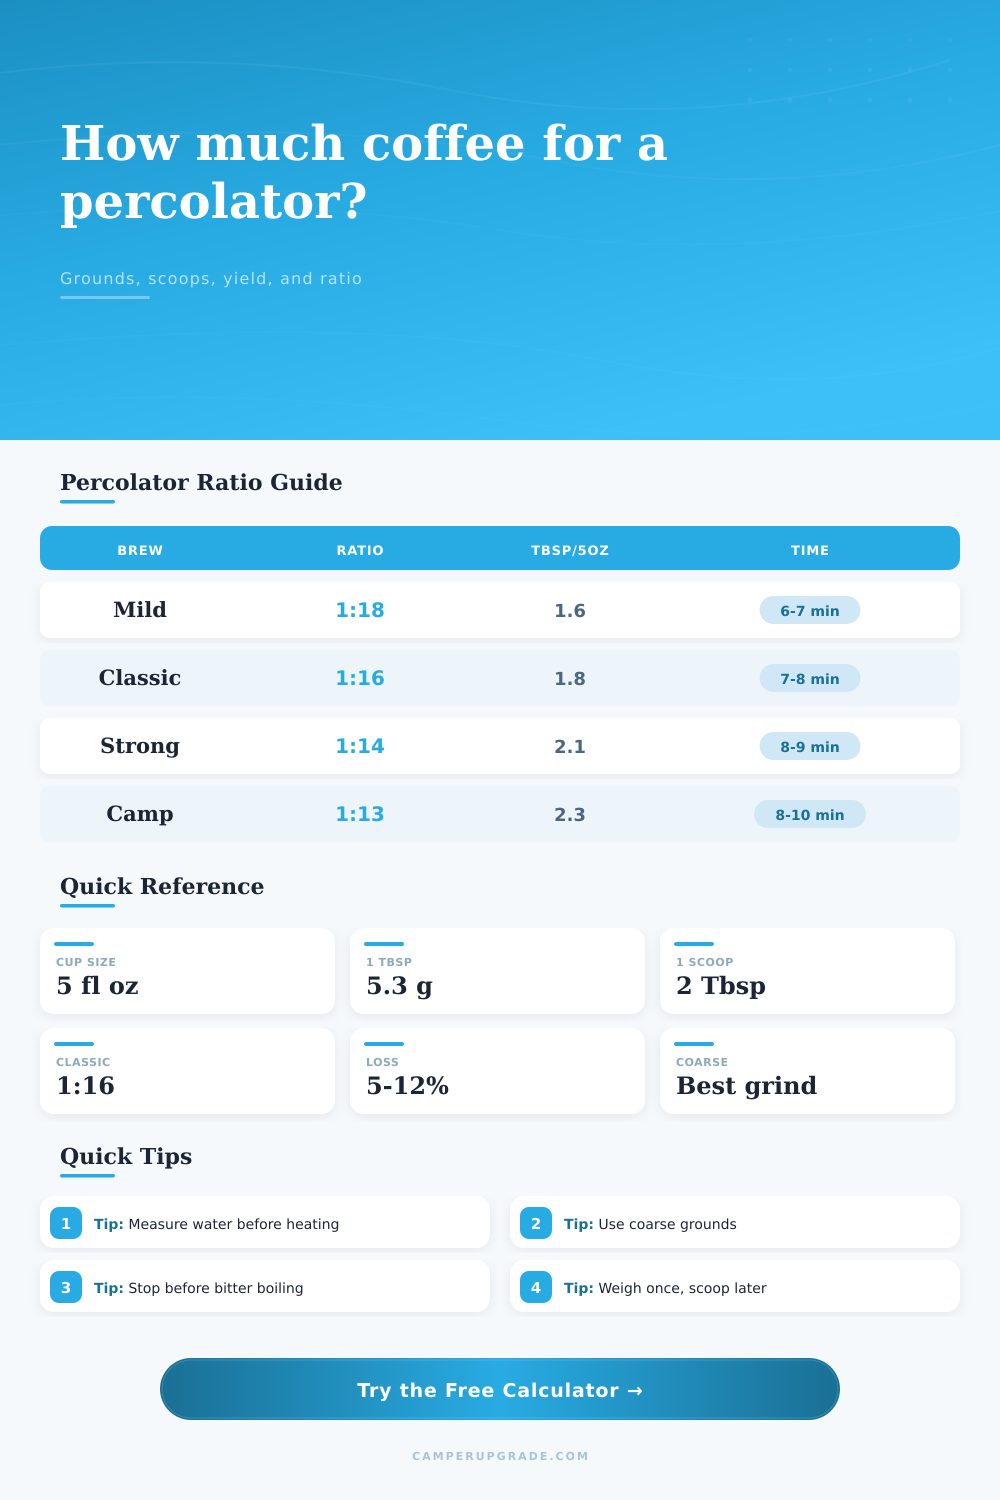
| Brew Target | Water-to-Coffee Ratio | Grounds Per 5 fl oz Cup | Best Use |
|---|---|---|---|
| Mild trail coffee | 1:18 | About 1.55 tbsp | Long sipping, light roast |
| Classic percolator | 1:16 | About 1.75 tbsp | Balanced RV or cabin pot |
| Full camp mug | 1:15 | About 1.85 tbsp | Milk, cream, or large mugs |
| Strong percolator | 1:14 | About 2 tbsp | Cold mornings and bold roasts |
| Campfire bold | 1:13 | About 2.15 tbsp | Large pots with heat variation |
| Marking Or Serving | Fluid Ounces | Milliliters | Classic 1:16 Grounds |
|---|---|---|---|
| 1 percolator cup | 5 fl oz | 148 ml | 9.2 g |
| 1 small camp mug | 6 fl oz | 177 ml | 11.1 g |
| 1 kitchen cup | 8 fl oz | 237 ml | 14.8 g |
| 12-cup perk pot | 60 fl oz | 1774 ml | 110.9 g |
| 2-liter camp pot | 67.6 fl oz | 2000 ml | 125 g |
| Setup | Expected Loss | Active Perk Time | Grounds Adjustment |
|---|---|---|---|
| Electric covered pot | 5% to 7% | 6 to 8 minutes | Use standard ratio |
| Stovetop stainless | 7% to 9% | 7 to 9 minutes | Use standard ratio |
| RV propane burner | 9% to 11% | 7 to 9 minutes | Add 0% to 3% |
| Campfire enamel pot | 10% to 14% | 8 to 10 minutes | Add 3% to 8% |
| Batch Name | Starting Water | Classic Grounds | Medium Tbsp |
|---|---|---|---|
| 4-cup solo pot | 20 fl oz | 37 g | 7 tbsp |
| 8-cup camp perk | 40 fl oz | 74 g | 14 tbsp |
| 10-cup trail crew | 50 fl oz | 92 g | 17.5 tbsp |
| 12-cup enamel pot | 60 fl oz | 111 g | 21 tbsp |
| 16-cup basecamp fill | 80 fl oz | 148 g | 28 tbsp |
Percolator cup markings are often 5 fl oz, not 8 fl oz. Match the calculator unit to the pot marking before adjusting strength.
Roast density changes spoon volume. Weigh one normal tablespoon from your camp coffee, then use that value as your repeatable scoop baseline.
Never worry about whether or not your amount of coffee is correct again. You’ll never have to guess how much coffee you need again. This calculator handle all the conversions from weight to volume to servings, so you can focus on when and how hot to make it.
The cup markings on the side of most pots is deceptive and can be a major trap for people. A “cup” in a percolator is actualy 5 fluid ounces. A “cup” in your kitchen are eight ounces. So when you fill your twelve-cup pot up to number, that’s not ninety-six ounces of water you’re brewing, it’s sixty.
How to Use the Coffee Calculator
The tool accounts for this difference right away. It allow you to choose the appropriate unit for your vessel so you don’t use too much (wasting grounds) or too little (making weak brew).
Next you select your ratio. Most folks prefers medium strength, which is one part coffee to sixteen parts water. That’s a good starting point for most roasts and most tastes. If you’re brewing something really dark (and therefore lighter in weight per tablespoon) or at high altitude, then you might want to bump it up a bit with a one-to-fourteen ratio. The calculator will adjusts your amount of grounds accordingly.
You can also adjust your scoop size. Light roasts has denser beans so a level tablespoon of light roast will weigh more than a heaping tablespoon of dark roast. Knowing this prevents you from under-dosing because your roast happens to be darker.
More than most realize, the outcome is heavily influenced by heat source. An open camp fire results in greater evaporation different than an electric percolator left on while camping in an RV. For this reason, there’s a spot for water loss on the tool. Add water loss into the equation and your final yield decreases. More water must be added in order to account for the change. That way, when you are brewing a pot of coffee on a trip it maintains its same strength.
If you use a wider hole basket (which lets some of the finer particles escape), that will make the coffee slightly weaker. To balance that out, the math will increases your brew amount by a few grams. The second variable is grind size, which alters results. Coarse are necessary for percolating coffee, just the right amount of grounds in the pot, not enough to rush through the steam tube. Too fine and you’ll taste burnt, sandy coffee. Though the tool mentions the grind adjustment, it’s your grinder where the action occurs. Think of it as a grainy texture similar to sea salt.
If you’re hand grinding, be patient. Many folks gets sloppy with their timing. There isn’t a formula using ratios to fix poor extraction.
If you don’t feel like typing in your own inputs each time, there’s also a list of handy reference tables on the page that give you some benchmark values for typical batch sizes. It lists tablespoons and grams per cup for both 12- and 6-cup pots. They are not absolute rules but they are good sanity checks. You don’t want to get to the point where you think you should of use fifty grams of coffee for four cups.
And so, really, it comes down to making the morning ritual free of guesswork. You weigh your water, you have confidence in the ratio and then you step back and let it do its thing.
The trick, though, is knowing what you’re measuring. If you understand how heavy an ounce is in your five-ounce cup and if you know how dense your roast is, then everything else is just basic math. That’s where the calculator comes into play… It does the math for you.
When you nail the ratio, you get to enjoy a pot of coffee worthy of the wait. No wasted beans. No panicked moments. Just a cuppa that turns out the way you hoped.