LED Strip Length by Amps Calculator
Estimate the longest practical LED strip run from available amps, supply voltage, strip wattage, derating, brightness, and feed method.
⚡Real Camper LED Presets
🔢Strip And Circuit Inputs
LED Strip Amp Budget Results
📊Common LED Strip Spec Grid
📐Reference Tables
| Strip type | Typical power | 12 V current | 24 V current | Camper use |
|---|---|---|---|---|
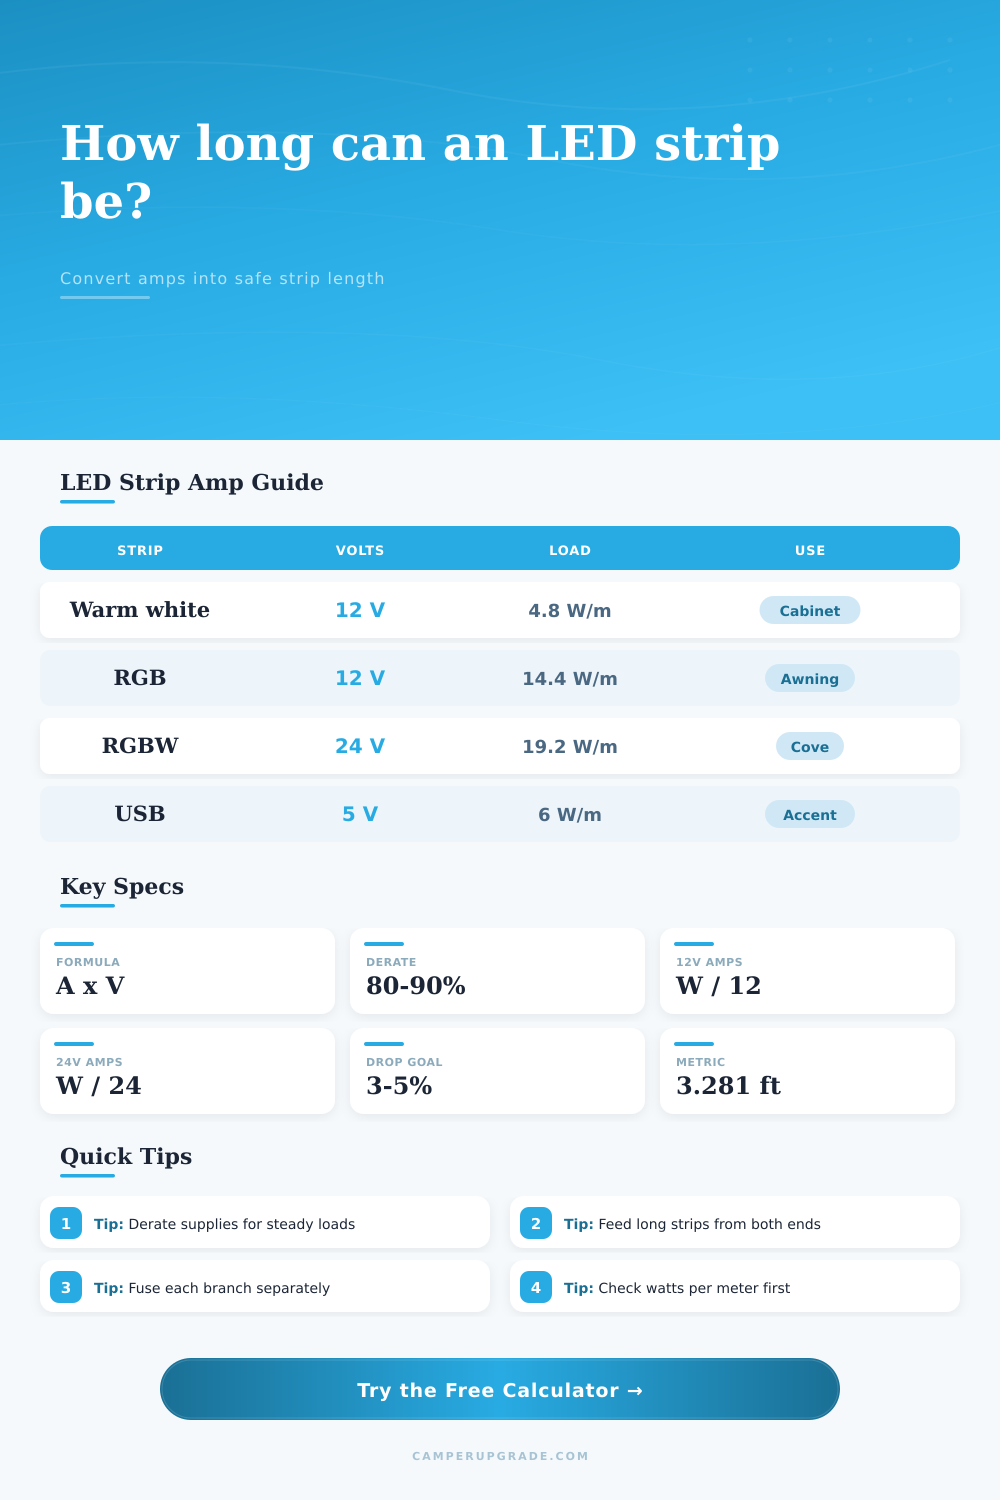
| Soft warm white 30 LED/m | 4.8 W/m | 0.40 A/m | 0.20 A/m | Cabinets, shelves, lockers |
| Amber exterior marker strip | 7.2 W/m | 0.60 A/m | 0.30 A/m | Porch rails and step glow |
| Task white 60 LED/m | 9.6 W/m | 0.80 A/m | 0.40 A/m | Galley counters and benches |
| Bright RGB strip | 14.4 W/m | 1.20 A/m | 0.60 A/m | Awnings and lounge accents |
| High-density white strip | 18.0 W/m | 1.50 A/m | 0.75 A/m | Garage or work bay lighting |
| RGBW or tunable white strip | 19.2 W/m | 1.60 A/m | 0.80 A/m | Cove lighting and full-color scenes |
| Available amps | Usable at 80% | 12 V watts | Max at 9.6 W/m | Max at 14.4 W/m |
|---|---|---|---|---|
| 2 A | 1.6 A | 19.2 W | 6.6 ft / 2.0 m | 4.4 ft / 1.3 m |
| 3 A | 2.4 A | 28.8 W | 9.8 ft / 3.0 m | 6.6 ft / 2.0 m |
| 5 A | 4.0 A | 48.0 W | 16.4 ft / 5.0 m | 10.9 ft / 3.3 m |
| 8 A | 6.4 A | 76.8 W | 26.2 ft / 8.0 m | 17.5 ft / 5.3 m |
| 10 A | 8.0 A | 96.0 W | 32.8 ft / 10.0 m | 21.9 ft / 6.7 m |
| 15 A | 12.0 A | 144.0 W | 49.2 ft / 15.0 m | 32.8 ft / 10.0 m |
| Feed method | Best for | Voltage-drop behavior | Calculator segment factor | Practical note |
|---|---|---|---|---|
| Single-end feed | Short strips | Highest drop at far end | 1.0 | Keep below reel limit when possible |
| Both-end feed | One long continuous run | Current shared from two ends | 2.0 | Use matched polarity at both ends |
| Center feed | Left and right branches | Two shorter electrical paths | 2.0 | Useful under beds and cabinets |
| Parallel branches | Multiple zones | Best control of branch drop | 3.0 | Fuse branches for their wire size |
| AWG feeder | Ohms per 1000 ft | Example 12 V load | Round-trip drop at 10 ft | Typical LED role |
|---|---|---|---|---|
| 18 AWG | 6.385 | 2 A | 0.26 V / 2.1% | Short accent branches |
| 16 AWG | 4.016 | 4 A | 0.32 V / 2.7% | Small cabinet and awning zones |
| 14 AWG | 2.525 | 6 A | 0.30 V / 2.5% | Medium strip circuits |
| 12 AWG | 1.588 | 10 A | 0.32 V / 2.6% | Longer 12 V lighting feeders |
| 10 AWG | 0.999 | 15 A | 0.30 V / 2.5% | High-current distribution trunk |
| Preset project | Voltage | Strip load | Planned length | Rated draw |
|---|---|---|---|---|
| 12V Warm Cabinet | 12 V | 4.8 W/m | 10 ft | 1.22 A |
| 12V RGB Awning | 12 V | 14.4 W/m | 16 ft | 5.85 A |
| 24V Cove Glow | 24 V | 9.6 W/m | 24 ft | 2.93 A |
| Low Draw Bed Rail | 12 V | 3.6 W/m | 12 ft | 0.91 A |
| 24V RGBW Lounge | 24 V | 19.2 W/m | 20 ft | 4.88 A |
💡Calculation Tips
The math look easy. You remove the LED strip from the reel and assume that’s it. Multiply length by the wattage per meter, divide by twelve volts, and voila, it feels like your current draw fit perfectly within a five amp fuse. On paper this all makes sense. In reality, it’s different.
You turn on the switch, head down the road and only the front half of your cabinet light up in a nice white while the rear dim to an ugly gray. Why does this occur? You approached the electrical problem like a numbers problem. It’s not just about how many amps the strip draw, it’s about how far those electron have to travel. The strip also has a distance to cover which impact how much of its power reaches the rear cabinets.
Why Math Is Not Enough for LED Lights
Rather than only focusing on maximum length, this calculator take into account physics as well. It makes you think about voltage drop and also continuous load derating. People tend to forget that their controller or power supply get hot too. If you leave your adapter running at full bore in a warm garage, its days is numbered; it won’t last a year.
The device prompt you to use an eighty percent rule. That’s conservative and it will ensure your equipment survives when surrounding temps rise. You sacrifice a little theoretical light output for real-world reliability. Making this simple tweak in input boxes avoids big headaches down the road.
Many people do not know how important the feed method selection are. For very short runs (less than 3 feet) it’s fine to just feed a strip from one end. But after that length the resistance of the trace is substantial enough to matter. Some of the current taken by the wire will diminish the voltage at the end where light is. If your feed use parallel branches or both-ends feeding, the calculator take this into account. It gives you an idea of how many real segment are required before uneven dimming occurs.
You don’t have to remember complicated resistance equations. Just use the reference tables on the page for the raw numbers if you want to understand the calculation. The most important factor is what density strip you choose. You’ll find that warm white low density strips pulls only about half an amp per meter, which means you can use thinner wiring and still run them quite far.
On the other hand, high density rgbw will pull upwards of a kilo of current in same physical space. If you’re trying to light up a large area such as a ten foot length of galley counter with high output lights, you may not have enough current on single twelve volt circuit. To do that, you can step up to a higher voltage like twenty four volts. The calculator will convert to and from that voltage automatically if you specify the supply voltage. Alternatively, you can go with heavier gauge wire.
The last component of the puzzle is wire gauge, which is what most DIYers miss. You can spend less in the short term using 18 AWG wire on a lengthy run, but you’ll create massive voltage drop by the time power hit the strip. For main feeders, sixteen or fourteen gauge are best. If you know how far away from the battery your wiring will be, the tool will help you see that trade-off when you input your wire gauge and distance.
It’s not a substitute for expert electrical advice, but it provides a good launching point to plan out your camper light layout. What we’re really aiming for is reliability, safety, and consistency across years on the road. We don’t want the lights to come on, but rather that they stay on and stay working year after year. There is a constant glow inside the cabin. You won’t have to worry about fried controllers or blown fuses.
That’s what comes out of running these numbers through this estimator; going from guessing to planning. It is a place where your physical layout fits into the power budget. There isn’t any wiggle room for surprises when you find yourself miles from assistance. What you get is lighting that works as it was designed, every step of the way from the very first connection point to the final LED in the chain.
You should of used the calculator earlier so everything would of been perfect. It actualy makes life easier.