Kids Camping Gear Weight Limit Calculator
Estimate a child-friendly camping pack load from body weight, age, carry percentage, base gear, water, snacks, clothing, trail distance, terrain, and parent carry split.
🏕Child And Trip Presets
🧒Child Size And Carry Limit
🎒Pack Load Inputs
🥾Trail Difficulty Inputs
📊Kids Gear Comparison Grid
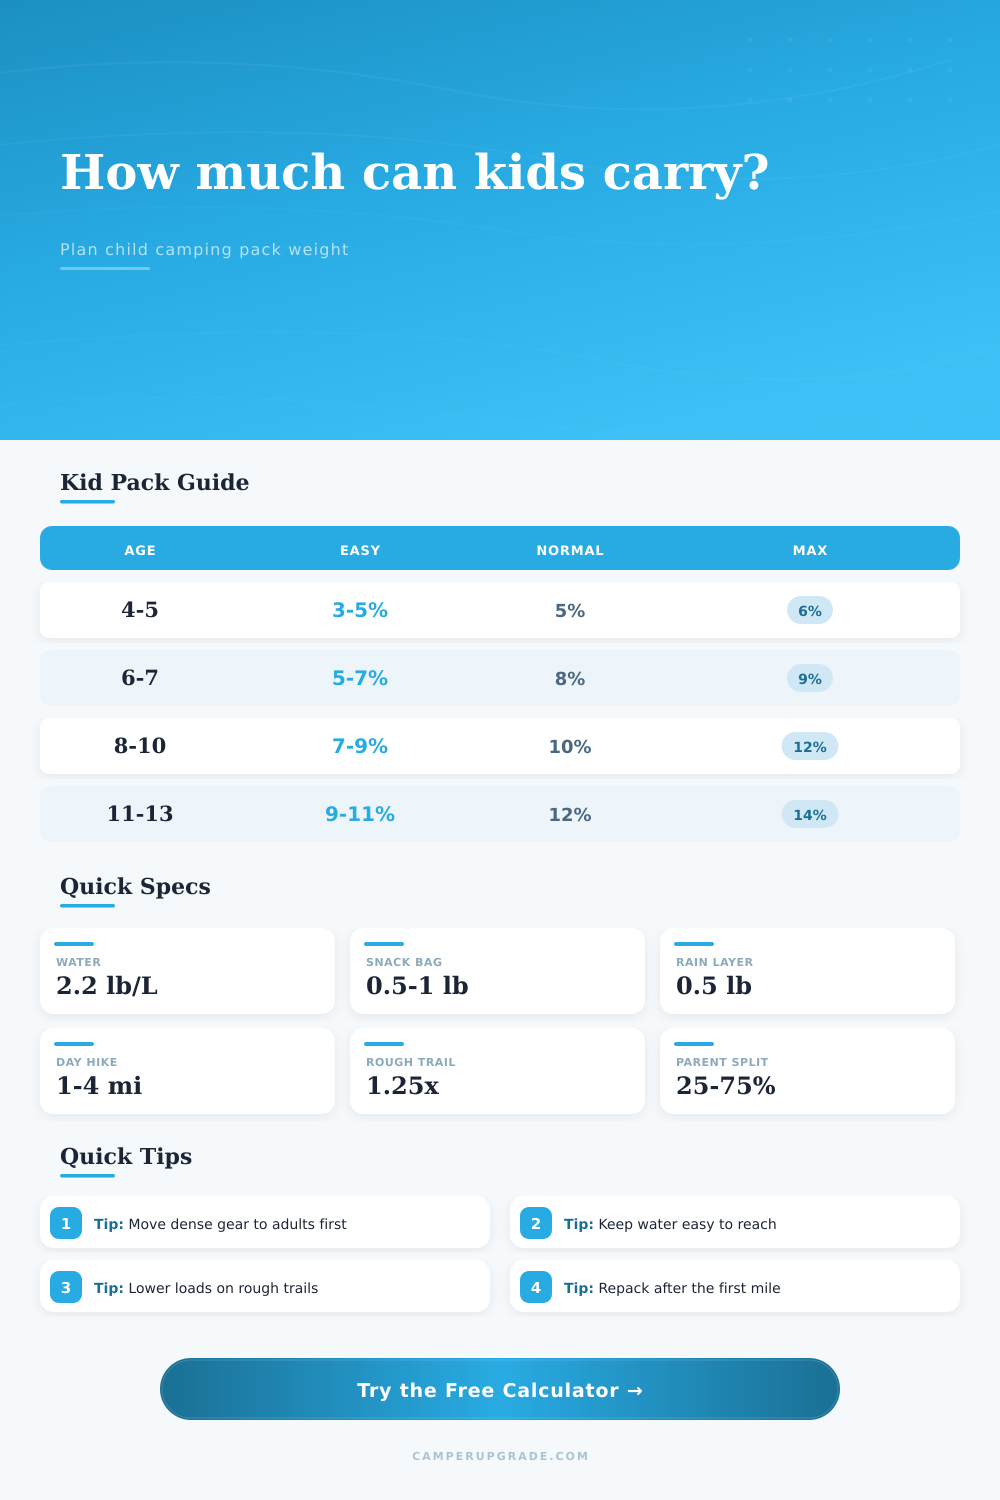
📐Age-Based Carry Percentage Table
| Child Age | Easy Camp Walk | Normal Short Trail | Upper Planning Cap |
|---|---|---|---|
| 4 to 5 years | 3% to 4% of body weight | 5% of body weight | About 6% for very short, easy walks |
| 6 to 7 years | 5% to 7% of body weight | 8% of body weight | About 9% when the trail is easy |
| 8 to 10 years | 7% to 9% of body weight | 10% of body weight | About 12% for comfortable hikers |
| 11 to 13 years | 9% to 11% of body weight | 12% of body weight | About 14% with careful packing |
| 14 to 16 years | 10% to 13% of body weight | 15% of body weight | About 18% for strong teens on easy routes |
🧺Common Kids Camping Gear Weights
| Gear Item | Light Estimate | Typical Estimate | Planning Note |
|---|---|---|---|
| Child day pack | 0.7 to 1.2 lb | 1.2 to 2.5 lb | Small frame packs and many pockets add weight fast. |
| Water bottle or bladder | 1.1 lb for 0.5 L | 2.2 lb for 1 L | Water is dense, so split it first when the load is high. |
| Snack bag or lunch | 0.4 to 0.8 lb | 0.8 to 1.5 lb | Dense bars and fruit are heavier than puffy snacks. |
| Rain shell or fleece | 0.4 to 0.7 lb | 0.7 to 1.5 lb | Bulky layers may feel awkward even when the scale looks fine. |
| Small extras | 0.2 to 0.6 lb | 0.6 to 1.5 lb | Notebook, toy, lamp, map, gloves, and comfort items belong here. |
🗺Terrain And Distance Adjustment Table
| Trail Setting | Terrain Factor | Distance Effect | How To Use It |
|---|---|---|---|
| Smooth campground path | 1.00x | Little added fatigue below 1 mile | Good for first pack practice and younger children. |
| Easy dirt trail | 1.08x | Small fatigue bump after 2 miles | Works for most family campground approaches. |
| Rolling roots or sand | 1.18x | Noticeable fatigue after 3 miles | Lower the pack target or increase parent split. |
| Steep or rocky trail | 1.28x | High fatigue above 2 miles | Move dense items to adults before the trailhead. |
| Snow, mud, or loose scree | 1.40x | Very high effort even on short routes | Keep child load mostly to clothing and small essentials. |
🧭Parent Split Planning Table
| Parent Split | Best For | Child Carries | Parent Moves |
|---|---|---|---|
| 0% to 15% | Older child, easy path, very light pack | Most personal gear | Only emergency overflow |
| 25% to 35% | Normal family camping trail | Pack, water, snacks, light layer | Some clothing and extras |
| 45% to 60% | Young child, hilly route, longer walk | Water sip, snack, comfort item | Dense layers and spare gear |
| 70% to 100% | Preschoolers or rough conditions | Tiny pack or no pack | Nearly all practical weight |
💡Kids Pack Weight Tips
After plugging in your kid’s numbers, the calculator takes care of the rest, no need for second-guessing whether that added fleece will make the going too tough. How much they can carry isn’t just a matter of how big their bag is; it’s also about comfort and distribution.
That’s when you notice it: A sagging set of shoulders, a sigh instead of small talk. Then the pack becomes a burden, and the time to consider weight is before tightening those bootlaces.
How to Use the Calculator
With the data you enter, the tool do all the guessing for you. It’s a matter of percentages. And it’s simple.
It doesn’t involve looking at how many pounds your kid has in their pack; that will be different than a forty pound preschooler than a ninety pound tenth grader. You’re looking at ratio of the load to body mass. That chart on the page gives those percentages based off age groups. A four year old should barely feel anything. By contrast, the pre-teen can carries a proper daypack load.
The kicker here is knowing what you are measuring. It’s not the pack itself, but the pack plus water, snacks, the emergency rain shell.
Weight matter: Water is the big one. A liter of H2O = about two point two pounds. That doesn’t sound like much until you realize that your kid will require two liters of water on a three hour loop in warm weather. All of a sudden you’re carrying an extra four and a half pounds on what was already a tight pack.
Enter the water fill function, which allows you to enter the precise amount of water you have, giving you a clear picture of how much wiggle room you have for treats. Families tend to pack way too much water (why run out?) yet underpack for comfort because they assume the kid will tough it out. You’ll get tired faster if that water sloshes around in a deep compartment at bottom of your pack. Keep it up top and accessible.
Effective load is also affected by terrain. Walking on a flat boardwalk isn’t a workout at all. Hiking through a rocky area will be a bit of a workout. Because of this, the calculator include a terrain factor that affects how much you need to carry. Rougher ground (steepness and loose footing) makes it more difficult for your body move your pack, thus making it feel heavier.
So maybe you have a terrain coefficient of one point two eight for a rocky hike. That indicates your body has to work 28% harder to move the same amount of weight. Small detail, but it comes in handy when trying to plan out a route with a six year old. Plan on dropping the percentage limit right away if the route is rough.
Distribute the weight: You have options for sharing the load. With the parent split feature, choose how much gear will go in your pack and how much will go in theirs. Take a quarter of that heavy stuff off their backs and make it a fun day on the trail instead of a slog. This isn’t babying them. It’s adjusting the experience to ensure they come out the other end with a spring in their step.
Light stuff like a little notebook goes in their pack; dense stuff like water bottles goes in yours. It’s about sharing the experience while keeping their back in good shape.
Beforehand you need to test it out. Load the pack and put it on the kid then let them walk around the house. Observe their spine. If their hips move or their lower back sticks out too far then it’s too heavy.
Take things out and repack so that heavier stuff is higher up and closer to the back of the pack. Lighter things goes lower. Recalculate when things come out. It should be a straight line from head to toe. Once you get it right there is no gear there, and your kid won’t remember they’re wearing it at all.
That’s why we should of do it in advance to avoid those slumped shoulders.