Glamping Tent Platform Lumber Calculator
Estimate decking boards, joists, beams, posts, blocking rows, board feet, and fastener planning quantities from platform size, spacing, board layout, waste, and load class.
This planning calculator estimates lumber quantities only. Confirm spans, footings, guards, stairs, uplift, frost depth, anchoring, and permit requirements with local rules before building.
Platform lumber estimate
Lumber breakdown
Pressure-treated pine
Common framingGood for beams, joists, posts, and budget-conscious decking where boards can dry before final gap decisions.
Cedar decking
Light surfaceUseful for walking surfaces where lower weight and a warmer feel matter, paired with structural framing below.
Composite decking
Tight layoutNeeds manufacturer-specific spacing and joist support, especially in sunny platforms and high-use resort decks.
Ground-contact posts
Footing zoneUse ground-contact-rated material for posts, sleepers, and low beams where splashback or soil moisture is possible.
| Load class | Typical platform use | Common joist spacing | Planning note |
|---|---|---|---|
| Light tent only | Simple bell tent or small yurt pad | 16 to 24 in on center | Best for low furnishings and short joist spans |
| Standard glamping | Queen bed, seating, rugs, luggage, and porch traffic | 16 in on center | Good default for most raised tent platforms |
| Heavy furnished tent | King bed, stove pad, tubs, or guest furniture | 12 to 16 in on center | Use tighter spacing, more beams, and reviewed spans |
| High moisture deck | Coastal, forest, or splash-prone platform | 12 to 16 in on center | Improve ventilation and use compatible fasteners |
| Actual board width | Gap | Rows per 10 ft width | Useful for |
|---|---|---|---|
| 3.5 in | 1/8 in | 34 rows | Narrow porch boards and tight curves |
| 5.5 in | 1/8 in | 22 rows | Common 5/4x6 or 2x6 decking layouts |
| 5.5 in | 1/4 in | 21 rows | Wet climates and boards expected to swell |
| 7.25 in | 3/16 in | 17 rows | Wide planks where joist support is adequate |
| Beam lines | Joist span zones | Posts per line at 6 ft | Planning use |
|---|---|---|---|
| 2 beam lines | 1 clear joist span | 3 to 5 posts | Low platforms with short width and light loads |
| 3 beam lines | 2 clear joist spans | 3 to 5 posts | Balanced default for 10 to 16 ft wide decks |
| 4 beam lines | 3 clear joist spans | 4 to 6 posts | Large furnished tents and porch extensions |
| 5 beam lines | 4 clear joist spans | 4 to 7 posts | Wide lodge platforms or very stiff floors |
| Platform | Area | Joist spacing | Typical lumber result |
|---|---|---|---|
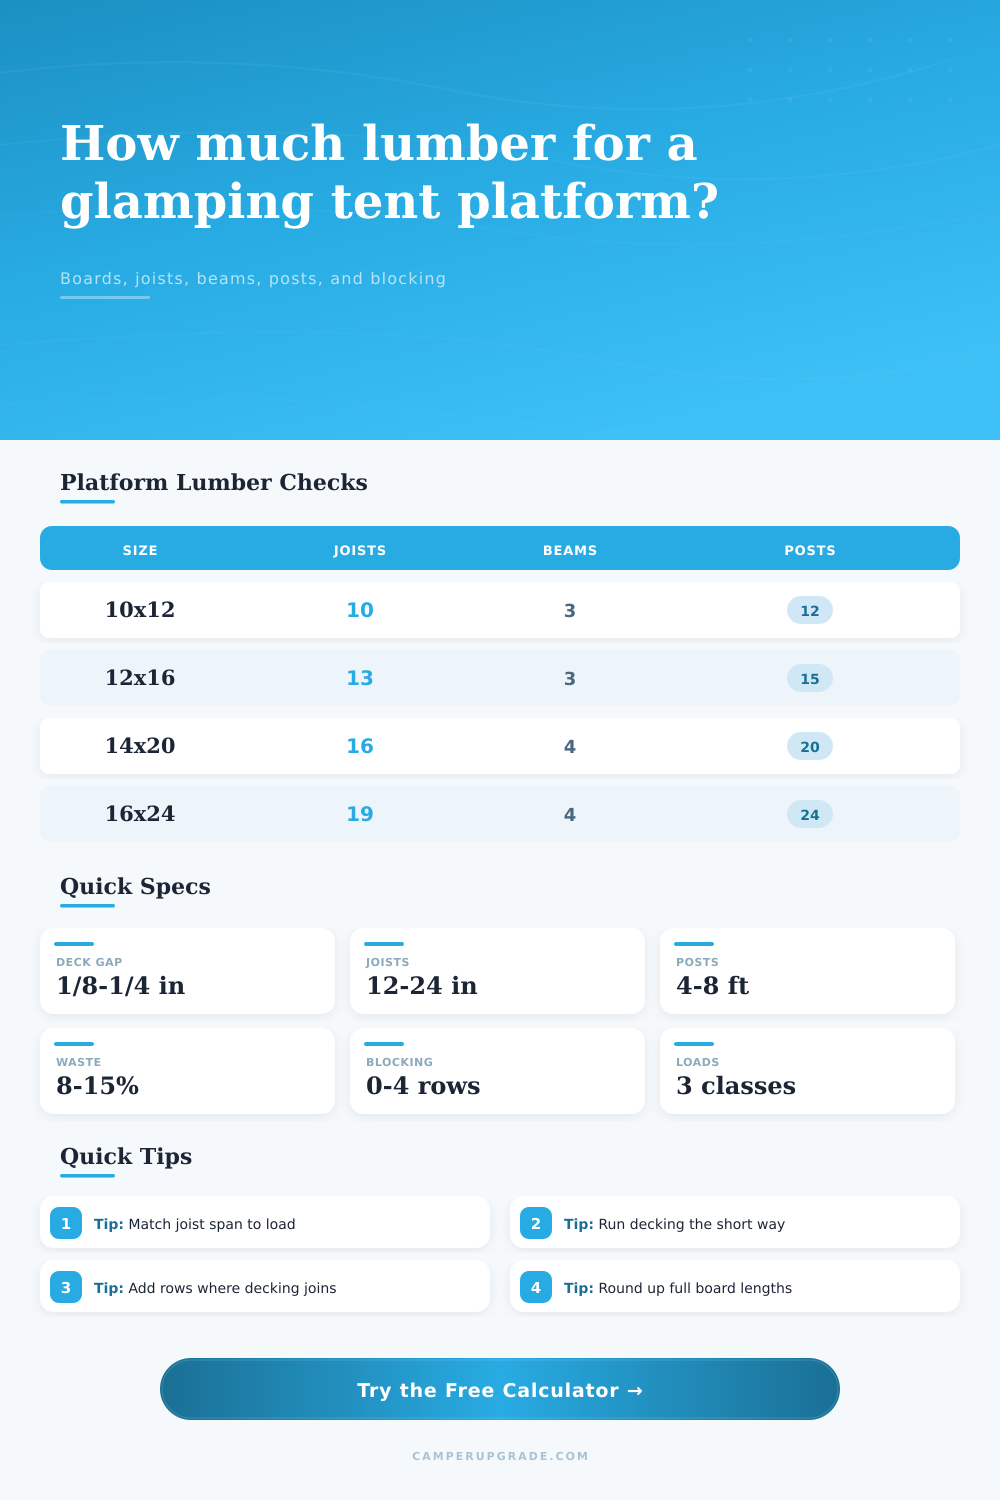
| 10x12 bell tent | 120 sq ft | 16 in on center | About 22 deck boards and 10 joists |
| 12x16 safari tent | 192 sq ft | 16 in on center | About 28 deck boards and 13 joists |
| 16x20 family tent | 320 sq ft | 12 in on center | About 43 deck boards and 21 joists |
| 20x28 raised lodge | 560 sq ft | 12 in on center | About 61 deck boards and 30 joists |
Example quantities assume 5.5 inch decking, a 3/16 inch gap, lengthwise boards, rounded full stock lengths, and a practical waste allowance.
When you think about going glamping, you picture a neat and flat place to stay. In reality, it’s a hole in the ground with a bed slow dissapearing into the muck. Your solution is to create platform to keep your bed off the dirt floor. Suddenly what was potentially a swamp becomes a nice dry spot.
Sounds easy enough, right? Then you glance over at the lumber rack. How many boards? Beams? Posts? What do I need?
How to Build a Glamping Platform
Enter the calculator above. It take the measurements of your tent and converts them into an exact material list. That way you spend less time trying to add and subtract, and more time building.
What’s the biggest goof? You might not account for the difference between nominal and actual board size. The board says it’s a two by six. That doesn’t mean it’s really two inches thick. And it doesn’t mean it’s six inches wide. It is 5 inches. Estimate by the printed-on name and you’ll underestimate, meaning you’ll end up buying too few boards. Halfway into the project, you’re going to be out of board.
What’s the solution? The tool makes allowances because you tell it the real dimensions. This includes the width. Knowing the width is critical to computing row counts, because it tells you how many rows fit across your platform.
And it takes into account spacing between boards. Why space them? For looks only? No. So water runs off, and the wood can dry off. Otherwise it rots, and sags. An eighth to a quarter-inch gap is typical. In a really wet climate, go bigger. Your estimate accounts for the gap so it matches what you’ll need. That’s why the number of boards come out right.
The bones are the skeleton in the framing. Mistakes there will cost you. To review, the verticals are called posts; they support the joists (horizontal members). Joists must be strong enough to hold your guests and their gear plus the tent’s own weight.
Sixteen inches on center is a conservative rule-of-thumb for joist spacing that will work well for most glamping sites. Tighten that up to 12 if you have a really heavy piece of furnitures or woodstove sitting out on the deck. Toggle the load class on the calculator. That way it will tells you when to increase or decrease joist count, and maybe upgrade to beefier beams.
The big bones are the beams. They act as the main spine for the structure. They connect to posts. The posts transmit the load downward in the earth. More lines of beam means less distance across for the joists. There is less bounce.
Material costs vs. It is about comfort. A bouncy floor make the structure feel cheap and unstable. A stiff one feels safe and solid.
Don’t overlook blocking. Blocking is a little bit of wood inserted between joists. Sounds easy, right? It is easy to overlook. It’s what keeps the structure of your deck square. Keeps everything from twisting out of shape. With this tool, you can create rows of blocking. It is good stuff on long platforms at their mid-span. It is also good anywhere you want to secure something heavy. It is not much of an add-on to your material list, but it would of been a big plus for the life of the build.
Another thing beginners tend to underestimate is waste. You’ll end up cutting some boards short. Find a split or check in the board stock. Make a mistake. Add a ten to fifteen percent waste margin and don’t think that this is being overly conservative. Think practicaly here. You’re going to have enough material to get the job done so you won’t have to run back to the store.
The last aspect of design comes down to what type of wood. Framing lumber is most commonly pressure-treated pine. It has a reasonable cost. It is resistant to rot. Cedar is a lighter-weight option for the walking surface. And it’s naturaly warm, which complements the outdoor environment. Composite lumber requires less upkeep. However, they may calls for closer joist spacing. A chart on the page compares characteristics with your desired use in mind.
If posts are exposed to the ground, use ground-contact rated lumber. Exposure to moisture will kill regular treated lumber and cause sagging over time. The result is a saggy-looking deck. That is worse than no deck at all.
Learn how to build a glamping platform. There’s no need for complicated engineering here. This is more about planning carefully and getting the numbers right from the start. Because if you don’t, you’ll end up with half-built platforms. And that will make you frustrated. Also, it will cause you to go overbudget. Which isn’t fun either.
Use the calculator below to do all the math for you. That way you’ll know exactly what you need to take with you when you visit the lumber yard. From there, you just assemble it. Make sure your platform is sturdy. Then it can hold a tent. Anchor the whole experience. Anchor the whole experience. Keep the romance alive even if your feet get wet.