Cooler Pre Chill Calculator
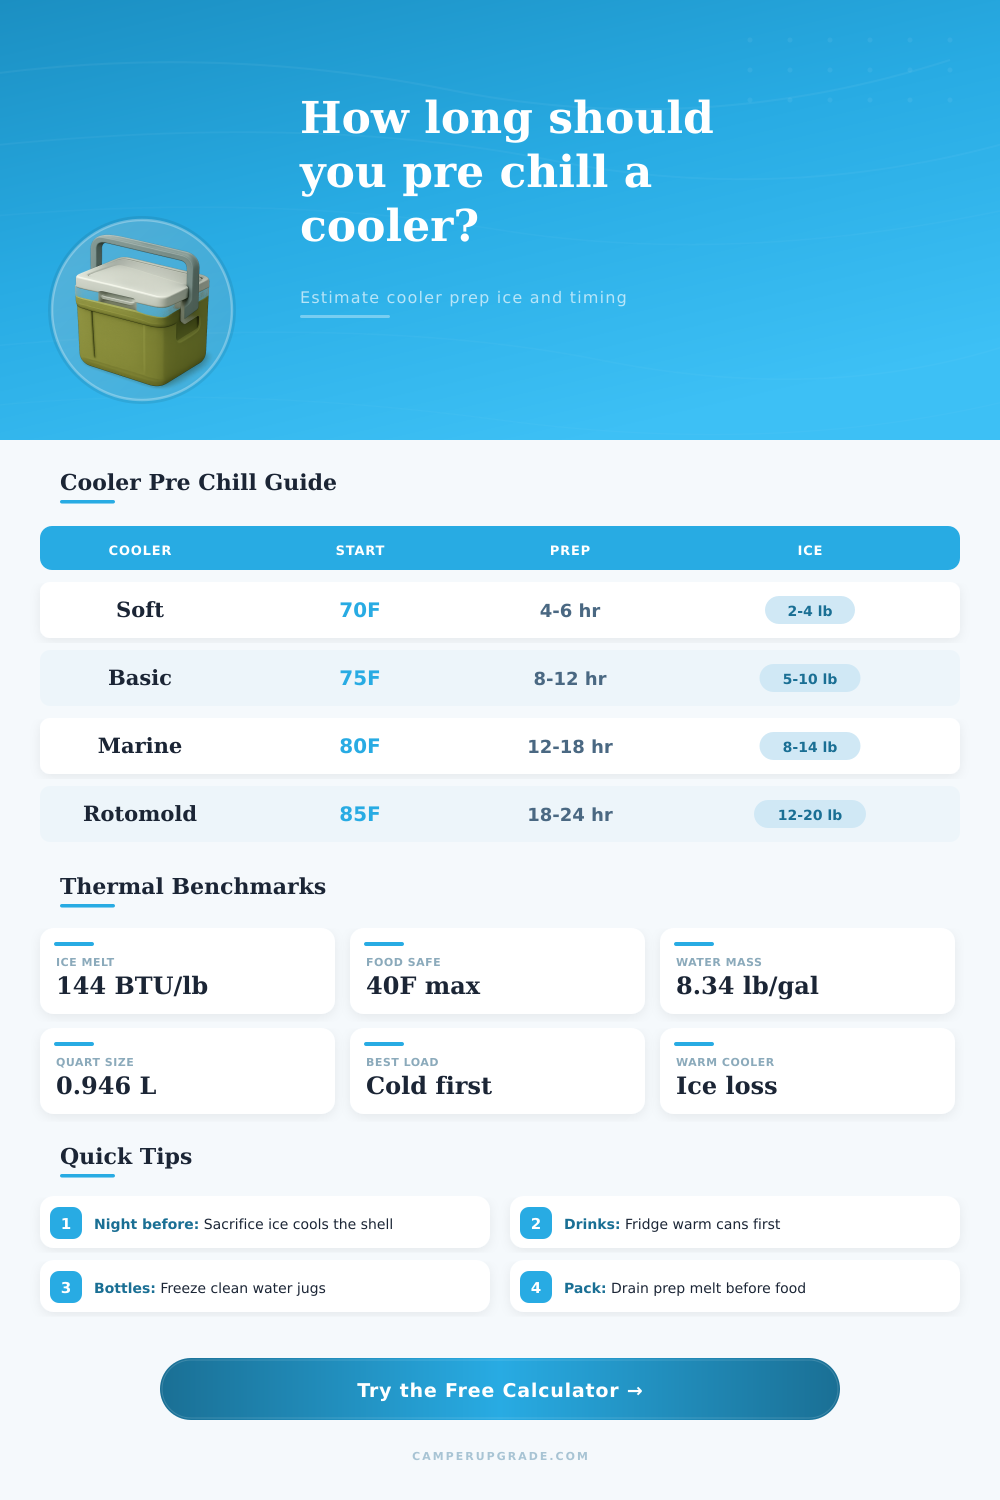
Estimate how much sacrificial ice or frozen bottle mass is needed to cool an empty camping cooler before food goes in, plus the fridge time needed for drinks and meals.
🏕Pre-Chill Presets
⚙Cooler And Load Inputs
The model uses 144 BTU per pound for ice melt, water at 1 BTU per pound per degree F, and lower specific heat values for food, plastic, foam, and freezer packs.
📊Thermal Mass Comparison
📘Pre-Chill Reference Tables
| Cooler class | Shell mass | Prep ice | Typical time |
|---|---|---|---|
| Soft cooler | 0.08 lb/qt | 0.08-0.15 lb/qt | 4-6 hr |
| Thin hard cooler | 0.14 lb/qt | 0.12-0.22 lb/qt | 6-10 hr |
| Standard camping | 0.20 lb/qt | 0.16-0.28 lb/qt | 8-12 hr |
| Marine hard cooler | 0.27 lb/qt | 0.20-0.35 lb/qt | 12-18 hr |
| Rotomolded cooler | 0.36 lb/qt | 0.25-0.45 lb/qt | 18-24 hr |
| Expedition chest | 0.44 lb/qt | 0.30-0.55 lb/qt | 20-30 hr |
| Starting temp | To 40 F | Shell load | Advice |
|---|---|---|---|
| 60 F | 20 F drop | Low | Short prep |
| 70 F | 30 F drop | Moderate | Evening prep |
| 80 F | 40 F drop | High | Overnight prep |
| 90 F | 50 F drop | Very high | Extra ice |
| 100 F | 60 F drop | Severe | Move inside |
| Pre-chill source | Heat absorbed | Contact | Best use |
|---|---|---|---|
| Cubed ice | 144 BTU/lb | Good | Most coolers |
| Ice-water slurry | 144 BTU/lb | Excellent | Fast shell prep |
| Block ice | 144 BTU/lb | Slower | Overnight prep |
| Frozen bottles | about 170 BTU/L | Fair | Clean drinking water |
| Gel packs | varies by pack | Fair | Reusable packs |
| Load item | Specific heat | 30 F drop | Pre-chill value |
|---|---|---|---|
| Water drinks | 1.00 BTU/lb/F | 30 BTU/lb | Very high |
| Mixed meals | 0.75 BTU/lb/F | 23 BTU/lb | High |
| Meat or fish | 0.80 BTU/lb/F | 24 BTU/lb | High |
| Produce boxes | 0.65 BTU/lb/F | 20 BTU/lb | Moderate |
| Frozen food | 0.45 BTU/lb/F | Already cold | Cold reserve |
🧭Common Cooler Prep Benchmarks
| Camping use | Cooler size | Start temp | Prep plan |
|---|---|---|---|
| Lunch and beach drinks | 24 qt soft | 70 F | 3 lb ice, 4 hr |
| Two-person weekend food | 48 qt standard | 75 F | 8 lb ice, 10 hr |
| Family rotomold camp | 65 qt rotomold | 80 F | 18 lb ice, 18 hr |
| Fishing catch chest | 72 qt marine | 82 F | 16 lb ice, 16 hr |
| Large base camp pantry | 110 qt expedition | 85 F | 32 lb ice, 24 hr |
💡Pre-Chill Notes
A cooler can fail to maintain an cold temperature within it if the cooler has absorbed thermal energy from its environments. Many people believe that ice is the only factor that is responsible for cooling the foods that is placed into the cooler. However, the temperature of the cooler walls and cooler insulation are also a factor in maintaining cool temperatures within the cooler.
If a cooler has been stored within a hot location, such as a garage or a porch, the plastic walls and insulation of the cooler will absorb the heat from those warm environment. If such a warm cooler is then used to place ice and food into it, that ice will melt quick due to the need to remove the thermal energy from the cooler walls and insulation. Thus, it is necessary to perform a process known as pre-chilling to remove the thermal energy from the cooler before it is to be packed with food and ice.
How to Pre-Chill a Cooler So Ice Lasts Longer
Pre-chilling is the process of reducing the internal temperature of the cooler prior to the cooler is to be pack with food and ice. Pre-chilling can be performed by using sacrificial ice to reduce the internal temperature of the cooler; this ensures that the remaining ice will remain frozen for the cooler trip. If the cooler is not pre-chilled, the sacrificed ice will simply melt as it attempt to cool the cooler, wasting that ice.
The amount of pre-chilling that is required of coolers of different type can vary. For instance, soft-sided coolers have less thermal mass than coolers made of rotomolded plastics, so less pre-chilling is required for soft-sided coolers than for rotomolded coolers. The cooler temperatures that are common within the ambient environment can have an effect on the pre-chilling step.
For instance, if you place coolers within a hot shed, the heat from the shed will heat the cooler; the cooler will then require more sacrificial ice to pre-chill to compensate for the heat from the shed. Therefore, you may move coolers to a climate controlled area (such as an air conditioned building) to pre-chill the cooler to reduce the amount of ice that is required for pre-chilling. Several methods can be used to pre-chill a cooler.
One method use cubed ice to reduce the internal temperature of the cooler. Ice cubes have a relatively large surface area that allow them to perform the pre-chilling process quickly. Another method of pre-chilling uses an ice water slurry; this method is more faster than using cubed ice because the slurry will coat the walls of the cooler.
Third, pre-chilling methods can use frozen water bottles to reduce the internal temperature of the cooler; this method is considered “clean” because it will not lead to the formation of a puddle of meltwater within the cooler; furthermore, the bottles also provide drinking water for cooler trip. The temperature of the food and drinks that are to be placed into the cooler can also affect the efficiency of the cooler. For instance, if you place room-temperature drinks into the cooler prior to adding ice, the drinks will absorb some of the thermal energy from the ice; this will cause the ice to melting at a faster rate then if the drinks were left out of the cooler.
All food and drinks should be chilled in the refrigerator prior to placement into the cooler to ensure that the ice within the cooler will not need to cool those items to an appropriate temperature. After the pre-chilling phase of the cooler has been completed, the meltwater from the sacrificed ice need to be drained from the cooler. The water that has melted the sacrificed ice has absorbed thermal energy from the cooler walls.
Thus, this water is warm in temperature. This warm water should not remain in the cooler; instead, you should drain the cooler of this water prior to the coolers trip. The cooler should be dry and cold and contain fresh ice prior to placement of the food and drinks.
Thus, by pre-chilling the cooler and removing the sacrificed meltwater, the cooler will maintain an appropriate temperature of the food and drinks, and the ice will last for an extended period of time.