Camper Tire Pressure Cold Adjustment Calculator
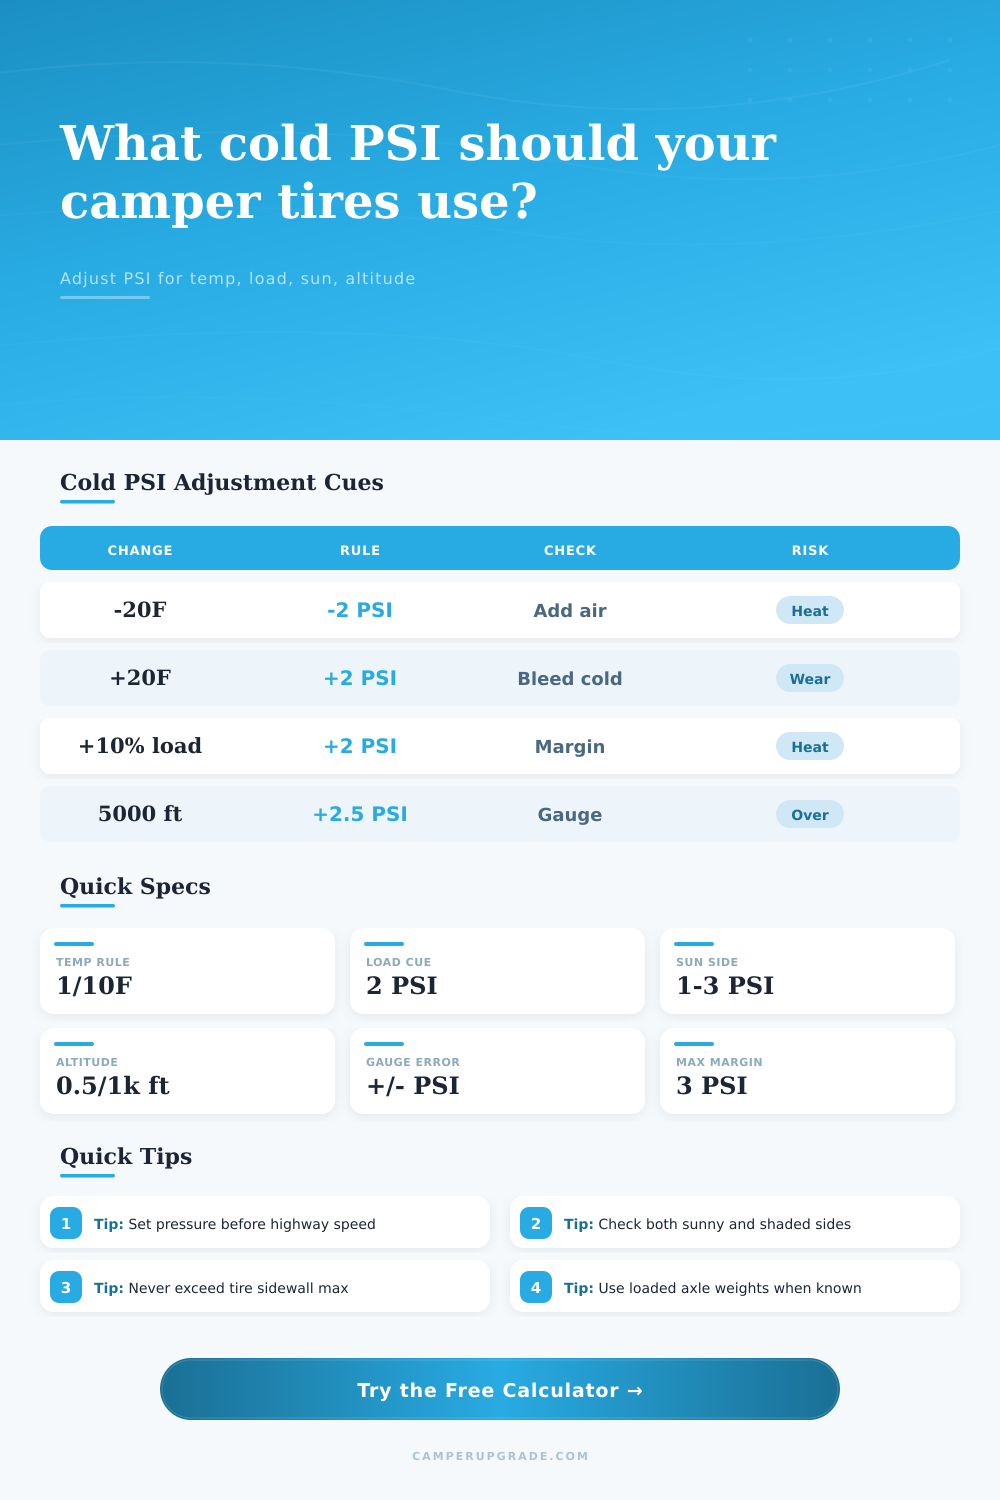
Convert a current camper tire reading into a practical cold PSI setpoint using placard pressure, tire temperature, target cold temperature, load change, sun exposure, altitude, gauge accuracy, and tire sidewall max.
🛞Temperature and Load Presets
📏Cold Pressure Inputs
📊Cold Pressure Result
🧮Adjustment Factor Grid
🗂Scenario Comparison Grid
📋Reference Tables
Temperature Change Reference
| Temperature shift | Approx PSI shift | Typical camper use | Action cue |
|---|---|---|---|
| -30°F from check | About -3 PSI | Cold dawn after warm evening | Add before travel |
| -20°F from check | About -2 PSI | Mountain night cooldown | Plan extra air |
| -10°F from check | About -1 PSI | Normal overnight swing | Small top-off |
| +10°F from check | About +1 PSI | Warmer departure | Usually okay |
| +20°F from check | About +2 PSI | Hot travel day | Check max margin |
Load Change Reference
| Load change | Pressure cue | Common cause | What to verify |
|---|---|---|---|
| -10% | May drop 1 PSI | Empty tanks or cargo removed | Still above placard need |
| 0% | Use placard baseline | Normal loaded setup | Same tire position |
| +5% | Add about 1 PSI | Food, tools, small gear | Axle balance |
| +10% | Add about 2 PSI | Water, bikes, tongue weight | Sidewall max |
| +20% | Add 4 to 5 PSI | Heavy trip load | Scale axle weight |
Altitude Gauge Drift Reference
| Altitude | Outside air pressure | Gauge rise from sea level | Planning note |
|---|---|---|---|
| 0 ft | 14.7 PSI | 0.0 PSI | Baseline placard check |
| 2500 ft | 13.4 PSI | 1.3 PSI | Small gauge rise |
| 5000 ft | 12.2 PSI | 2.5 PSI | Noticeable on trailers |
| 7500 ft | 11.1 PSI | 3.6 PSI | Watch max margin |
| 10000 ft | 10.1 PSI | 4.6 PSI | Recheck when cold |
Gauge Accuracy and Sun Correction
| Condition | Possible error | Calculator treatment | Best check |
|---|---|---|---|
| Quality digital gauge | 0.5 to 1 PSI | Small cushion | Check twice |
| Pencil or old dial gauge | 2 to 4 PSI | Larger cushion | Compare gauges |
| One sunny sidewall | 1 to 2 PSI high | Subtract bias | Use shaded side |
| Hot blacktop parking | 2 to 3 PSI high | Raise observed setpoint | Wait or shade tire |
| After highway driving | 4+ PSI high | Not a cold reading | Cool tires first |
💡Cold Pressure Tips
This calculator estimates pressure behavior from the gas law and common RV tire-check practice. Follow the tire placard, tire maker load tables, wheel limits, and measured axle weights when available.
When you get on the highway and notice your camper feel a little loose, it might be unsettling. You do not want to pull over immediately but you know something isn’t right. What’s wrong? It’s probably just your tire pressure.
And most folks only inspect their tires at home (driveway/campground) where they are subject to conditions that make the inspections less than useful. Why does this matter? It usually isn’t the tire that makes the difference between driving safely and having a blowout; it is whether or not you can accurately interpret what gauge reading means. This tool takes into account factors not accounted for with static placard numbers and closes gap between gauge and reality.
Why Tire Pressure Changes
It’s simple: Air is dynamic; it changes based off altitude, temperature, load, etc., and if you don’t address it, it will react with violent predictability. Setting a base level (filling your tires) mean your baseline changes when conditions change. A tire checked under shade at dawn won’t be the same as one checked out in sunlight at noon, even though both gauges show the same number. The thermodynamics is handled by the calculator. No need for a slide rule in your glove box.
For example, when sunlight bakes onto a black tire sidewall, it heats the inner portion of the tire significant, causing an artificial increase in the pressure. You then bleed off air to bring it down to the placard number; but guess what, you’re now underinflated. As soon as you get back in the shade or after dark, the pressure go below the safety margin. To make up for this bias, the calculator has a sun side factor, which it use to adjust the true cold pressure by subtracting away the false high reading. This adjustment may be only a pound or two, but it’s the difference between a flexing-tire-safe ride and an overheated-failure-on-the-interstate ride.
The other silent variable is load. Load varies because labels is based on some sort of loaded configuration. Adding a fully filled water tank? Bringing an extra bag of gear? Installing a bicycle rack? All these factor increase weight and the amount of tire needed to hold that weight. A feature in the calculator lets you add the load change as a percentage. Then it will adjust your target pressure up accordingly. It is not so much for comfort than it is for structure. The more an underinflated tire flexes when rolling, the more heat it generate. And heat weakens the tire’s casing, creating separation. You don’t want the rubber holding the air up; you want the air support the weight.
Altitude is another factor. This is primarily due to how gauges work. Standard tire gauges operate by measuring the difference from ambient atmospheric pressure to tire pressure. If you go higher in elevation, that means lower ambient pressure. Even though your tires might contain exactly the same amount of air as at sea level, your gauge will shows slightly more. That’s why the calculator accounts for this shift. You don’t want to be overinflating just because you’re further up. It’s a subtle change, something you’ll notice more after three thousand feet or so. But it can matter, especially if you’re getting close to max tire capacity.
The last wildcard is gauge accuracy. That cheap gauge doesn’t tell the truth. It could read two pounds high and you don’t know it. Or it can read two pounds low and you don’t know it. There’s a field in the calculator where you can add your gauge error so you can create a safety margin into your target. If you know your gauge isn’t accurate, then you put more margin. So if your gauge is off and even if you’re wrong, you’re still going to be in the safe range of operation. It is better to be a little more sure than to guess.
Margin All this gets down to the margins of tire safety. Do you want too little? That’ll cause the tire to overheat and potentially fail. Too much? That could result in a harsh ride, as well as causing an over-inflated tire to blow out. That’ll make your ride rough and potentially damage whatever you’re carrying. Too much? That could result in a harsh ride, as well as causing an over-inflated tire to blow out.
So how do you know? Enter the calculator. It provides a specific answer and that’s what you’re seeking. Peace of mind. Tires should of checked while they’re cold, adjusted accordingly to the conditions, and you should trust the numbers more than your gut. Flat is an inconvenience. A failure is dangerous. Math has your back.