Camper Sound Deadening Sheet Count Calculator
Estimate sheet count, treated panel area, packs, leftover area, and added weight for camper van floors, walls, roof, doors, wheel wells, and cab panels.
Areal weights vary by product construction. Use the custom field when the manufacturer lists weight per sheet, per square foot, or per square meter.
| Coverage strategy | Typical target | Best camper panels | Sheet planning note |
|---|---|---|---|
| Rattle knockdown | 25% to 35% | Doors, hatch, wheel wells | Small patches on ringing sections |
| Balanced build | 45% to 60% | Floor, walls, doors | Good default for camper shells |
| Rain roof control | 60% to 85% | Roof skin, large roof bays | Plan extra long strips between ribs |
| Barrier layer base | 80% to 100% | Flat floor before MLV | Heavy and sheet hungry |
| Sheet format | Area per sheet | Metric area | Sheets per 50 sq ft treated |
|---|---|---|---|
| 12 in x 20 in | 1.67 sq ft | 0.155 sq m | 30 sheets |
| 16 in x 28 in | 3.11 sq ft | 0.289 sq m | 17 sheets |
| 18 in x 32 in | 4.00 sq ft | 0.372 sq m | 13 sheets |
| 20 in x 30 in | 4.17 sq ft | 0.387 sq m | 12 sheets |
| 500 mm x 800 mm | 4.31 sq ft | 0.400 sq m | 12 sheets |
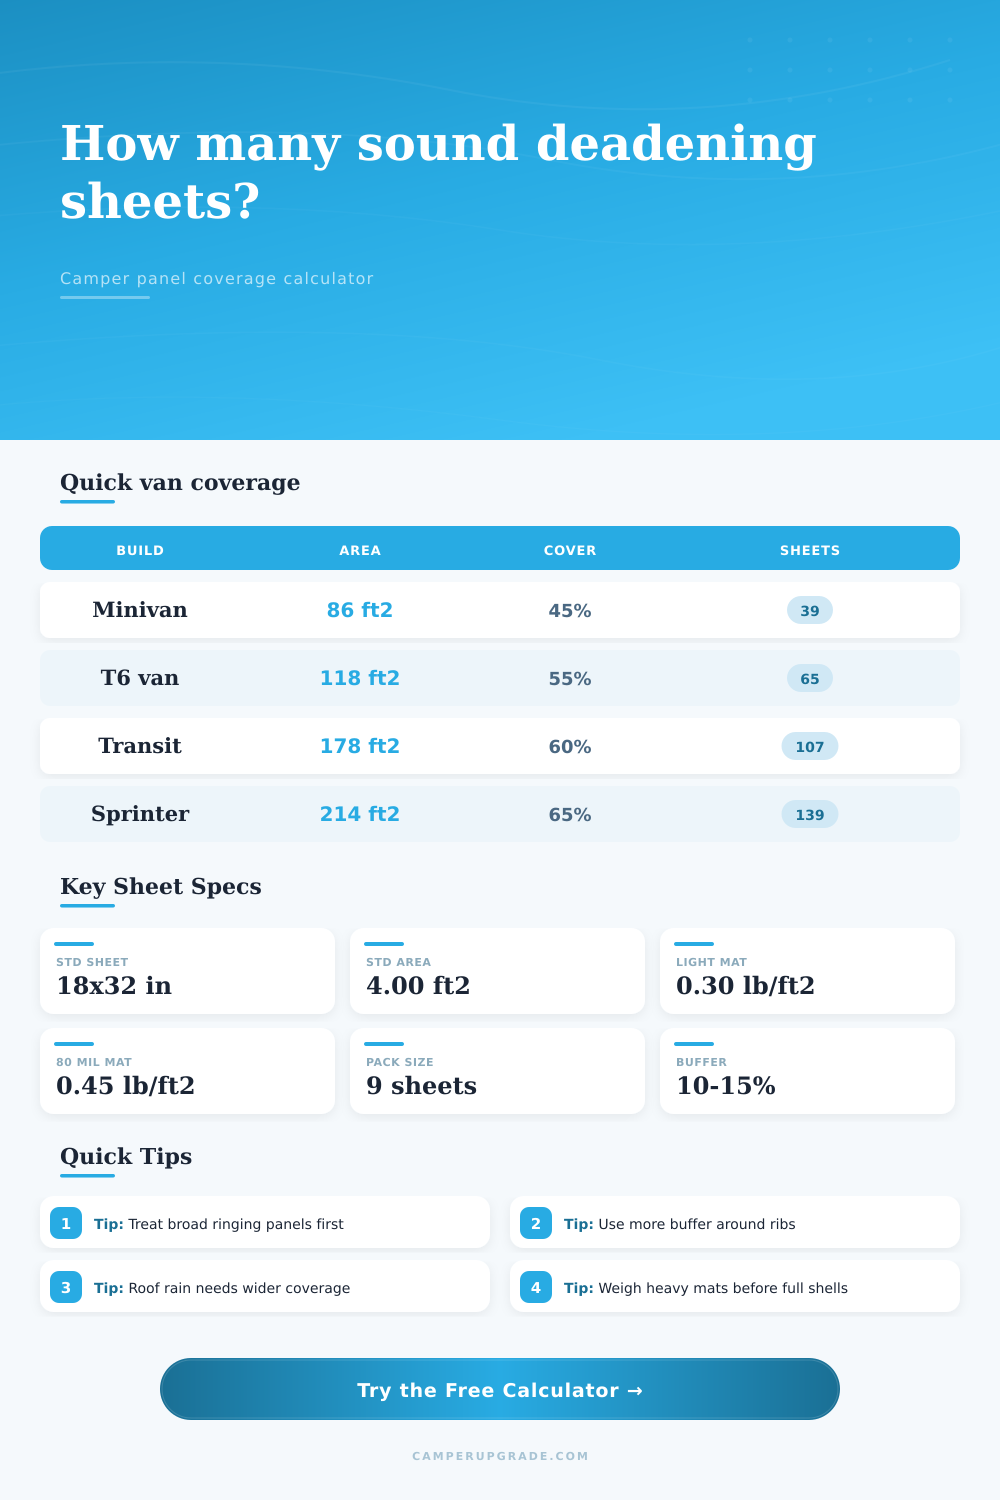
| Camper example | Reachable metal area | Target coverage | 18 x 32 sheets plus 12% |
|---|---|---|---|
| Toyota Sienna camper floor, doors, hatch | 86 sq ft | 45% | 11 sheets |
| VW Transporter T6 weekender shell | 118 sq ft | 55% | 19 sheets |
| Ford Transit 148 camper shell | 178 sq ft | 60% | 30 sheets |
| Mercedes Sprinter 144 broad shell | 214 sq ft | 65% | 39 sheets |
| Material type | Typical thickness | Areal weight | Use in calculator |
|---|---|---|---|
| Foil butyl CLD light | 50 mil | 0.30 lb/sq ft | Doors, small panels |
| Foil butyl CLD standard | 80 mil | 0.45 lb/sq ft | General camper shell |
| Foil butyl CLD heavy | 100 mil | 0.62 lb/sq ft | Floor, wheel wells |
| Butyl plus foam sheet | 4 mm to 6 mm | 0.70 lb/sq ft | Limited stacked treatment |
| Mass loaded vinyl sheet | 1/8 in nominal | 1.00 lb/sq ft | Barrier weight check |
Managing noise in a camper van require keeping weight down. Metal roofs make for some serious drum-like sounds during a summer storm and you will be up all night. A naturaly reaction may be to put something heavy over everything inside the camper to muffle sound. Generally that’s not the right solution. Just making something heavier don’t dampen the vibration of a surface.
To reduce resonance, you must apply constrained layer damping but doing so indiscriminately add mass to the vehicle. The trick is to damp the resonant frequencies while preserving handling and fuel economy. Lead won’t work because you don’t have to blanket everything with lead; just particular spots where the noise originate.
How to Quiet Your Camper Van Without Adding Weight
If you use the rain data plus know how big your roof is, the math work out pretty simply. If you want it to work, that is. Don’t make the common mistake of measuring the outside of your van and thinking you have the same square feet on the inside. No. Just measure the metal panels. These are the ones that rattle when you tap them.
Once you put in the size of your roof and rainfall information into the calculator, it figure the rest for you. It tells the difference between the area you can access versus the overall area. A lot of the time, there is big chunks of the inside covered by wiring, wood framing, and insulation. Those aren’t places you can add any dampening sheet. You can’t get something behind a panel if it is already shut.
The tool allows you to subtract out these spaces. And you should! Do the math based off what you can reach, not total sqft, and you’ll end up buying enough with some buffer for cutting mistakes.
The overall square footage are important but also take into account the sheet size. Damping sheets come in standard sizes and the most common is eighteen inches wide by thirty-two inches long. That’s a hard sheet to work with in cramped quarters. When working between roof ribs or wheel well area, you’ll end up wasting materials. Typically it’s about ten to fifteen percent waste. The calculator allow for this waste.
On the other hand if the floor is relatively flat and smooth, a couple of sheets may do the job. If there are ribs in the roof, you’ll probably have several smaller patch jobs. The more complex the shape, the larger the waste factor need to be.
Your goal determines what percent of the sound you’d like to eliminate. To stop door rattle, maybe just twenty five percent coverage is all that is necessary. To quiet the rain on the roof, you may need sixty percent coverage or better. Those aren’t arbitrary numbers. They’re points where one can hear a noticeable difference in noise level.
The weight of your van will determine how it perform. Throwing thick sheets everywhere is usually where projects go wrong because mass alone don’t solve the noise. You did that? Good for you. But now you’ve added thirty pounds to the top of the van which changes its center of gravity and make it feel top-heavy in corners. This estimate takes into account the amount of material you add.
If you want light 50 mil sheets (easy to handle, cheap) then you’ll need more of ’em to get job done. If you go heavy (hundred-mil, expensive, stiff), you’ll cut down more noise per sheet. It’s a trade-off: it produces less noise per pound, but it is easier to cut. Decide what’s important to you. Do you want lighter axles or easy cutting?
Before buying any sheets, step inside an empty van. Where’s the noise coming from? Tap on the doors. Tap on the roof. Pay attention to what rings loudest. Those are your priorities. And that’s why they’re treated first. With the help of the calculator, you know exactly how much you need to spend on these priorities.
This turns your vague worries about noise into concrete shopping items. You aren’t going into the store guessing; you’re there with a number. You slap some sheets onto the loudest areas and then test again. Is it still loud? If so, treat some more. Is it quiet and do you have room left in the weight allowance? Congrats, you’ve done it.
Many people try treating their whole vans all at once. This isn’t good. Treat your van step by step. Focus on the loudest spots first. Let the tool tell you how much is needed.
Your end result is a quiet, non-feeling-heavy ride. You got the silence you desired while staying within a reasonable weight. The storm arrives once more, but it’s softer. Sleep well.