Camper Fastener Count by Panel Calculator
Estimate screws, rivets, clips, packs, shared seam credits, opening extras, and loaded panel weight for camper wall, ceiling, door, and cabinet panels.
📌 Camper panel presets
🔩 Panel fastener inputs
Panel fastener estimate
🧱 Spec and material comparison grid
📋 Panel material reference
| Panel material | Approx weight | Common fastener | Camper use |
|---|---|---|---|
| 1/8 in luan plywood | 0.30 lb per sq ft | #8 trim or pan screw | Light wall and ceiling skins |
| 1/4 in plywood | 0.80 lb per sq ft | #8 pan or washer head screw | General wall, ceiling, and cabinet panels |
| 3/8 in plywood | 1.20 lb per sq ft | #8 or #10 pan screw | Service panels and furniture faces |
| 0.09 in FRP liner | 0.70 lb per sq ft | Rivet or washer head screw | Garage, wet gear, and utility areas |
| 1/8 in ABS sheet | 0.75 lb per sq ft | Washer head screw | Curved liners and door inserts |
| 3 mm aluminum composite | 0.75 lb per sq ft | Rivet or pan head screw | Durable removable access panels |
| 1/4 in HDPE panel | 1.25 lb per sq ft | Washer head screw | Wet bath and gear-zone panels |
| 1/4 in cedar tongue panel | 0.65 lb per sq ft | Trim head screw | Decorative ceiling and wall runs |
🔩 Fastener style reference
| Fastener style | Typical pilot hole | Approx each | Best fit |
|---|---|---|---|
| #8 trim head screw | 3/32 in in wood | 0.07 oz | Low-profile decorative panels |
| #8 pan head screw | 7/64 in in wood | 0.10 oz | Most plywood-to-furring layouts |
| #8 washer head screw | 7/64 in in wood | 0.14 oz | Thin plastic, FRP, and flexible panels |
| #10 pan head screw | 1/8 in in wood | 0.18 oz | Thicker panels or higher grip zones |
| 1/8 in aluminum rivet | 1/8 in drill | 0.05 oz | Thin panel to aluminum rib |
| 3/16 in aluminum rivet | 3/16 in drill | 0.08 oz | Heavier liner to metal support |
| Panel clip with screw | Clip specific | 0.16 oz | Removable panels and access covers |
📏 Spacing pattern guide
| Panel location | Edge spacing | Field spacing | Typical support pattern |
|---|---|---|---|
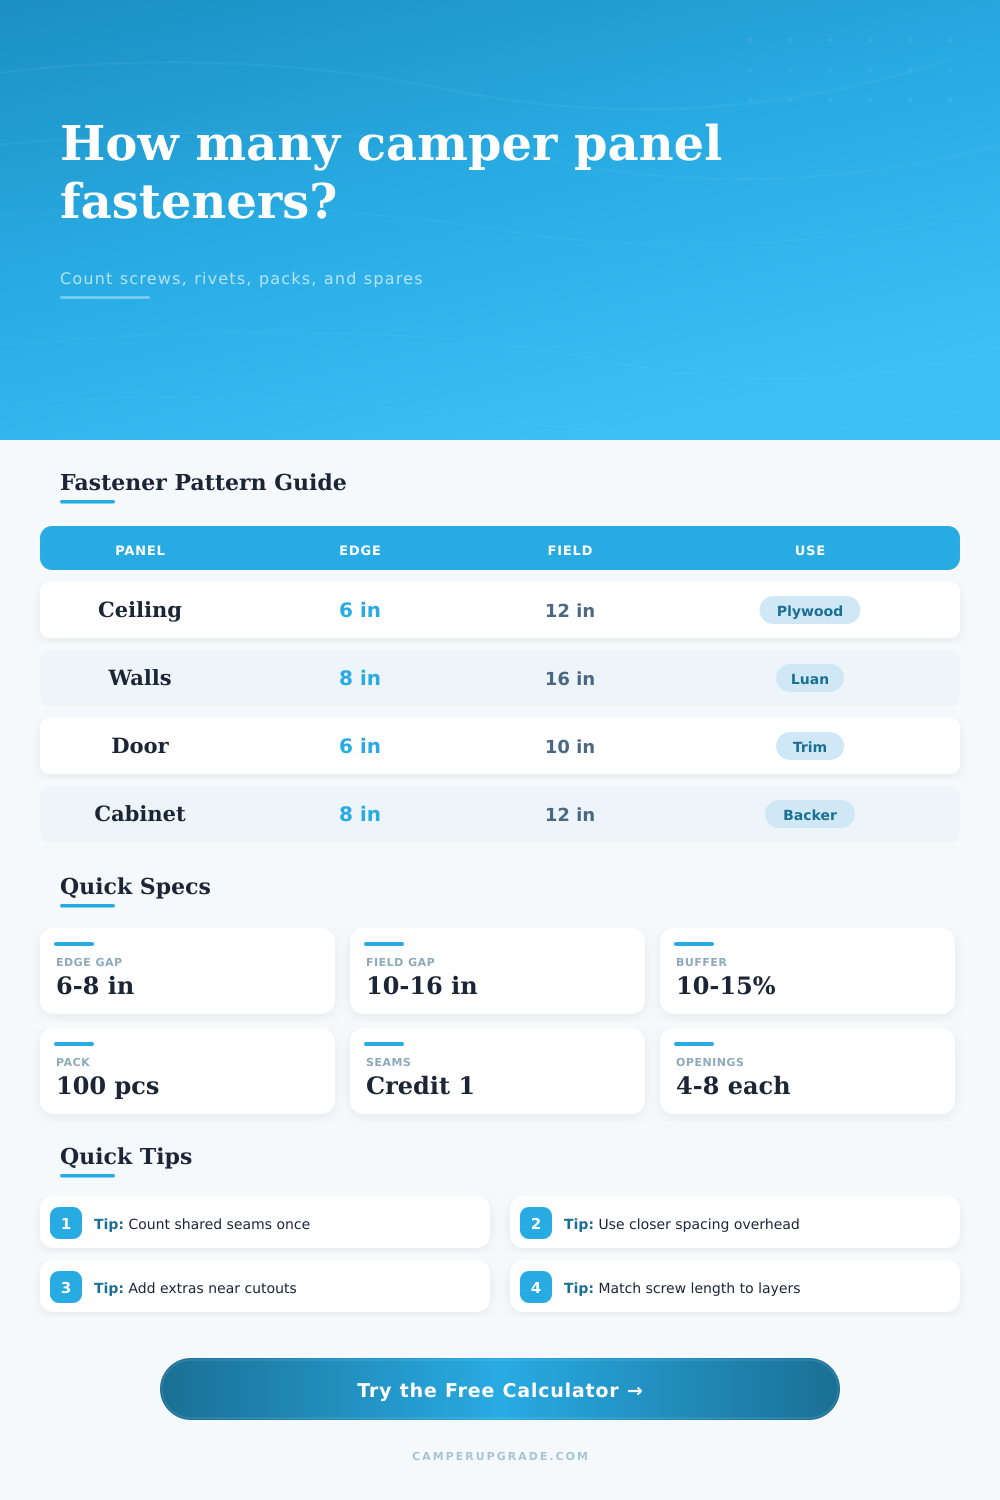
| Ceiling or headliner | 6 in to 8 in | 10 in to 12 in | Ribs or battens across panel width |
| Side wall liner | 8 in | 12 in to 16 in | Vertical ribs plus panel seams |
| Door insert panel | 5 in to 6 in | 8 in to 10 in | Perimeter plus molded inner ribs |
| Cabinet back panel | 8 in to 10 in | 12 in | Frames, cleats, and shelf dividers |
| Wet bath or gear panel | 6 in | 10 in to 12 in | Close perimeter with washer heads |
🚙 Common camper panel examples
| Project panel set | Panel count | Typical size | Pattern estimate |
|---|---|---|---|
| 144 van ceiling panels | 3 panels | 48 x 54 in | About 150 to 175 fasteners |
| Pair of side wall panels | 4 panels | 36 x 60 in | About 170 to 205 fasteners |
| Rear door insert panels | 2 panels | 22 x 38 in | About 70 to 90 fasteners |
| Galley cabinet backs | 6 panels | 18 x 28 in | About 110 to 135 fasteners |
| Wet bath wall liners | 5 panels | 30 x 72 in | About 245 to 290 fasteners |
🛠 Substrate reserve reference
| Backing type | Reserve added | Why it matters | Counting note |
|---|---|---|---|
| Wood furring or plywood backer | 0% | Easy pilot holes and predictable bite | Normal spare buffer is usually enough |
| Aluminum ribs or angle | 3% | Rivet mistakes or mismatched hole sizes happen | Add a few extra rivets or screws |
| Steel ribs or hat channel | 5% | Hard drilling increases damaged fastener risk | Keep extra bits and fasteners nearby |
| Plastic or composite backer | 4% | Threads can strip if overtightened | Washer heads spread the load |
| Mixed ribs, furring, and blocking | 7% | Different supports may need different fasteners | Round up by style, not only total count |
💡 Counting notes
Before you drill, count your way out of panic. Counting your fasteners prevents plywood from becoming a sieve. Once you drill too many holes, there is no turning back on those sheets.
You won’t have to buy extra boxes of screws, guess what you need, or make more hole. How many fastener will be needed for each panel? You gotta count for the edge rows, field rows, and your own screwups. Let’s face it, the calculator does all the math for you.
How to Count Your Screws
First enter in your panel. Is it going to be lauan plywood (standard), or something like thicker FRP? Why the material? Because that determines what fastener you’ll use. If you’re using thin aluminum, don’t try and drive a trim-head screw into it; it will strip. There is no sense in having those oversized rivet heads on a nice looking ceiling either. The tool adjust the weight estimates based off those material choices. That way you can keep your total weight below gross weight of vehicle.
But it’s about spacing, that’s where the engineer comes in. Don’t just throw screws all over at random, six inches here, there, everywhere. It’s a waste. Tighter spacing is required on edges which take vibration and flex. Wider spacing are possible on field rows (e.g. Space them 12 to 16 inches apart. The table of references show these spacings according to each kind of panel.
Door inserts require tighter spacing then static cabinet backs. Doors come and go; they take abuse. The ceiling doesn’t budge.
Don’t double-count seams where multiple panels meet. For instance, if two panels join at one of the wooden ribs then they don’t each requires a column of screws through that seam. That’s a seam that gets counted once, for both panels together. Counting each side separately means you’ll purchase fasteners you won’t use. The calculator handles this for you by taking out any doubled-up lines. It all adds up when you’re working with lots of panel.
This gets even more complicated with openings. Each one adds another count, reinforced on the perimeter of each vent or hatch. Unsupported edges cause cracking, so they must be supported. There are bunches of additional fastener around the hole. Add another counter for each opening. No calculating by hand; this holds it all together.
Always add A BUFFER: Van building isn’t a spreadsheet. Cross threading a screw or dropping it on the floor ruins a fastener. Shifting a row because a rib is off center happen. Having that 10 to 15% buffer is insurance. It is insurance so you won’t have to go to the store before finishing the job.
Respect the structure of the vehicle, as well as the materials. Plan the fastener count accordingly; you’re making a shell that needs to flex with the road. Get the number of seams counted out and the spacing correct. Fill up that buffer bag. Know what is holding the walls up and then some for unexpected cutouts.
You should of added extra.