Camper Cabinet Cut List Calculator
Plan cabinet panels, shelves, doors, drawer fronts, face-frame parts, edging, and sheet goods before cutting plywood for a camper build.
🚙 Camper Cabinet Presets
📏 Cabinet Inputs
Cut sizes are rectangular blanks. Add appliance openings, wall scribes, radiused corners, and hinge boring after confirming the cabinet fits the actual camper wall.
Formula Breakdown
✂ Generated Cut List
| Part | Qty | Finished Size | Cut Blank With Kerf | Material | Notes |
|---|---|---|---|---|---|
| Enter cabinet dimensions and calculate to generate the cut list. | |||||
🧰 Spec and Material Grid
📚 Reference Tables
| Material | Actual Thickness | Best Camper Use | Cut List Note |
|---|---|---|---|
| 3/8 in lightweight ply | 0.375 in | Upper doors and small boxes | Use extra cleats on wide spans |
| 12 mm European ply | 0.472 in | Balanced weight and stiffness | Confirm hinge cup depth first |
| 1/2 in Baltic birch | 0.500 in | Most van galley carcasses | Good screw bite with pilots |
| 5/8 in plywood | 0.625 in | Bench bases and lockers | Reduces shelf sag |
| 3/4 in plywood | 0.750 in | Heavy drawer banks | Stronger but adds weight fast |
| Camper Cabinet Type | Common Outside Size | Typical Parts | Planning Caution |
|---|---|---|---|
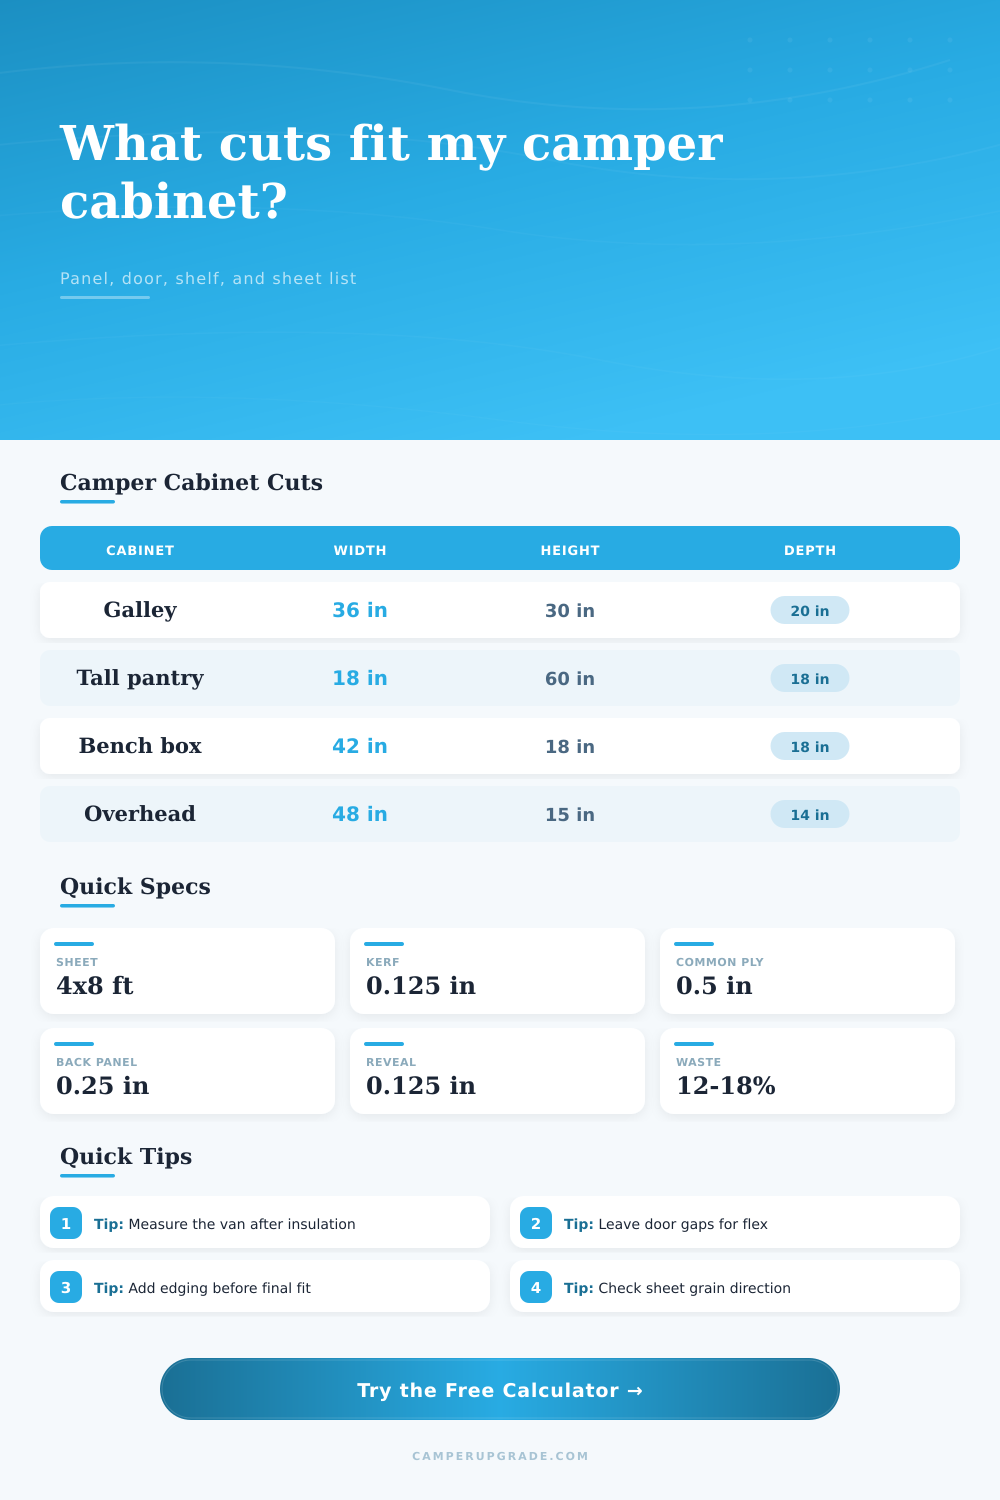
| Galley base | 36 × 30 × 20 in | Sides, bottom, deck, shelf, doors | Reserve room for sink and plumbing |
| Tall pantry | 18 × 60 × 18 in | Tall sides, shelves, narrow door | Anchor to wall ribs and floor |
| Bench storage | 42 × 18 × 18 in | Long panels, lids, dividers | Watch cushion and lid clearance |
| Overhead locker | 48 × 15 × 14 in | Light box, bottom, doors | Keep weight low and latch doors |
| Drawer bank | 24 × 28 × 22 in | Carcass, fronts, dividers | Leave slide and latch allowance |
| Door Layout | Width Formula | Height Formula | Best Use |
|---|---|---|---|
| Frameless overlay | (Opening / doors) + 2 overlays | Opening + 2 overlays | Simple camper cabinet doors |
| Face-frame overlay | (Opening / doors) + 2 overlays | Opening + 2 overlays | Traditional cabinet look |
| Face-frame inset | (Opening - gaps) / doors | Opening - 2 reveals | Flush fronts with tight gaps |
| Drawer fronts | Opening width + 2 overlays | (Opening height / drawers) - gaps | Stacked drawer banks |
| Sheet Planning Item | Formula | Typical Value | Why It Matters |
|---|---|---|---|
| Sheet area | 48 in × 96 in / 144 | 32 ft² | Base for sheet count |
| Cut allowance | Kerf × cut length count | 1/8 in | Prevents undersized blanks |
| Waste buffer | Part area × buffer | 12% to 18% | Covers grain and camper scribes |
| Edge banding | Visible edges + buffer | 10% buffer | Allows trimming after pressing |
💡 Camper Cut List Tips
Use a cut list calculator before cutting anything. When measuring your walls you’ll discover they’re not square. Floor will slope slightly backward. And then there’s the ceiling which leans toward the front. These deviations from ideal geometry create all sorts of building mistakes. The calculator makes you deal with reality.
Save some bucks and prevent build mistakes with expensive Baltic birch plywood. It calculates the dimensions for your cabinet blanks. When you input your cabinet size, it will subtract out the size of carcass material. That establishes what the inside is going to be. Then it figures out how big doors should be and where shelves would goes.
Why You Should Use a Cut List Calculator
If you have a traditional face frame box or a frameless box, that’s different. Each time there is a face frame, it alters all measurements on the inside. So, it calculates that in automatically. That saves time and prevents you from having any fitting mistakes.
When selecting materials, consider balance between durability and weight. Lighter plywood is easier on fuel consumption and tow vehicle, but it’s thinner and flexes more when loaded. For a table/bench seat combo like I made, the calculator recommend bracing or thicker stock. It is a little bit heavier, but it has a solid structure. Because the calculator considers loading, your table will be rock solid rather than wobbly.
Kerf is amount of material removed from each cut. With most blades, it’s roughly an eighth of an inch per cut. If you don’t account for this on your cut blanks, your joints won’t line up. The calculator includes this allowance in your cut blank dimensions. So they’ll butt tight against one another.
It also provides a waste buffer of 12-18%. Don’t think this is excess material for cutting errors. It’s there because when you have curved walls, you’re going to need to scribe them to get them to fit. To match the curve of the van, you’ll want some additional length. The calculator handles all of these variables.
For doors and drawers, it figures out dimensions based off your choice. You can choose an inset door that sits inside the frame and requires tighter tolerances. Or, you can choose an overlay door that covers the face frame for a moddern look. And since doors will bind if there’s too little gap between them in the van, this determines the reveal gaps.
Also, wood expands and contracts with temperature. Metal does as well. Leave enough space to allow for expansion and contraction so it does not stick in the rain, but do not go crazy and make it look sloppy.
Pay attention to your edge banding estimate. Raw plywood edges are chippy and just don’t look finished. This will estimate the linear footage of banding you need to cover the exposed sides. Buy a little extra, cause it takes some time to apply it. If you run out of banding part way through your box, that would of cut into your work flow. Follow the calculator’s estimate so you can avoid all that frustration.
How many four by eight sheets of sheet goods do you need? This is the number that the estimate gives you. It’s calculated based on your overall parts area + waste. If you don’t have enough, then you stop building mid way through. If you get too many, then you are adding unneeded weight in your van. We are looking for efficiency when using furnitures.
Walls do not follow plans so be sure to double-check the measurements in the actual car. The calculator will give you precision, but ultimately it needs to fit securely for the road. Begin with the math and finish with a snug fit for the road.