Astro Exposure 500 Rule Calculator
Estimate the longest untracked night-sky shutter speed from the 500 rule, safer crop rules, NPF-style pixel drift, lens aperture, sensor size, star declination, and sky brightness.
🌌Real Astro Presets
📷Camera, Lens, and Sky Inputs
🔭Sensor and Lens Spec Comparison
📊500 Rule Reference Tables
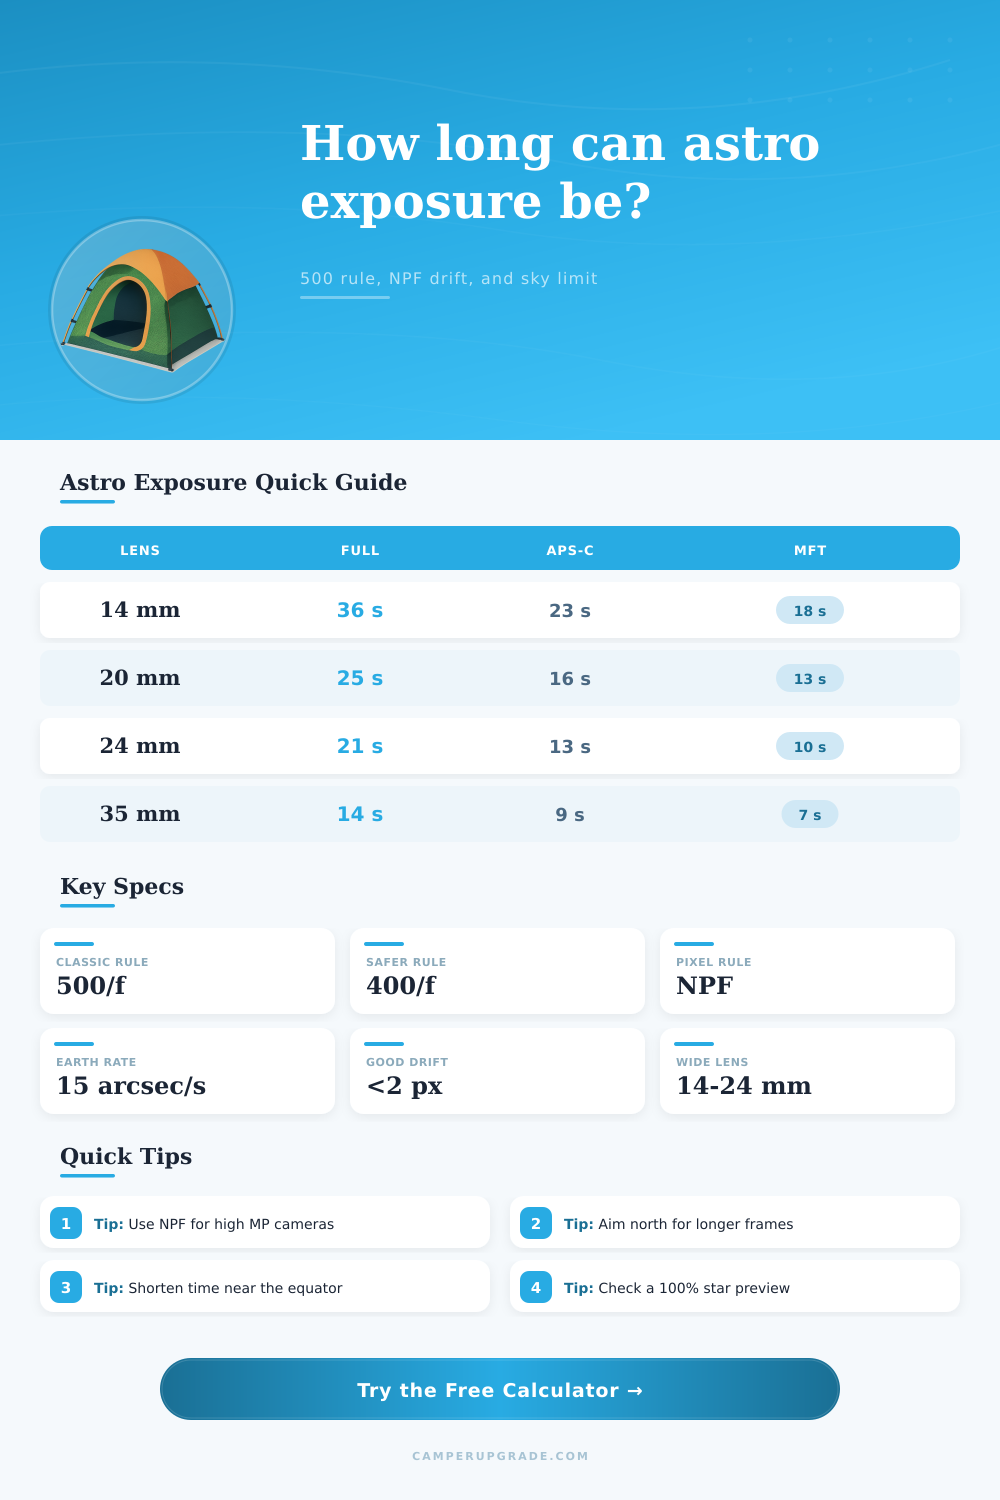
| Actual Lens | Full-frame 500 Rule | APS-C 1.5x | Micro 4/3 2x |
|---|---|---|---|
| 14 mm ultra-wide | 36 seconds | 24 seconds | 18 seconds |
| 20 mm wide prime | 25 seconds | 17 seconds | 13 seconds |
| 24 mm landscape prime | 21 seconds | 14 seconds | 10 seconds |
| 35 mm night panorama | 14 seconds | 10 seconds | 7 seconds |
| 50 mm constellation frame | 10 seconds | 7 seconds | 5 seconds |
| Rule | Formula | Best Use | Tradeoff |
|---|---|---|---|
| 500 rule | 500 ÷ equivalent focal length | Traditional wide Milky Way exposure | Often generous on high-resolution sensors |
| 400 rule | 400 ÷ equivalent focal length | Cleaner stars for web and moderate prints | Needs a bit more ISO or stacking |
| 300 rule | 300 ÷ equivalent focal length | High megapixel cameras and tight crops | Shorter frames gather less light |
| NPF-style | (35N + 30p) ÷ focal length | Pixel-aware exposure planning | Depends on pixel pitch and declination |
| Declination Zone | Trail Speed | Exposure Effect | Example Targets |
|---|---|---|---|
| 0° to 15° | Fastest apparent motion | Use the shortest recommended time | Orion Belt, celestial equator fields |
| 20° to 40° | Moderate motion | Typical Milky Way and wide-field planning | Summer Milky Way, Cygnus, Scorpius |
| 45° to 65° | Slower motion | Can hold slightly longer before trails show | Cassiopeia, Cepheus, northern fields |
| 70° to 90° | Slowest rotation around pole | Longest round-star tolerance | Polaris, polar star fields |
| Sky Condition | Typical Limit | Exposure Choice | Stacking Note |
|---|---|---|---|
| Bortle 1-2 dark sky | 35 to 45 seconds at f/2.8 | Star motion usually limits first | Long frames are efficient |
| Bortle 3-4 rural sky | 22 to 30 seconds at f/2.8 | Balance sky glow and trails | Good default for campsites |
| Bortle 5-6 suburban sky | 10 to 16 seconds at f/2.8 | Sky brightness may dominate | More shorter frames help |
| Moon or twilight | 4 to 8 seconds at f/2.8 | Protect highlights and color | Use lower ISO if needed |
🧮Formula Notes
💡Exposure Planning Tips
It’s the Milky Way. You’ve positioned yourself on top of a ridge and set up your tripod. The aperture are wide open; the camera is waiting. But there’s one tricky factor in astrophotography: How do you know when to keep shutter open? Too short and you’ll get noisy underexposed images; too long and stars will smears into tiny dashes. Exposure rules is going to be your only friend in the dark.
We’re used to thinking of classic 500 rule as some kind of law of physics. It isn’t. It’s a loose heuristic that says: divide 500 by your equivalent focal length. The result is max shutter speed at which you’ll get round stars. With a full-frame camera and a 14 mm lens, that’s about 36 seconds. Sounds like plenty.
Why You Need to Use the NPF Rule for Clear Star Photos
But things have changed since then, thanks to our moddern sensors. They cram a heck of a lot more pixel inside the same old glass rectangle compared to cameras two decades ago. More pixels mean any slight movement is magnified more. Even if you set the same overall exposure time, that round star on your older 12-megapixel sensor are going to appear as a vague streak on 45-megapixel one.
There’s no point doing it by hand, dividing things up. Just plug in your pixel pitch and sensor dimensions into calculator and let it do its thing. No more guesswork about whether your gear is too tight or has enough room. Simply input your real-world focal length (not that cropped number), since it will automatically apply the crop factor internally according to sensor size you’ve chosen. Finally, pick a tolerance level. Want really tight tolerances so you can zoom in 100% and check out shape of those stars? Great, go for it. Just shooting for web sharing and viewing on small screens? Loosen things up big time.
Declination is another key variable that most simple charts dont take into account. Though the Earth spins, how fast objects seem to move through your field of view has everything to do with what direction you have your lens pointed. Objects near the celestial equator zip through your field of view as quick as possible. Ones near either of the celestial poles rotates nearly in place and in ever-slower circles around a single point. For example, when you point at galactic core or even Orion, trails will show up after relatively short exposures. But if you point at, say, Polaris, you can shoot much longer exposures without any sign of trails. It takes all this geometry into account, so it adjusts its prediction of drift to match your target’s latitude in the sky.
Sky brightness is another factor: even if you can make your stars sharp as tacks, it’s ultimately a hard cap on the image. If you live in an urban environment (Bortle class 7 skies) then before the earth has rotated sufficiently to smear the stars, your histogram may hit pure white. That means you have to run higher ISO and shorter exposures in order to preserve contrast. You can’t stack noise away if sky is already blown out.
Longer exposures on darker skies improve the signal-to-noise ratio naturaly, without having to push your ISO sensitivity into red zone. The whole point of the change is that stacking alters exposure planning dynamics. Rather than shooting everything in one long exposure, you shoot lots of short exposure and stitch them together after. That way, you get as much total exposure time as you want (on the order of dozens or even hundreds of frame). You also stay within the NPF limits, which keep stars sharp as long as you follow those limits closely. Twenty seconds may sound like a tight exposure duration; but imagine walking back to the car for a warming cuppa during that period, and you could of shot fifty of those frames in that time.
The calculator will tell you how much data you’re acquiring from each session, based off the number of frames you intend to take and your total integration time. There’s always a trade off here: Sharpness vs. Noise. Long exposures will trail but provide a cleaner signal for every frame. Short exposures makes stars round but take more frames to achieve the same depth. With moddern high megapixel bodies, you can’t use shutter speeds as long as the old 500 rule suggests; it is often closer to a 400 or even 300 rule, depending on pixel pitch.
Once you understand the limits, you turns your night photography from a game of chance into a controlled process. No more guessing, now you stack. And once you see those first results, watching the cold air is worth it because you can see exactly what is happening with each frame.