Layering for Activity Temp Calculator
Estimate an active layer plan, immediate stop layer, warmth margin, and vent risk from temperature, wind, activity intensity, weather exposure, sweat state, and the layers you plan to wear.
🏕Activity Layer Presets
⚙Weather, Activity, and Layer Inputs
📌Layer Spec Grid
📋Reference Tables
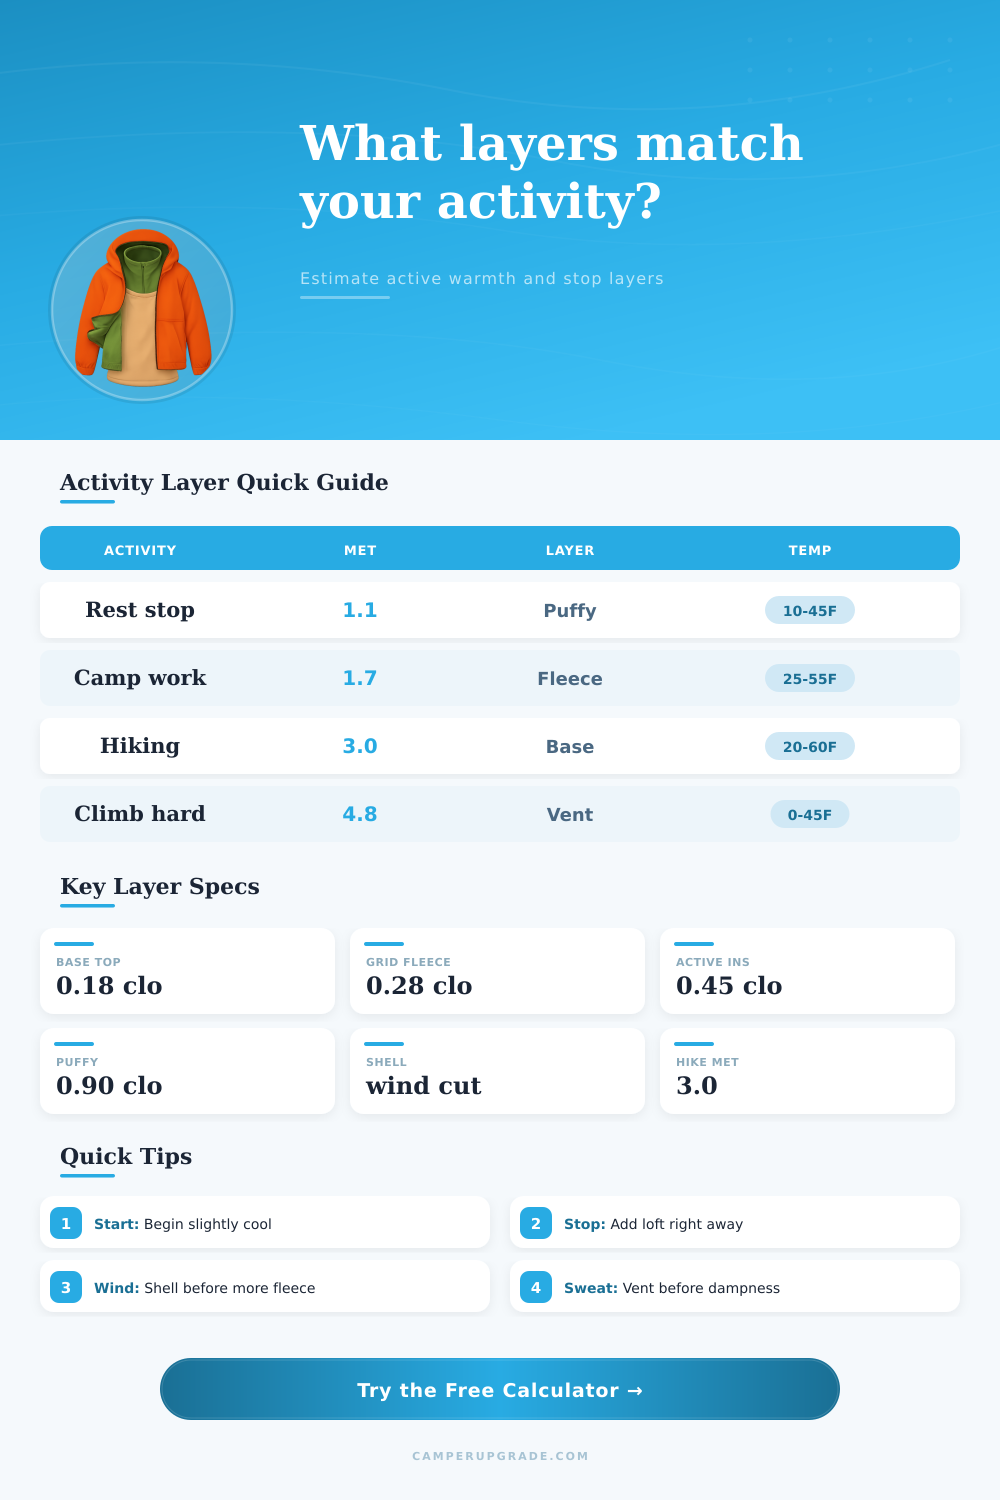
| Activity | Modeled MET | Layer cue | Common mistake |
|---|---|---|---|
| Standing or belaying | 1.1 | Use stop loft early | Waiting until chilled |
| Camp chores | 1.7 | Fleece plus shell works | Wearing belay parka |
| Easy hiking | 2.4 | Start slightly cool | Too much mid layer |
| Steady uphill | 3.2 | Base plus wind layer | Closed vents |
| Hard climb or skin | 4.8 | Minimal active warmth | Sweating into insulation |
| Layer item | Active clo | Best use | Watch point |
|---|---|---|---|
| Thin tee or sun shirt | 0.10 | Warm movement | Little stop warmth |
| Light long base | 0.18 | Cool starts | Can wet out |
| Grid fleece | 0.20 to 0.32 | Breathable active warmth | Wind passes through |
| Active insulation | 0.45 | Cold steady travel | Too warm above freezing |
| Puffy parka | 0.75+ | Stops and belays | Protect from sweat |
| Weather | Model effect | Layer response | Field cue |
|---|---|---|---|
| Dry calm air | Full layer value | Use breathable stack | Skin feels dry |
| Wind above 10 mph | Convective loss | Add wind shell first | Fleece feels leaky |
| Light mist or snow | Moisture penalty | Shell plus venting | Cuffs dampen |
| Hard rain or sleet | Large shell need | Protect insulation | Stop layer stays packed |
| Bright sun | Small warmth gain | Vent sooner | Back feels hot |
| Margin | Meaning | Action | Stop plan |
|---|---|---|---|
| +0.45 clo | Warm while moving | Open vents or remove mid | Puffy may wait |
| +0.15 clo | Good moving buffer | Keep steady | Add layer at break |
| 0 clo | Near target | Watch hands and sweat | Layer immediately |
| -0.25 clo | Too cool moving | Add shell or mid | Use full stop layer |
| -0.60 clo | Under-layered | Revise plan | Do not linger exposed |
💡Layering Tips
When you stop moving on an cold ridge, your body temperature can drop quick. Your body temperature can drop faster then many people expect. You have to think about you’re clothing in a specific way because there is a difference between moving warmth and static warmth.
Moving warmth are the heat that your body create when you are moving. Static warmth is the warmth that you need to retain when you are not moving. This calculator will help you to calculate how much warmth you need in each layer of clothing so that you dont experience the problem of shivering when you are stationary or feeling like you are sweating while you are on your hike.
How to Keep Warm on Hikes
Your activity level is a factor in the amount of heat your body will produce. Your activity level can change on the hike depending on the rate at which you hike or how hard you may hike uphill. The faster that you hike or the steeper the climbs, the more heat your body will produce.
The clothing that will keep you warm when you are hiking may not be the best clothing to wear when you are stationary. The calculator account for this with separate calculations for the active layer of clothing and the stop layer of clothing that you may need for your hike. The additional factor of wind and moisture will play a role in how much heat your body loses.
The more exposed that you are to the wind or the moisture in the air, the more you will feel the difference in temperature. A breeze can remove the heat from your fleece jacket or moisture from the air can wet your hiking clothes. When your clothes is wet, they will not provide the same amount of insulation as your dry clothes.
The warmth margin result in the calculator will factor in these variable so that you can see if your clothing layers are sufficient for the conditions that you will encounter. If the warmth margin indicates that you need more warmth from wind protection or if you need to change your active layer, the calculator will tell you so. Sweat can also affect the performance of your clothing.
Sweat can ruin your plan for your hike if you do not account for it. If your clothing is dry, it will provide the warmth and performance that you can get from the clothing manufacturer rated for the clothing. However, if your clothing is damp from sweating, it will not be able to provide the same amount of warmth as when you are not produce moisture from your body.
The setting for the amount of sweat that you may produce while on the hike will adjust the calculations that the calculator performs. Therefore, two individuals may be wearing the same clothing yet have different results from the calculator depending on their own body chemistry and the amount of sweat that they may produce while on the hike. Other factor to consider include your bodys response to the cold and the weight of your hiking pack.
Some individuals lose heat from their extremities at a faster rate than other individuals. Additionally, if you have a heavy hiking pack, your body will need to produce more heat while on the hike because it is carrying the weight. However, a heavy hiking pack may also be compressing the insulation that is within your clothing.
The calculation of both your personal response to the cold and the weight of your pack will allow for recommendation for you specifically with the calculator. The reference table can help you understand the calculations for activity and clothing. However, the calculator will perform those calculations for you.
Additionally, you can change the wind speed that you enter into the calculator to see how this affect the warmth margin. You can also change the length of the stop that you will make while on the hike to see how this change the warmth margin that you may produce. The variable will have an impact on the clothing recommendation.
The goal with the calculator is that you are slightly cool while you are moving and have a stop layer ready when you need to stop moving. When you use the calculator, you can find a balanced plan for your clothing layers. If the warmth margin does not allow you to feel comfortabley with the clothing that you are to wear, the advice section will tell you how to fix the problem.
The advice may be to wear a shell or a puffy jacket. Thus, the calculator will turn a list of clothing into a system that manage your body temperature throughout the day.