Approach and Departure Angle Calculator
Estimate front approach, rear departure, breakover, and ramp clearance using bumper overhang, tire radius, ground clearance, wheelbase, lift, sag, obstacle height, and ramp angle.
Extra bumper, winch mount, hitch step, or tire carrier reach beyond factory bodywork.
Half of measured tire diameter while loaded on level ground.
Use the lowest front or rear contact point if a skid, hitch, or bumper sits below the frame.
Distance between front and rear axle centers.
Horizontal distance from front axle center to the first low point at the nose.
Horizontal distance from rear axle center to the lowest rear bumper or hitch point.
Net clearance added after suspension lift, tire change, or spacer lift.
Subtract squat from passengers, cargo, water, trailer tongue weight, or rear carrier load.
Curb lip, rut crown, rock edge, berm, or break in the surface before the slope starts.
Use driveway, ferry ramp, trail climb, ditch exit, or loading ramp angle.
Enter your measurements, then calculate.
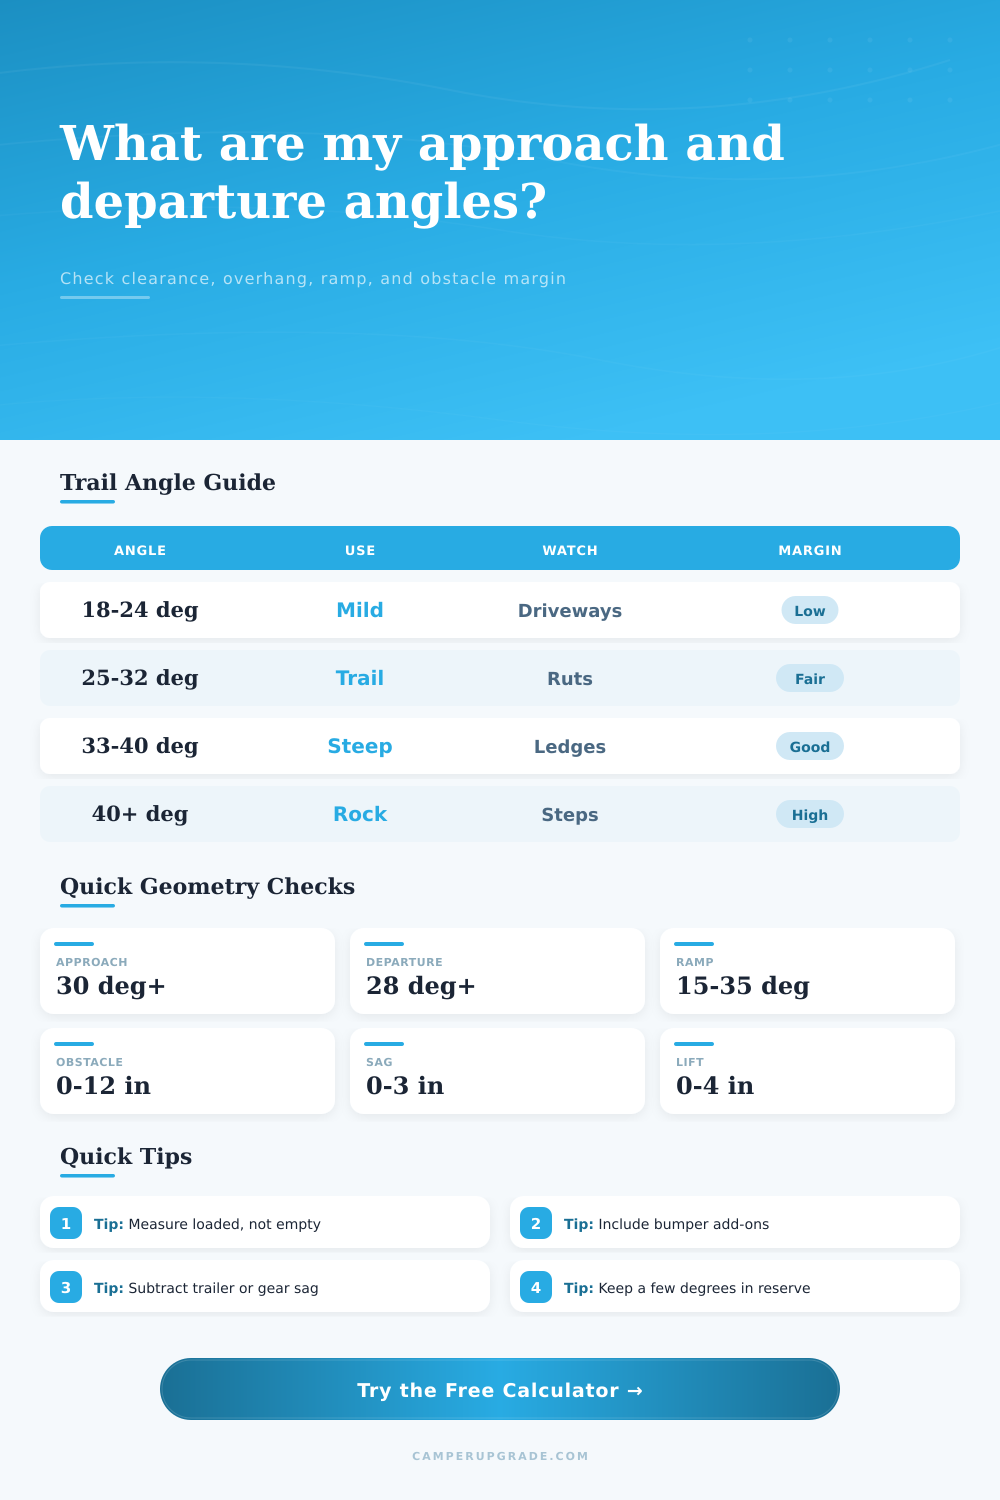
| Angle range | Typical use | What it usually handles | Driver margin |
|---|---|---|---|
| Under 18° | Pavement and mild gravel | Shallow driveways, low berms, campsite transitions | Measure carefully and spot often |
| 18–25° | Light trail travel | Forest roads, washboard dips, mild ferry ramps | Good for easy routes when loaded lightly |
| 25–35° | Moderate overland travel | Rutted roads, sharper driveways, small ledges | Useful reserve for real-world suspension movement |
| 35° and up | Technical trails | Steep climbs, shelves, breakovers, tight exits | Still limited by tires, traction, and line choice |
| Vehicle style | Wheelbase | Front overhang | Rear overhang |
|---|---|---|---|
| Short trail SUV | 95–105 in | 24–32 in | 28–36 in |
| Midsize pickup | 125–142 in | 32–40 in | 42–54 in |
| Full-size crew cab | 145–160 in | 38–46 in | 54–68 in |
| Camper van or Class B | 140–170 in | 34–46 in | 62–86 in |
| Measurement | Use in formula | Measure from | Common error |
|---|---|---|---|
| Bumper overhang add-on | Adds to front reach | Factory bumper face to outer add-on | Forgetting recovery hooks or hitch steps |
| Ground clearance | Vertical rise for all angles | Lowest loaded point near the contact zone | Using brochure clearance instead of loaded height |
| Lift and sag | Net adjustment to clearance | Before and after loaded ride height | Counting tire gain twice |
| Obstacle height | Subtracts usable clearance | Top of lip, rut crown, curb, or ledge | Only measuring the ramp slope |
| Ramp angle | Example setting | Preferred margin | Check before crossing |
|---|---|---|---|
| 5–10° | Gentle driveway or campground pad | 5°+ | Rear hitch, mud flaps, and spare tire |
| 10–18° | Steeper apron or wash crossing | 7°+ | Front bumper corners and rear departure path |
| 18–28° | Trail climb, ferry ramp, loading ramp | 10°+ | Breakover, traction, and suspension compression |
| 28°+ | Technical ledge or steep exit | 12°+ | Use a spotter and inspect the line first |
If you’ve got an aggressive looking rock crawling rig, I’m sure there’s been more than one time where you’ve approached a nasty section of rocks and your heart sinks. Will I make it? Will my bumper scrape? How high does my truck look from this side? Most folks eyeball it like that. And most times, they’re wrong.
It’s not a matter of the truck’s “height”; it’s a matter of geometry. Knowing true angle helps you calculate your limits and avoid scraping. But you don’t need to do math. The calculator does it for you, just input your own numbers and it do the rest. Click the button; that’s the easy part. What matters is the inputs.
How to Use the Angle Calculator
Ground clearance measures is usually taken with an empty vehicle in a garage. But real life is heavy. There’s gas, water, passengers and maybe even a roof-top tent. That add weight and makes the suspension sag. The tool needs to account for loaded sag. Losing a half-inch off the back of the vehicle can cost you two or three degrees of departure angle. That is the difference between clearing a rut and dragging a hitch receiver.
The other important aspect is front overhang. You may have a stock bumper and think it’s okay but then put on heavy duty bull bar or a winch mount. That pushes lowest point of contact forward, making the angle steeper. The more out that point is the steeper the angle has to be. Which makes it worse because now there is leverage against you. Your front overhang are short, but your nose is long. Guess what? Physics work against you. The calculator adds the bumper overhang to reach calculation. This shows you where it hits ground first.
In reverse, approach and departure angles works about the same. Typically, the rear of your vehicle sit lower than the front if you’re hauling anything or towing. This puts the bottleneck at the rear bumper, rear step, or rear spare tire carrier. Departure angle needs to be greater then approach angle or you’ll probably scrape something off the back before reaching the top.
See the reference table on the page for a matching angle based off your planned usage. Less margin is needed for mild trails and more are required for tech rock crawling. The last part of this group is breakover angle. That’s highest point you can go over with your belly off the ground. How high? That depends on your wheelbase. Wheelbase. The longer the wheelbase, the lower the breakover angle. A short wheelbase like in a Jeep clears that hard ridge better than full size crew cab. There is no way to modify your wheelbase other than by purchasing another vehicle. That’s why you should of pick your line and drive slow. And knowing the limit is what the tool will give you, when to quit climbing and find a new line.
In the real world, ramp angles don’t all begin at the same level. You’ve got curbs and an often-flat apron leading into the steeper part of the incline. Guess what? Vehicles gets stuck on that transition. Use the obstacle height input to compensate for it. Let’s say you have a two-inch curb followed by a sloped driveway. Your actual clearance now decreases by two inches. That’s a huge reduction in margin. Measure from the ground up, not down from the tread of your tires. You can’t see the actual height because of how much your tire deform. Don’t trust the spec sheet from the company. Angles are for brochures of an empty test mule without any accessories. You don’t have that. You have mods, wear and weight.
The presets in the tool are a guide, take those and adjust according to what is real. Then add the sag. If you’ve already factored in the lift gain to your tire radius, subtract it out. Get it right. Don’t get optimistic about it. Save some extra paint just in case.
The geometry isn’t forgiving. It doesn’t care how good your shocks are or how much they cost. It just cares about angles and lines. So when the calculator tells you you’ve got a twenty-five degree approach angle don’t try to hit a twenty-five degree ramp, hit a twenty. Leave yourself some buffer. That’s for the inevitable miscalculation, uneven terrain and suspension compression under load on the move.
Measure once, drive confidentally, and leave the scraping to the rocks.