Tire Pressure by Terrain Calculator
Estimate a practical cold PSI target for pavement, gravel, sand, mud, snow, rock, and mixed trail driving from tire size, load range, axle weight, sidewall stiffness, speed, temperature, beadlock status, and load margin.
🛞Terrain Presets
📏Tire and Load Inputs
📊Pressure Comparison Grid
Current
--Calculate to compare the entered terrain setup.
Softer
--Shows a lower traction-biased setting when margin allows.
Faster
--Shows pressure with a speed reserve added.
Pavement
--Shows the on-road pressure you entered.
🛻Tire Setup Reference Grid
📋Terrain and Tire Pressure Tables
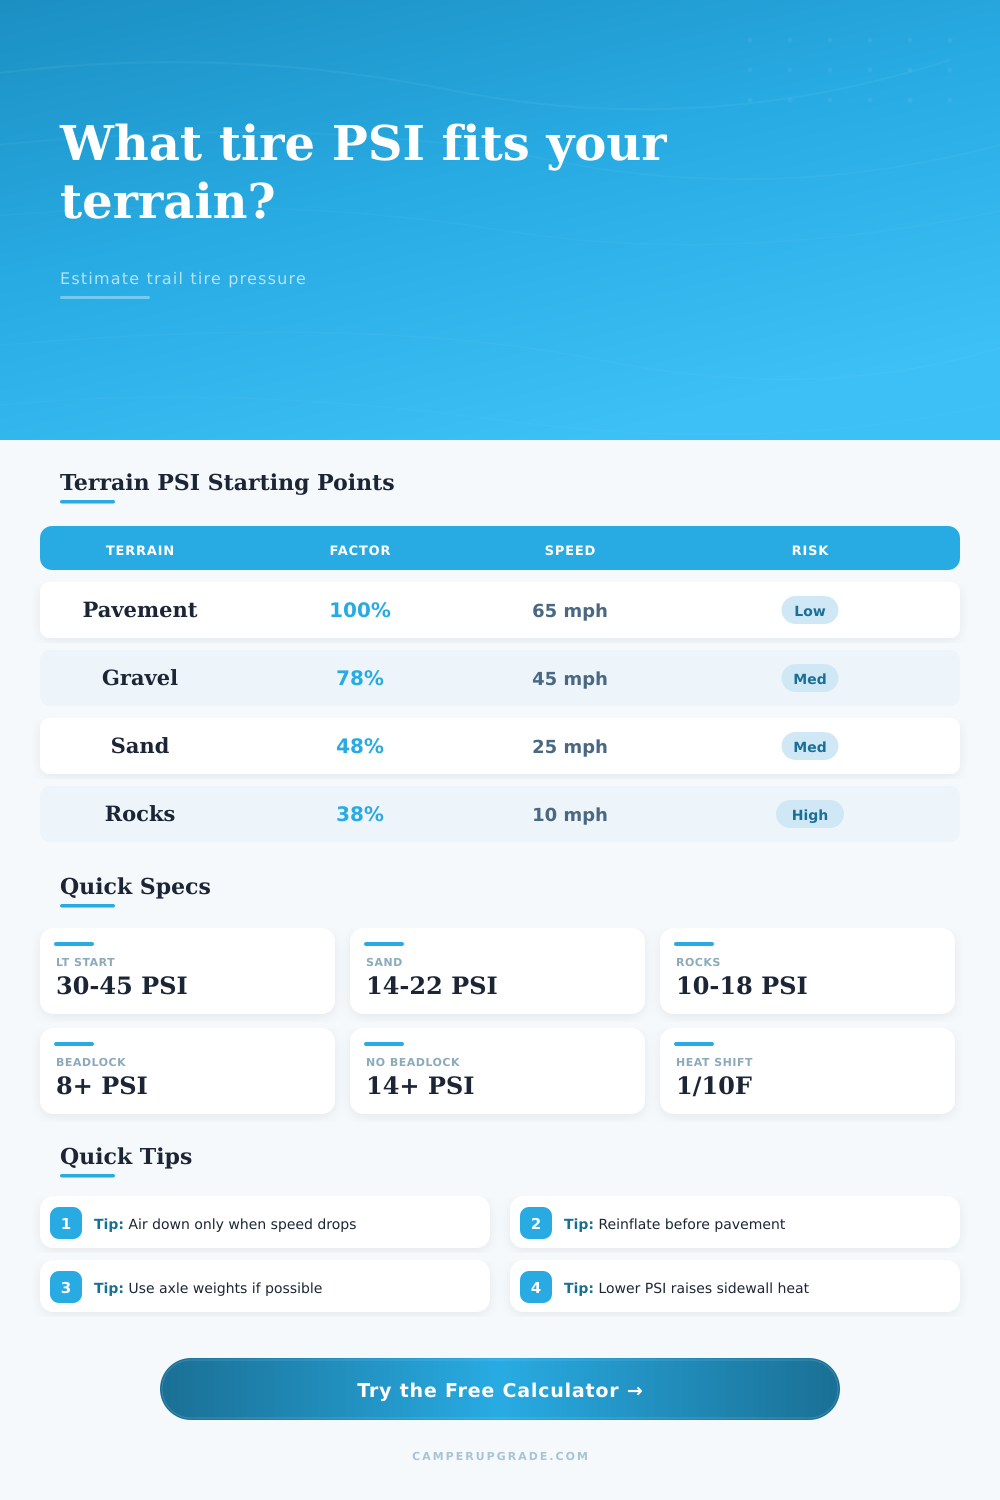
Terrain Starting Factors
| Terrain | Pressure Factor | Comfort Speed | Use Case |
|---|---|---|---|
| Pavement | 100% of road PSI | 65 mph | On-road travel before and after trails |
| Graded gravel | 78% of road PSI | 45 mph | Comfort and chip resistance on maintained roads |
| Washboard gravel | 70% of road PSI | 35 mph | Corrugations, chatter, and light trail vibration |
| Forest trail | 62% of road PSI | 30 mph | Mixed dirt, roots, mild rocks, and ruts |
| Slickrock ledges | 50% of road PSI | 15 mph | Grip on firm rock with slow inputs |
| Slow rocks | 42% of road PSI | 10 mph | Crawling, ledges, and sidewall flex |
| Soft sand | 48% of road PSI | 25 mph | Beach approaches and desert washes |
| Deep sand | 38% of road PSI | 18 mph | Dunes and very soft flotation needs |
| Mud or snow | 55% of road PSI | 20 mph | Traction with enough clearance for steering |
Load Range and Pressure Reference
| Load Range | Common Max PSI | Casing Feel | Typical Trail Note |
|---|---|---|---|
| C | 50 PSI | More compliant | Good ride, watch load reserve on campers |
| D | 65 PSI | Medium-stiff | Balanced for many SUVs and light trucks |
| E | 80 PSI | Stiff LT casing | Often needs lower road PSI on light axles |
| F | 95 PSI | Very stiff | Heavy campers need margin before airing down |
Bead and Speed Practical Floors
| Wheel Setup | Normal Floor | Slow Crawl Floor | Best Use |
|---|---|---|---|
| Standard wheel | 14 PSI | 12 PSI | Conservative trail pressure without bead retention |
| Bead grip wheel | 11 PSI | 9 PSI | Moderate low-pressure use with smoother steering |
| True beadlock | 8 PSI | 6 PSI | Slow technical terrain where local rules allow use |
| High-speed dirt | 22 PSI | Not crawl use | Heat control when speed stays above 45 mph |
Tire Size Footprint Reference
| Tire Size | Diameter | Section Width | Footprint Adjustment |
|---|---|---|---|
| LT265/75R16 | 31.6 in | 10.4 in | Baseline narrow LT tire |
| LT275/70R17 | 32.2 in | 10.8 in | Balanced factory-size all-terrain |
| LT285/70R17 | 32.7 in | 11.2 in | Small pressure reduction for footprint |
| LT315/70R17 | 34.4 in | 12.4 in | Wider tire, lower pressure potential |
| 35x12.50R17 | 35.0 in | 12.5 in | Good flotation, watch wheel width |
| 37x12.50R17 | 36.8 in | 12.5 in | Large casing, slow-trail pressure range |
💡Pressure Planning Tips
This calculator gives a planning starting point. Always stay within tire, wheel, vehicle, and trail-use limits, and reinflate before sustained pavement speed.
A couple pounds of air in your tires can be the difference between a stuck situation and arriving home. Running your most capable off-road machine at pavement pressures across loose sand means you’re gonna get stuck. Running it too soft down the highway means you’ll tear up a tire casing from heat.
Finding that sweet spot isn’t about guesswork; it is about understanding how weight, speed, and terrain interacts. To avoid tedious deflection chart memorization, the calculator simply asks what kind of terrain you’ll be riding on and your axle weight. It does work for you (see top).
How to Find the Right Tire Pressure
Beginning with load distribution 101, it’s important to understand what weight is being placed where on each axle you plan to air down. For example, if you have a lightweight front axle or heavy rear axle, you’ll want different amounts of pressure depending on tire size, tread pattern and axle weight; even if the tires are the same size and have the same tread pattern.
By allowing you to enter exact weight per axle, the tool will divide that weight between the tires on that axle so it’s recommending based off your real-life load instead of some generalized average.
The amount of pressure also depends upon your terrain; the terrain dictates how much contact patch you need. For pavement, lots of pressure means no sidewall flex at speed. For gravel, a little less will roll over and provide a smoother ride with less vibration. For sand, it needs a big cutback to spread out the load and make the tire float on top of soft stuff. And for rocks, lower pressure lets the tire mold to whatever shape it’s on so it grips better on slick rock.
Each has its own factor in the calculator that pulls the starting road value downward until it gets to a level safe for trails.
Most folks pay no attention to speed until it’s too late. If you’re going slow, you can get away with running low pressure. As you start to pick up speed, however, the sidewalls begins to flex quicker and create heat that causes tire to come off the wheel.
By taking into account the amount of speed you plan on traveling, the tool raises the suggested PSI to protect you from the heat build-up. It also accounts for stiffness of your tire casing. Load ranges go from A through E; a load range E tire has stiffer sidewalls that resist excess flexing and can handle lower pressures than a Range C tire. This makes all the difference when you push things to the limit.
The safety floor is completely changed with beadlock wheels. With stock wheels, they use air pressure to hold your tire bead down onto the rim. So if you go too low with air pressure, then the tire could actualy come off the rim when you brake hard or turn hard. A beadlock wheel has a mechanical way of locking the tire in so you can go much lower with no fear of it coming loose.
The calculator factors in if you are running a standard rim or something like a bead grip wheel or true beadlock. It adjusts the bottom end to match so you don’t push yourself into danger with the wrong setup.
There is also a lesser but still valid thought about the temperature factor. As air warms it expands and as it cools it contracts. Even without adding or removing any air from the gauge, you may notice that your pressure on a chilly morning is lower than during an afternoon run. Taking the ambient temperature into account allows you to begin with a real baseline instead of one skewed by temperature.
Now that you’ve got a number, go up from the recommended range just a little bit. Decrease your pressure by a couple pounds at a time. See where it bulges on the tire and test the steering response. Is your steering vague? Is the sidewall folding onto the wheel? You went too low. Is the ride harsh, making you feel every stone? Still too high. That’s when it becomes fine tuning.
That’s where the reference table on the page comes in handy. It gives you a quick look at the starting point so you can compare them side by side. This helps you understand how wildly different the needs are from dune to pavement.
It’s not about finding the magical number per mile. It’s about dialing-in your pressure to meet the needs of surface below your wheels. Go conservative. Observe your sidewalls. Reinflate before hitting the highway. This discipline will keep your trail days long and your tires safe.
You should of checked your pressure regularily.