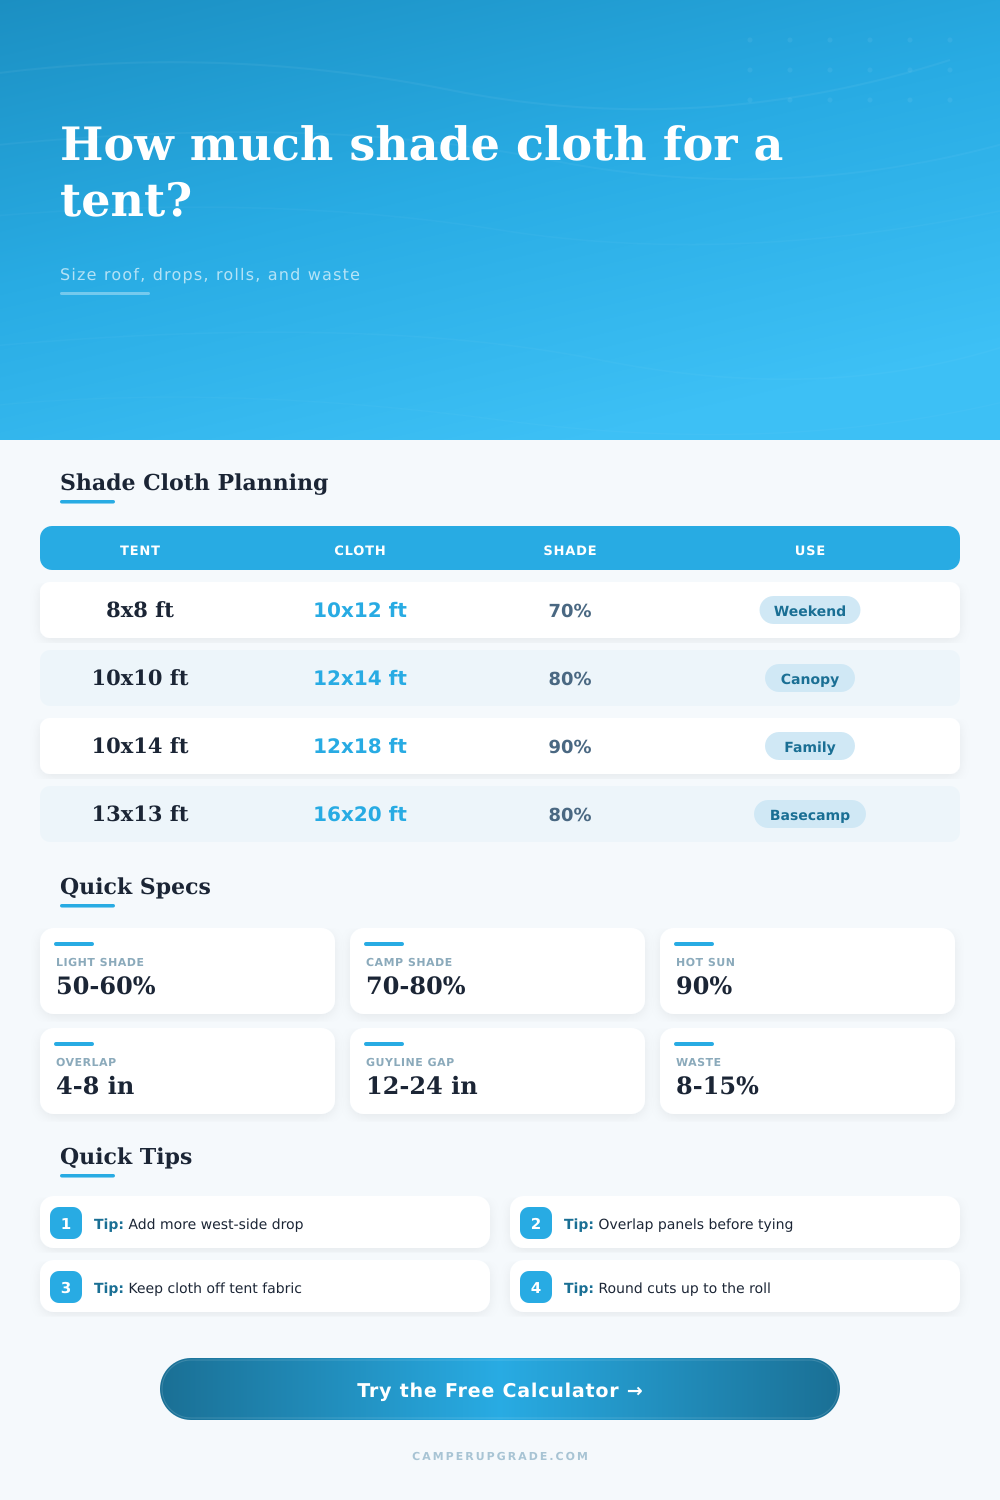
Tent Shade Cloth Coverage Calculator
Estimate shade cloth size for tents, awnings, tarps, and pop-up canopies using footprint dimensions, sun angle overhang, side drop, roll width, panel overlap, guyline clearance, shade percentage, and waste factor.
Coverage breakdown
Knitted HDPE
FlexibleGood all-around camping choice because it stretches slightly, resists fraying, and handles repeated pitching better than brittle woven fabric.
Woven shade cloth
TighterWorks for broad flat panels, but cut edges usually need better binding, hems, or taped reinforcement before grommets are loaded.
Aluminet style
ReflectiveUseful for intense sun where reflected heat matters; leave airflow space so reflected heat does not trap against tent fabric.
Mesh tarp panel
RuggedOften has finished edges and tie points already, so roll-length math still helps when joining panels or adding side drops.
| Sun angle | Overhang from 6 ft height | Best use | Planning note |
|---|---|---|---|
| 25° low sun | 12.9 ft projection | Late day west side | Use drop panels or a separate side shade |
| 35° shoulder sun | 8.6 ft projection | Morning and afternoon | Expect more cloth than the tent footprint |
| 45° moderate sun | 6 ft projection | General campsite shade | Balanced roof overhang for most tents |
| 60° high sun | 3.5 ft projection | Midday summer sun | Roof coverage matters more than side drop |
| 75° overhead sun | 1.6 ft projection | Noon shade | Small overhang can still protect tent walls |
| Roll width | Good for | Panel strategy | Overlap guidance |
|---|---|---|---|
| 4 ft | Small tents and side drops | Many narrow strips | Use 4-6 in seams |
| 6 ft | Dome tents and awnings | Two panels on small tents | Use 6 in seams |
| 8 ft | Family tent roof cover | Two to three panels | Use 6-8 in seams |
| 12 ft | Canopies and cabins | Often one center panel | Overlap only joins |
| 16-20 ft | Large basecamp shade | Few wide panels | Check pole spacing first |
| Shade percentage | Light level | Airflow feel | Camping use |
|---|---|---|---|
| 50% | Bright | Very open | Mild climates, view-through cover |
| 60% | Light shade | High airflow | Cooking, lounging, shoulder seasons |
| 70% | Balanced | Good airflow | Most tent roof shade setups |
| 80% | Deep shade | Moderate airflow | Hot campsites and family tents |
| 90% | Very dark | Lower airflow | Desert, beach, exposed fields |
| Common shelter | Footprint | Suggested cloth | Typical shade |
|---|---|---|---|
| 2-person backpack tent | 5 x 7.5 ft | 8 x 10 ft panel | 60-70% |
| 4-person dome tent | 8 x 8 ft | 10 x 12 ft panel | 70-80% |
| 6-person family tent | 10 x 10 ft | 12 x 14 ft panel | 80% |
| 8-person cabin tent | 10 x 14 ft | 14 x 18 ft panel | 80-90% |
| Large group canopy | 13 x 13 ft | 16 x 20 ft panel | 80% |
At 2pm, maybe you’re realizing that your tent has no shade. Now the interior of the tent is heating up. Everything’s getting warm: your gear, your sleeping pad, even air around you. You can’t help thinking “I just need some more!” But it isn’t always an issue of how much; it’s an issue of geometry.
What’s optimal for shade cloth? It create a buffer between you and the sun. This buffer needs height through an overhang. It should be based off where the sun actualy is, not just where it is right now, to create a buffer zone.
How to Calculate Your Shade Cloth Size
Once you know your roof size and sun angle (which you calculate on this page), the rest are handled by the calculator. No more guesswork when converting and figuring out the coefficient.
A common starting point for most folks is to measure their tent footprint. Makes sense, right? That’s the logical place to begin…except it’s where most plans goes awry. Do you think you’re gaining anything if you purchase a piece of shade cloth that have the exact same dimensions as your tent? Nope. Overhang is required.
The sun enters your campsite at an angle. Even at the equator standing directly underneath the noon time sun doesn’t mean the sun hits you straight-on. It hit your campsite from the side. This means you’ll need some extra coverage past your tent walls to catch that angled sunlight so it never reach your tent and warms up its fabric.
This is where the tool comes in, allowing you to enter the low sun angle. Late in the summer when you’re camping, the suns hanging low in the afternoon. A thirty-five degree angle might seem steep, but the projection gets long quickly. Entering that angle into the calculator tell it how far out to extend your roof panel width.
It will also account for any side drops. Side drops are vertical panels that drop down off the end of the roof cover. These block the side light missed by the roof. Not every side necessarily require a drop. Usually, the west side is the one that sees the most action since the sun is lower and stronger in the afternoon. In the northern hemisphere, the north side hardly ever needs anything.
The other compromise is choosing a shade percentage. Do you want 90% which blocks most of the heat but also restricts air-flow? Or do you want something like 70% if it’s a humid climate and you want to maintain a bit of air movement? The chart on that page explains this, showing the relationship between shade density and light transmitted.
Standard fabric for this application is knitted HDPE. That’s what lets the air through but stops the UV rays from entering. Make it too taut and you’ve got yourself a lid for a solar oven. You don’t want that. You want sun blocked, but air flowing.
The downside to shade cloth: Waste. Knitted or woven material whose every edge must be treated (hemed, or grommeted) lest it fray after careless cutting. The calculator includes a waste factor to add to the total area for hemming, for seam allowance, and for that one mistake you always make when measuring in the wind. Better to order just a little too much fabric than not have enough to cover and find yourself with an unsightly gap in your shade canvas; enough to admit a beam of direct sun, which defeats the whole purpose.
In the end, shade cloth isn’t so much an input purchase as it is a plan for light management, you’re creating a moving shadow, after all. Because the inputs require you to consider how the cloth will move across them, you must figure out where you draw the line on what’s comfortable under the shelter, or how much weight you’re willing to lug around. More material means a bigger piece of cloth to cut down to size, sure, but it weigh more when you go to bring it along. Smaller material means seams, which create weak spots.
This gives you the plan. A single measurement doesn’t mean much unless it is part of a plan. This one has the number of panels and the length for cutting each panel off the roll. It also includes the guyline clearance, which is enough space between the stake and the edge of the fabric so your staking out doesn’t pull at the edges of the cloth. It is a little thing, but it is important. Clearances done right can keep the cloth intact in the face of a bit of wind.
The numbers are the easy part. The rest is a matter of how well you cut, tie, and hem it. You also need to consider how much it breathes. Where do you tie it so it’s comfortable? It has to fit right and when you get in your tent you want the temperature to go down instantly. If it begins raining, you don’t want to get wet from the sun… It’s about comfort too.
The numbers make it happen. It makes a fuzzy feeling for shade become an actual number with dimensions. No guessing when you get to camp. You are just unfolding the plan that considers the waste, wind and sun. That is the difference between sweat and relax.
Understanding what you’re really measuring is the trick. The material is just the medium. The end result, the product, is the shadow.