RV Skirting Panel Length Calculator
Estimate skirt run length, panel count, finished height, fabric area, vents, snaps, stakes, and access panels from real RV dimensions.
Full Formula Breakdown
| Panel material | Typical use | Nominal width | Planning note |
|---|---|---|---|
| 18 oz coated vinyl | Flexible RV skirt runs | 54-61 in | Good for snap-on panels and curves |
| 22 oz cold-weather vinyl | Long winter stays | 54-61 in | Plan extra overlap at corners |
| 600D polyester | Light seasonal skirting | 58-60 in | Works best with hemmed edges |
| 12 oz treated canvas | Breathable fabric panels | 58-60 in | Add flap weight in windy areas |
| Rigid foam board | Flat wall sections | 48 in | Count each board as a panel |
| Corrugated plastic | Temporary straight panels | 48 in | Use battens at vertical joints |
| Measured drop | Top allowance | Ground flap | Cut height |
|---|---|---|---|
| 24 in | 2 in | 4 in | 30 in |
| 28 in | 2 in | 6 in | 36 in |
| 32 in | 2 in | 6 in | 40 in |
| 36 in | 2 in | 8 in | 46 in |
| 42 in | 3 in | 8 in | 53 in |
| Nominal panel width | Seam overlap | Usable width | Panels per 60 ft run |
|---|---|---|---|
| 48 in | 2 in | 46 in | 16 panels |
| 48 in | 4 in | 44 in | 17 panels |
| 54 in | 3 in | 51 in | 15 panels |
| 60 in | 3 in | 57 in | 13 panels |
| 96 in | 4 in | 92 in | 8 panels |
| Common RV setup | Body size | Full perimeter | Skirt run after gaps |
|---|---|---|---|
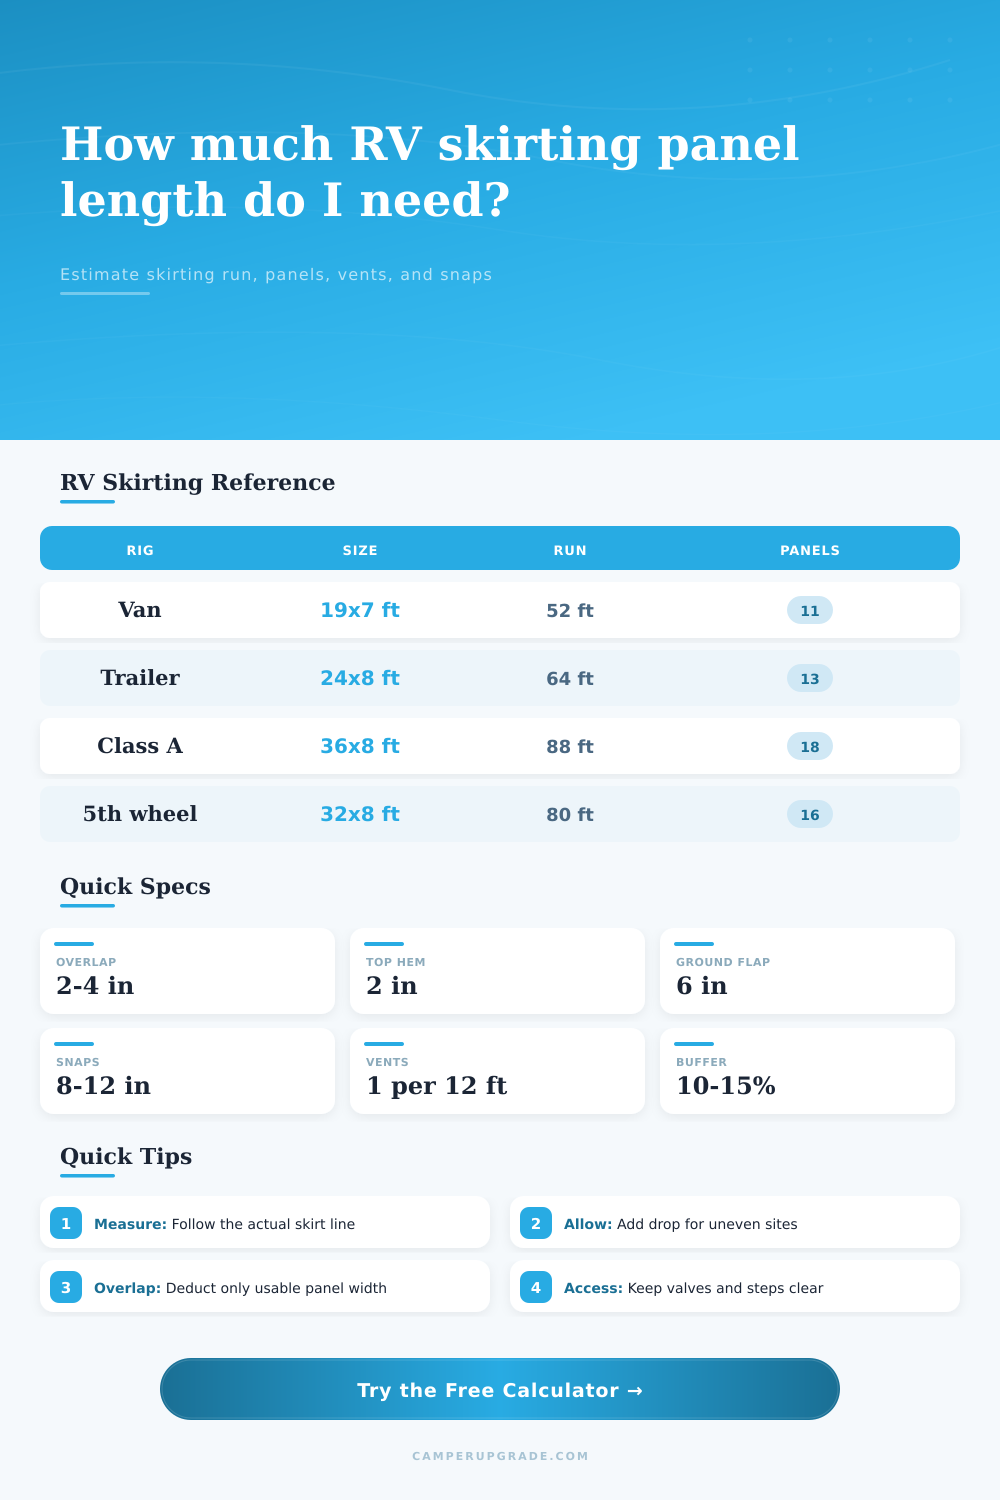
| Class B van | 19 x 7 ft | 52 ft | 44-48 ft |
| Pop-up trailer | 12 x 7 ft | 38 ft | 32-36 ft |
| Travel trailer | 24 x 8 ft | 64 ft | 54-60 ft |
| Fifth-wheel | 32 x 8 ft | 80 ft | 68-76 ft |
| Class A coach | 36 x 8.5 ft | 89 ft | 78-84 ft |
| Fastener spacing | Snaps per 10 ft | Snaps per 60 ft | Best use |
|---|---|---|---|
| 6 in | 21 | 121 | Windy exposed storage lots |
| 8 in | 16 | 91 | Most vinyl RV skirting |
| 10 in | 13 | 73 | Moderate sheltered sites |
| 12 in | 11 | 61 | Light fabric on straight runs |
Panel count: usable width = panel width - seam overlap. Panels = ceiling(order run × 12 ÷ usable width).
Cut height and area: finished height = largest drop + top allowance + ground flap. Material area = order run × finished height, converted to square yards and square meters.
Sealing the space under your RV to the ground is one of the best upgrades you can make to be more comfortabley in the winter. The ground are cold, and your heat system shouldn’t be fighting that battle alone.
It’s not as easy as you’d think… Tire wells and boxes with slides aren’t exactly straightforward. Hems gets sewed shut; panels cut too small can’t magically become large again. This page will do the geometry work for you, which translate to a clear-cut shopping list from a crazy-looking perimeter.
How to Plan Your RV Skirt Project
The largest trap is assuming that the path the fabric has to follow is just the two straight line lengths of the vehicle body. In reality it is messier than that. You can’t just add up a trailer that is 28′ long. You have to account for the bumper, the hitch, and odd angles around the wheels…etc.
When you input the width and length of your body it will tell you how much to get based off the full perimeter of it. But don’t forget to subtract those places where you know it won’t go like openings. Subtract tire wells and step gaps so you aren’t overbuying material or sliding in some return with a slide out (which add back some of that coverage where you lose the most heat). It’s all about the real world run length versus the nominal size of the rig.
There’s also length; that’s where our gut instincts tend to fail. Measuring from ground to the rail sounds good, but what about an uneven camp site? Measure your longest drop: That’s how long your skirt needs to be. It doesn’t matter if you measure from the rail to the ground; if one corner sits higher then the rest, that’s the longest drop the skirt has to cover. Add a couple of inches for a bit of a ground flap to keep wind from slipping underneath the hem. Then your shelter won’t turn into a sail. A six-inch allowance may seem like a lot of wasted fabric, but it is the difference between a skirt that stays put and one that flaps noisely all night.
It also depends on material… You should pick your fabric first because different materials does behave differently. For example, heavier vinyl will hold up to wind better than lighter materials because it is not as floppy. However, it has more stress along the edges, so corners needs wider seams. Polyester fabrics (like the light versions) breathe better and are easier to work with but must be staked down more often or can start to lift out of place.
On the chart below, you’ll see that the number of inches wide each panel can be used determines how many panels you’ll need based on their overlap. Using a wider panel without much overlap reduces the number of seams (less chance to fail). Going narrower gives you more flexibility for curves but creates more seams (more work). It is a tradeoff between durability and ease of installation. Going narrower give you more options to fit curves but creates more seams (more work). Durability vs. Ease of installation is a trade-off.
Ventilation is the quiet killer of any skirting project. Why is there always moisture underneath the floor? Why did my propane valve freeze? People seal it all up snug as a bug and then wonder what happened. Airflow needs space too. Blocking the wind is essential. The tool tells you how long the run should be so you get just enough air circulation to keep things from icing over without compromising the insulation.
It even figures out the fasteners. It reminds you that a good rule of thumb is to put one snap every ten inches along the top edge to hold it secure against the gusts. The last thing you want to do is crawl around in your storage bin in the dark trying to find more stakes because you didn’t think about spacing. You should of thought about it first.
And so the skirt’s not as much about the fabric as it is the plan. Plan ahead and take the time to measure real-world obstacles, then add a cut error buffer. This turns a frustrating chore into a one-and-done project. You save money on propane, maintain the integrity of your plumbing, keep the undercarriage dry, and keep the interior warm. Not only do you have a covered RV, but that process creates a belief in the plan which results in peace of mind come the drop in temperatures. Enjoy the warmth inside and know the cold is exactly where it should be…out there.