Altitude Water Requirement Calculator
Estimate high-elevation water needs for day hikes, summit pushes, overnights, and camper basecamps using altitude, effort, heat, exposure, and carry capacity.
Full formula breakdown
Total liters = ((baseline daily liters × trip hours / 24) × altitude factor) + activity liters + heat/exposure liters + acclimatization liters - meal-fluid credit, then × planning buffer.Baseline is calculated as 35 ml per kg of body weight per day. Activity liters use the selected effort rate per moving hour. Heat, dry wind, snow glare, and recent arrival add planning margin, while food and wet meals can reduce the carried drinking-water amount.
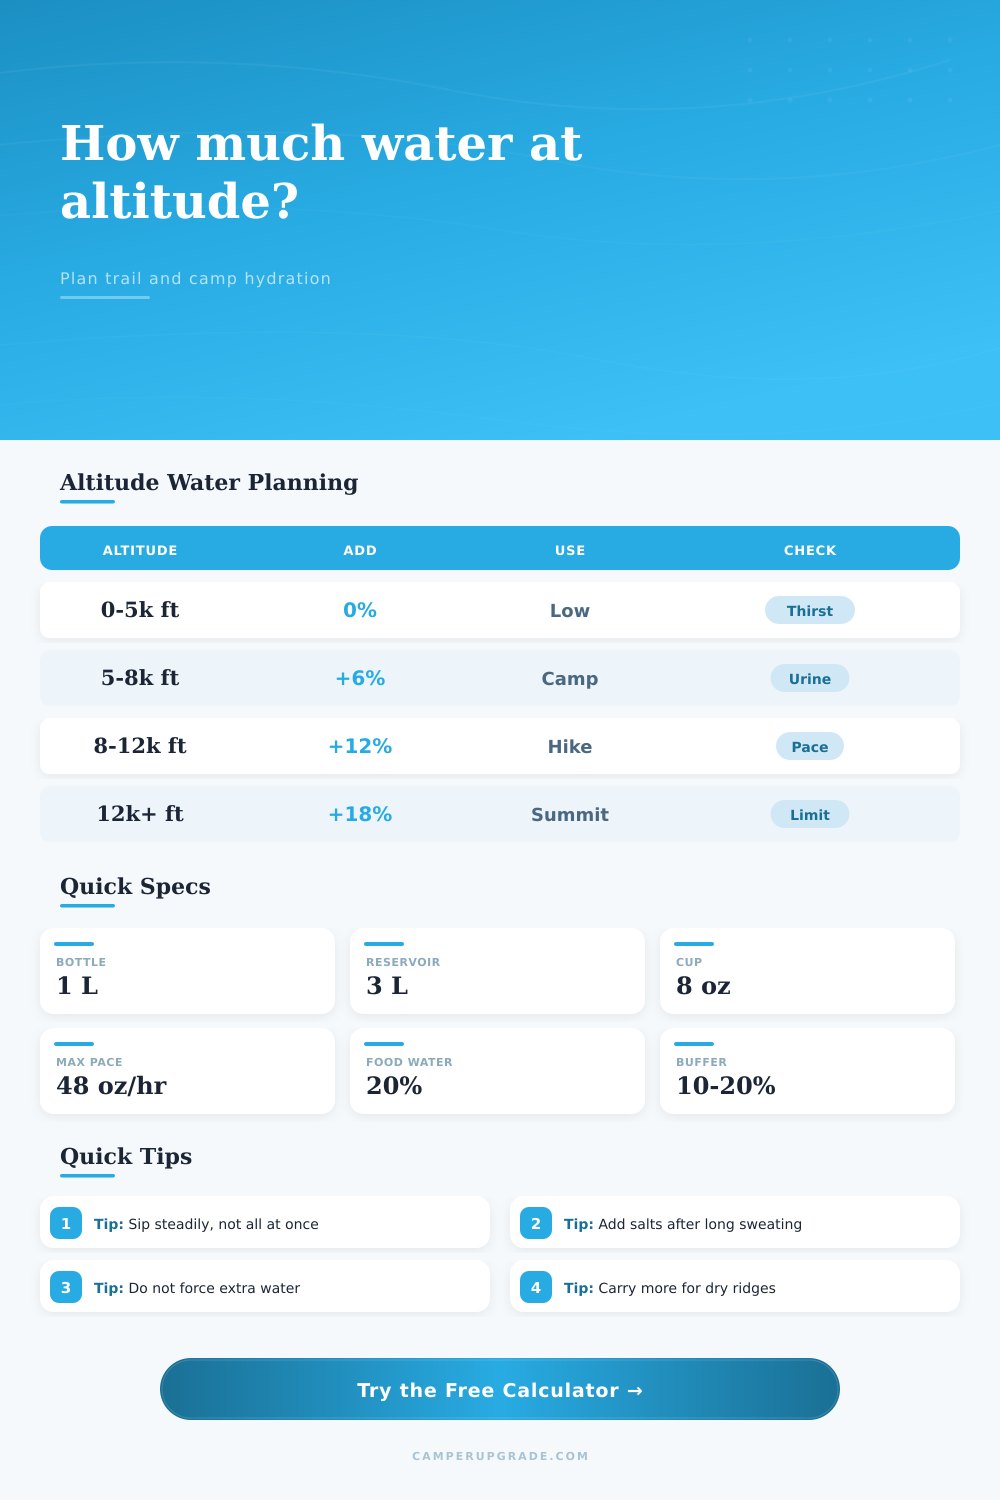
| Altitude band | Planning add-on | Why it matters | Best use |
|---|---|---|---|
| Sea level to 5,000 ft | 0% | Normal camper baseline; heat and effort usually matter more than elevation. | Low trailheads, valley campgrounds, warm approach days. |
| 5,001 to 8,000 ft | 6% | Dry air and quicker breathing begin to increase fluid loss for many visitors. | High desert rims, Sierra road camps, Colorado foothill hikes. |
| 8,001 to 10,000 ft | 10% | Common alpine campsite range where new arrivals often underdrink early. | High trailheads, meadow camps, cool but dry nights. |
| 10,001 to 12,000 ft | 14% | Breathing, sun, and low humidity can make thirst a late signal. | Summit basecamps, passes, hut approaches, exposed basins. |
| 12,001 to 14,000 ft | 18% | Long movement and cold dry air can hide sweat loss while exertion stays high. | Fourteener routes, volcanic rims, high snow approaches. |
| Above 14,000 ft | 22% | Use conservative planning and avoid forcing water beyond thirst and safe hourly limits. | Short summit windows with reliable descent and refill planning. |
| Input choice | Added liters | Calculation detail | Example situation |
|---|---|---|---|
| Camp rest | 0.20 L/hr | Light movement, cooking, short walks around camp. | Basecamp afternoon at 8,500 ft. |
| Easy walk | 0.35 L/hr | Low sweat rate with frequent stops or mild grade. | Lake loop, rim path, nature trail. |
| Moderate hiking | 0.55 L/hr | Steady climbing or moving with a normal day pack. | Alpine pass approach or long campground hike. |
| Hard loaded hiking | 0.75 L/hr | Large pack, fast pace, steep trail, or sustained ascent. | Backpack climb to a dry high camp. |
| Summit push | 0.90 L/hr | Very hard movement; calculator flags high hourly rates. | Pre-dawn climb above treeline. |
| Hot day above 85°F | +12% | Applied to moving-hour fluid before the final buffer. | Desert rim, sunny road walk, exposed overlook. |
| Exposed dry wind | +8% | Applied to moving-hour fluid; snow glare uses +10%. | Open ridge, slickrock, windy alpine basin. |
| Container | Metric volume | US volume | Water weight when full |
|---|---|---|---|
| 500 mL soft flask | 0.5 L | 16.9 fl oz | 1.1 lb / 0.5 kg |
| Standard 20 oz bottle | 0.59 L | 20 fl oz | 1.3 lb / 0.59 kg |
| 750 mL bottle | 0.75 L | 25.4 fl oz | 1.7 lb / 0.75 kg |
| One-liter bottle | 1.0 L | 33.8 fl oz | 2.2 lb / 1.0 kg |
| Two-liter bladder | 2.0 L | 67.6 fl oz | 4.4 lb / 2.0 kg |
| Three-liter reservoir | 3.0 L | 101.4 fl oz | 6.6 lb / 3.0 kg |
| Scenario | Typical altitude | Planning focus | Starting preset logic |
|---|---|---|---|
| High desert rim walk | 6,000–8,000 ft | Sun and dry wind can outrun thirst cues. | Moderate effort, exposed, 10% buffer. |
| Alpine meadow campground | 8,000–9,500 ft | Long camp time plus short hikes across dry air. | Easy effort, mixed exposure, meal credit. |
| Backpack to high camp | 10,000–12,000 ft | Loaded climbing makes carry volume more important. | Hard effort, 15% buffer, electrolyte flag likely. |
| Fourteener summit day | 12,000–14,500 ft | High output, cold dry air, and limited refill options. | Summit effort, exposed, strict hourly review. |
| Snowfield approach | 9,000–13,000 ft | Glare and cold reduce obvious sweat signals. | Moderate to hard effort, snow exposure. |
Halfway up a hot and dry trail that hasn’t seen rain in three weeks, you find yourself in a certain sort of panic: your water is gone. It’s not just about thirst. This comes from the cold math of how far you are above sea level and how many more miles of relentless, thin-air, dry ridges stands between you and next creek.
Because most hikers underestimate this distance: They plan their hike assuming they will walk comfortabley at sea level, yet they’re on a trail hundreds of feet higher than that. Carrying that extra half liter of water, respecting the elevation’s dryness instead of ignoring it because you felt okay, can mean the difference between a pleasant afternoon hike and a miserable scramble home.
Why You Need More Water at High Altitudes
It’s not just about counting bottles. It’s an attempt to calculate how quickly your body will lose water under conditions where sun bakes exposed granite, and your lungs struggle for oxygen. Below eight thousand feet, you can trust your thirst. Above it, thirst becomes a lagging indicator. The water in your bloodstream has already thickened, and yet you feel completely hydrated.
This is where things get tricky: that lag time is deadly. That’s why the calculator uses altitude bands with percentage buffers. Eighteen percent may sound insignificant at lower altitudes, but at twelve thousand feet, it’s the amount needed to transform a bearable pack into one that cause shoulder pain.
In terms of input, how hard do you plan on hiking? Surprisingly, this matters more then many people realize. When I was younger, I thought a “moderate” dayhike sounded cool… Until I realized moderate at 10,000 feet feels like sprinting at sea level.
Your heart rate goes up and you’re taking bigger gasps of air, so you release more water with each breath. Even though you aren’t dripping sweat, you’re still losing water. To account for this, it uses a multiplier based off the number of active hours you put in.
For instance, if you choose a summit push, it figures you’ll be pushing yourself pretty hard cardio-wise. That higher effort causes the calculator to estimate higher amounts of fluid needs because your body has to work overtime to pump oxygen into your blood. It’s a subtle setting adjustment, but it prevents common mistake of underestimating fluid loss during short, intense bursts of activity.
The third variable that changes the reality of the hike is container choice. Three one-liter bottles are heavier than a single three liter reservoir, but they provide more flexibility. If you find a reliable stream, you can refill bottles without dumping half your pack. Or you could bring three liters worth in a single reservoir and carry less weight.
You can choose what size containers you will use and the calculator will then tell you exactly how many you need. That’s your floor. Don’t try to beat that number by bringing fewer bottles because you hope to find water along the way. Streams will go dry even earlier than you think in high alpine environments.
The whole point of the buffer percentage in the tool is for that kind of uncertainty. A 10-20% buffer will cover the detour you didn’t see on the map or the spring that turned out to be a dry ditch. The higher numbers involve electrolytes as well.
In fact, if you drink nothing but plain water for several hours in high altitudes, without replenishing with salts, it’s possible to have low salt levels (even more severe than dehydrated). Depending on how long you’re out there, how much heat you’re exposed to, and what you’re doing, the calculator warns when it thinks you may require salts.
A reminder: Hydration isn’t all about volume. It’s about balance. But it all depends on acclimation. Have you spent the previous couple of nights asleep at low elevation before arriving at altitude? That means your body is already beginning to adjust. Your kidney function shifts. Your breathing has stabilized.
This status can be included in the calculator. Fresh off the valley floor, the system is going to assume that you’ll be more susceptible to altitude sickness symptoms and fluid loss. This is a protective measure. You don’t want to find out your limits on day one. Plan for ‘em.
On the page it also has a reference table breaking out where those changes occur. This table demonstrates that the likelihood of problems is small between five thousand and eight thousand feet but also not zero. Past that point the risk increase dramatically.
Knowing what those bands mean allows you to choose to go direct up to your next destination or camp lower one night to make the trip safer. It’s a time/safety tradeoff. Ultimately, planning for water has nothing to do with optimism. Planning for water has everything to do with being conservative.
Take what the calculator spits out and take it seriously. Trust the math more than your gut. Your gut is going to tell you to skimp on water so you have less weight to haul around. The math is going to tell you to pack enough to get you through the worst case scenario.
You should of planned for the worst. Hope for the best. That’s the only way you’re gonna make it back down, with water to spare and a clear enough head to soak in the scenery.