Backpack Lid Volume Calculator
Estimate top-lid liters, usable packing space, panel fabric area, and recommended lid load from real pack-brain dimensions.
| Profile | Volume formula | Best measured on | Typical accuracy |
|---|---|---|---|
| Tapered rectangular brain | Length x average width x height + dome volume | Floating lids wider at the front edge | Good when both widths are measured |
| Squared box pocket | Length x width x height + dome volume | Simple travel and internal-frame top pockets | Best for straight side walls |
| Rounded oval top lid | Ellipse area x height + crown allowance | Soft, rounded lids with curved zippers | Good if widest length and width are used |
| Low wedge lid | Base footprint x height x 0.72 + crown allowance | Thin lids sloping toward the hiker | Conservative for flat wedge shapes |
| Saddle curved lid | Curved footprint x height x 0.85 + crown allowance | Lids arcing over drawcord collars | Good for soft framed backpack lids |
| Lid category | Typical gross volume | Usable packed volume | Common contents |
|---|---|---|---|
| Rain-shell day lid | 1.0 to 2.5 L | 0.8 to 2.0 L | Shell, beanie, light gloves |
| Overnight top pocket | 2.5 to 4.5 L | 2.0 to 3.7 L | Snacks, headlamp, filter, map |
| Weekend floating lid | 4.5 to 6.5 L | 3.6 to 5.3 L | Layers, hygiene kit, trail essentials |
| Expedition brain | 6.5 to 10.0 L | 5.2 to 8.2 L | Winter gloves, goggles, repair kit |
| Trip style | Lid volume target | Dense load share | Balance note |
|---|---|---|---|
| Fast day hike | Up to 2 L | 5% of pack weight | Keep the lid nearly flat for head clearance. |
| Weekend trail pack | 3 to 5 L | 8% of pack weight | Use the lid for light frequent-access items. |
| Alpine climbing pack | 4 to 7 L | 5% to 8% of pack weight | Low, compact lids reduce helmet contact. |
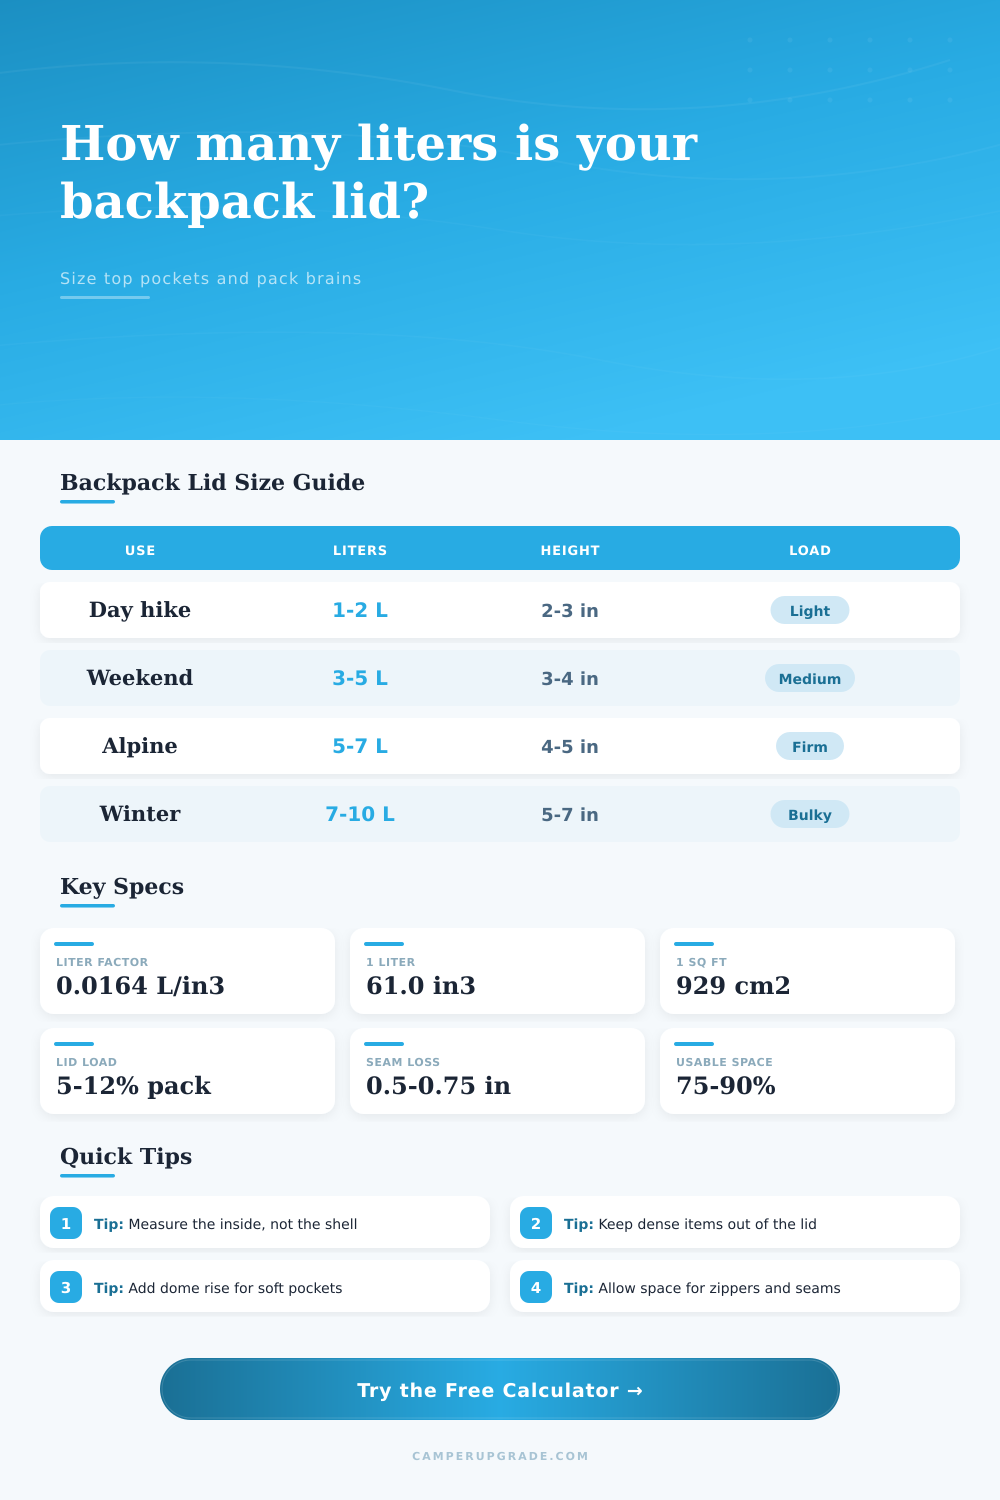
| Winter or expedition pack | 7 to 10 L | 8% to 10% of pack weight | Bulky mitts and layers work better than dense kits. |
| Fabric | Nominal weight | Stiffness | Suggested lid use |
|---|---|---|---|
| 70D ripstop nylon | 1.9 oz/yd² | Soft | Minimal daypack top pockets |
| 210D Robic nylon | 3.9 oz/yd² | Medium | General backpack lid replacement |
| 330D Cordura nylon | 5.0 oz/yd² | Medium firm | Trail lids with abrasion points |
| 500D Cordura nylon | 6.5 oz/yd² | Firm | Travel, alpine, and external-frame lids |
| X-Pac VX21 | 6.0 oz/yd² | Firm laminate | Structured removable lids |
| EPLX200 laminate | 4.3 oz/yd² | Medium laminate | Water-resistant lightweight lids |
| Ultra 200X laminate | 4.8 oz/yd² | Crisp laminate | High strength ultralight top pockets |
| 1000D Cordura nylon | 9.8 oz/yd² | Very firm | Haul-style and rescue pack lids |
The hip belt cut into your hips on a steep section of trail and you know what that means, you overloaded your pack with unnecessary weight. Too often, the culprit are a first-aid kit or other supplies in the top lid. The weight comes close to your shoulder blades and tugs center of gravity forward. Suddenly, balancing along a manageable section of trail become impossible.
Most hikers view the backpack lid as an afterthought. Take a closer look at how full your pack is. Don’t guess by eyeballing it; evaluate actual volume of what’s inside.
How to Pack Your Backpack Correctly
Once you input your measurements, the calculator do all the math for you. No need to remember complex geometric equations for dome shaped bags or tapered wedge shaped bag. It calculates what will fit in the bag physically, but it also calculates what can actually be used. It does this by subtracting space for seam allowance, zipper size, and other internal mesh pocket.
A lot of folks take circumference of the opening of their pack and think they’ve got plenty of room but when you go to put something in there, it won’t fit. The secret is the interior seam to seam measurement. That takes up precious real estate with fabric thickness and stitch lines. They’ll cut 1/2″, 1″ off each side. So a pack that appears to have plenty of room on paper might lose ten percent of its capacity once you account for those lost inches.
Let’s look more at profile shape. While there is tons of packs out there these days with tapered or curved tops meant to hug your body better, I still prefer a square-ish pocket when packing stuff, as that’s a very efficient way to pack volume into a box. However, if you choose one of those tapered bags, you’ll be surprised at how much gear you can fit in there (especially soft things like down jackets and puffies). Because of that curved crown, the tool give you the ability to choose a rise coefficient for that dome, predicting the additional volume that shape adds to your pack size. Without accounting for it, you’re going to grossly under-estimate the amount of space you’ll have for bulky insulating layers.
Weight matter too. On an ultralight thru-hike, that 70D ripstop nylon lid may shave some ounces, but it won’t hold up very well to heavy abrasions and hard rocks in mountain environments. The heavier fabrics such as 500D Cordura will weigh more but give the lid enough structure to help retain shape even when compressed. That means it’ll close better with a fully packed backpack and protect what’s inside it better. This is the tradeoff between immediate weight saving and long term reliability. It all depends on where you intend to hike.
The silent killer in all of this is weight distribution. Hikers want things handy, so many stuff their camera gear and other heavy items in the top lid. It makes sense. Until you remember that everything above you use leverage against your back. Instead, make the lid airy and light (save it for your headlamp, map, and rain layers) and move the heavy stuff down nearer to the back panel.
The chart on the page spells it out nicely: the longer your trip, the more volume you’ll need in the top lid. A winter traveler may need that space for goggles and mittens, but a day hiker won’t. In the end, packing is all about balancing balance, weight, and accessibility. Do you go for the big ol’ lid, which will carry all the gear you could of possibly imagine carrying? Or do you go for something streamlined so you don’t knock your center of gravity out of whack?
The idea isn’t necessarily to fill up every last bit of space, but to make the most of what you’ve got while still allowing movement on the trail. Once you begin to think less about stuff and more about volume and load limits, the pack no longer fight you. Instead, it becomes part of your body. It is a tool that works for you instead of against you. No longer are you thinking about the weight on your shoulders; now you’re able to focus on where the road takes you.