Bell Tent Center Pole Height Calculator
Calculate the standing pole height from bell tent diameter, wall height, roof pitch, cap stack, floor offset, canvas sag, and section overlap.
⛺Named Bell Tent Presets
📏Pole Height Inputs
Calculated Bell Tent Pole Fit
🛠Material / Spec Comparison Grid
📚Named Model Reference Table
| Named tent preset | Floor diameter | Center height used | Wall height used | Best use in calculator |
|---|---|---|---|---|
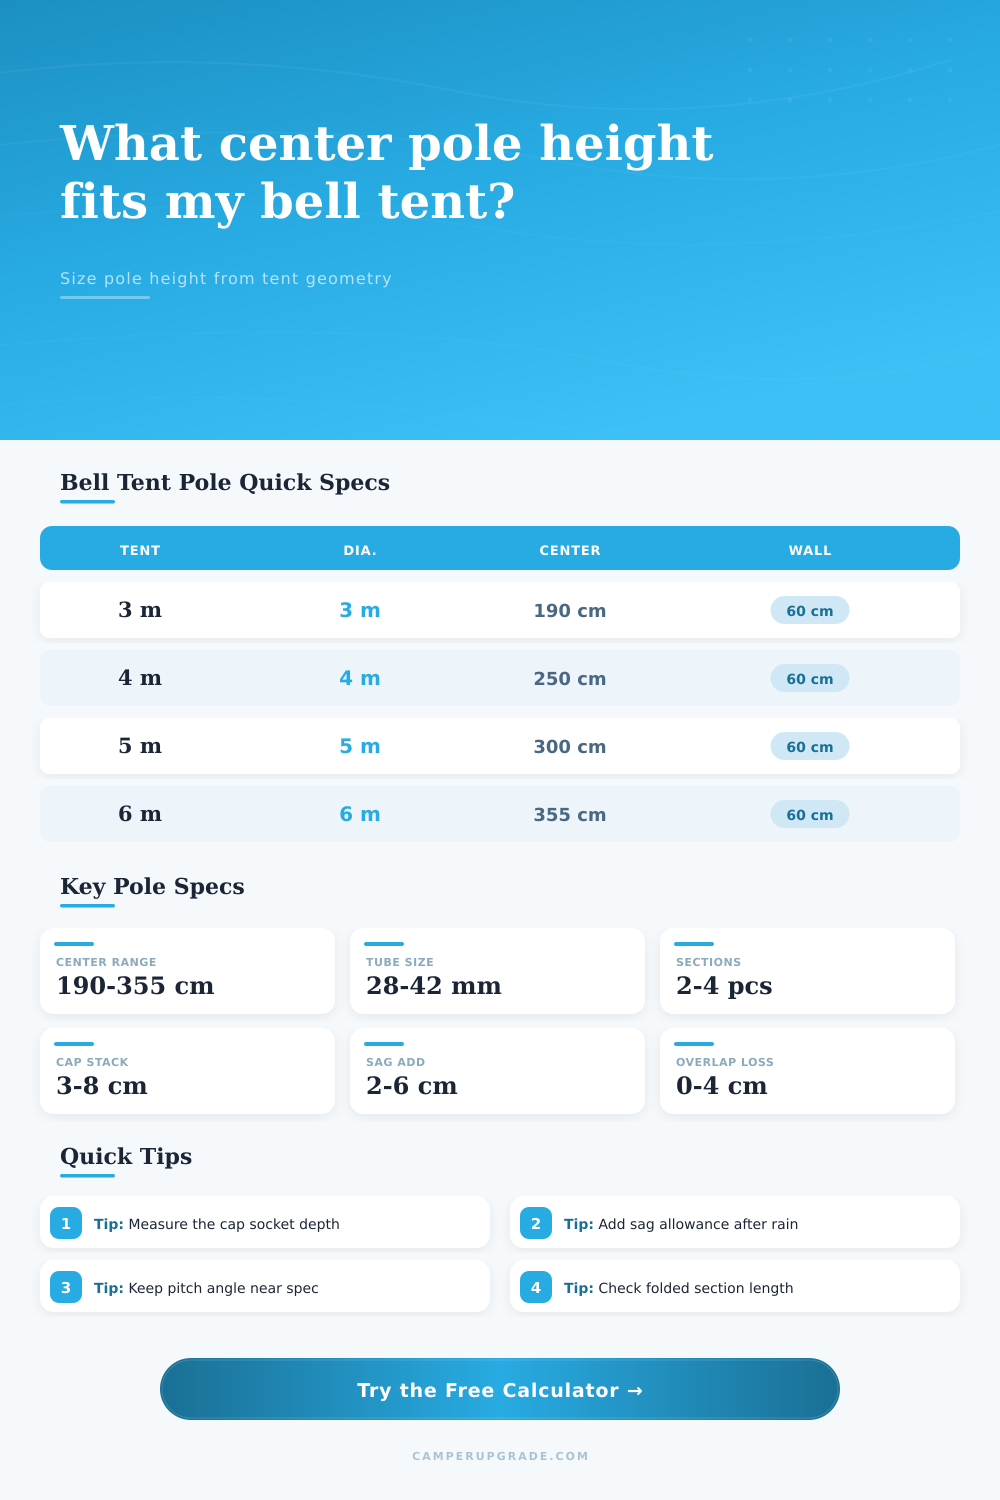
| CanvasCamp Sibley 300 | 3.0 m / 9.8 ft | 190 cm / 6.2 ft | 60 cm / 2.0 ft | Small bell tent replacement pole estimate |
| CanvasCamp Sibley 400 | 4.0 m / 13.1 ft | 250 cm / 8.2 ft | 60 cm / 2.0 ft | Common family bell tent baseline |
| CanvasCamp Sibley 450 | 4.5 m / 14.8 ft | 275 cm / 9.0 ft | 60 cm / 2.0 ft | Mid-size bell with taller peak |
| CanvasCamp Sibley 500 | 5.0 m / 16.4 ft | 300 cm / 9.8 ft | 60 cm / 2.0 ft | Classic 5 m glamping bell tent |
| CanvasCamp Sibley 600 | 6.0 m / 19.7 ft | 355 cm / 11.6 ft | 60 cm / 2.0 ft | Large event or family bell tent |
| White Duck Regatta 13 ft | 13.0 ft / 4.0 m | 8.2 ft / 250 cm | 2.7 ft / 82 cm | Imperial tent spec cross-check |
| White Duck Avalon 16.5 ft | 16.5 ft / 5.0 m | 9.8 ft / 299 cm | 3.0 ft / 91 cm | Taller-wall bell tent estimate |
| Life inTents 10 ft | 9.7 ft / 2.95 m | 6.3 ft / 193 cm | 2.0 ft / 61 cm | Compact canvas bell pole sizing |
| Life inTents 16.5 ft | 16.4 ft / 5.0 m | 9.7 ft / 295 cm | 2.6 ft / 79 cm | Large canvas bell pole sizing |
△Roof Geometry Reference Table
| Diameter | Pitch angle | Roof rise above wall | Panel slope length | Geometry note |
|---|---|---|---|---|
| 3 m / 9.8 ft | 41° | 130 cm / 51 in | 199 cm / 78 in | Matches many 190 cm compact center heights with 60 cm walls |
| 4 m / 13.1 ft | 43.5° | 190 cm / 75 in | 276 cm / 109 in | Typical 250 cm center height with low sidewalls |
| 5 m / 16.4 ft | 43.8° | 240 cm / 94 in | 347 cm / 137 in | Typical 300 cm center height with low sidewalls |
| 6 m / 19.7 ft | 44.3° | 295 cm / 116 in | 421 cm / 166 in | Large bell tents often need stronger center poles |
| 5 m / 16.4 ft | 38° | 195 cm / 77 in | 318 cm / 125 in | Lower roof; verify door clearance before cutting |
| 5 m / 16.4 ft | 50° | 298 cm / 117 in | 389 cm / 153 in | Steep roof; tension loads rise quickly |
🔧Pole Material Comparison Table
| Material | Typical diameter | Strength behavior | Field adjustment | Best fit scenario |
|---|---|---|---|---|
| Galvanized steel tube | 32-42 mm | High stiffness and good compression capacity | Cut with tube cutter or hacksaw; deburr before use | Large 4-6 m canvas bell tents |
| Aluminum alloy tube | 28-38 mm | Lighter but needs adequate wall thickness | Easy to trim; protect ends from splitting | Travel setups where packed weight matters |
| Ash or beech wood pole | 35-50 mm | Good compression feel with natural flex | Trim slowly; seal the cut end | Traditional canvas bell tent interiors |
| Laminated bamboo pole | 35-55 mm | Strong for weight when straight and dry | Use capped ends to prevent splitting | Decorative or semi-permanent camp setups |
| Carbon composite tube | 28-36 mm | Very stiff but sensitive to point damage | Cut with fine abrasive blade and mask dust | Lightweight specialist replacements |
📦Section Length Planning Table
| Finished pole height | 2 sections | 3 sections | 4 sections | Packing note |
|---|---|---|---|---|
| 190 cm / 75 in | 95 cm each | 63 cm each | 48 cm each | Compact bell tent; easy car storage |
| 250 cm / 98 in | 125 cm each | 83 cm each | 63 cm each | Common family tent pole split |
| 300 cm / 118 in | 150 cm each | 100 cm each | 75 cm each | Check vehicle cargo width before choosing sections |
| 355 cm / 140 in | 178 cm each | 118 cm each | 89 cm each | Large tents benefit from ferrules or sleeves |
| Custom cut | Height / 2 | Height / 3 | Height / 4 | Add overlap loss before dividing section blanks |
📝Formula Breakdown Reference
| Calculator step | Formula | Input source | Why it matters |
|---|---|---|---|
| Radius | Diameter / 2 | Floor diameter | Bell tent roofs slope from the center pole to the circular wall seam. |
| Roof rise | Radius x tan(pitch) | Pitch angle | Calculates the vertical roof rise when no published center height is available. |
| Target center | Wall height + roof rise | Wall plus geometry | Represents the inside center height before pole hardware allowances. |
| Finished pole | Target + cap + floor + sag + guy - overlap | Hardware and pitch inputs | Converts tent geometry into the standing replacement pole length. |
💡Bell Tent Pole Tips
With a bell tent, there’s only one piece of vertical spine, the center pole. The problem with that? One inch too tall and your roof is popping up any time wind blows; one inch too short and your middle is sagging like a saggy thing. You don’t want to be pounding spikes into solid ground and you also don’t want a tent that keeps trying to pop-up each time puff of wind hits.
The height affect more than just looks; if it isn’t right, puddles will collect on the canvas during heavy rain or water won’t wash off properly. It’s a bit easier said then done; eyeballing this can result in some wonky triangulation, but the math is actualy quite simple.
How to Choose the Right Tent Pole Length
First, establish base (a.k.a., what you’re standing on). This are defined by the sidewall height and diameter of the floor. Next, extend the pitch angle, which dictates how high the roof ascends until reaching the pole located in middle of tent. A higher pitch require a longer pole and tighter guy lines; however, it sheds water better and is steeper. Conversely, a lower pitch are easier to carry but puts you at risk of rainwater pooling as canvas stretches/sags with age.
Enter your tent’s unique dimensions into the calculator above and let it do all the math for you. But that is only part of it. Before you buy any amount of metal, you need to add up hardware stack. What are you putting at the top? And even more important, what are you putting at the bottom of the pole?
If you’re using most bells, you’ll have some sort of spike socket or mushroom cap at the crown. These takes up some of length within their cups so your visible height is less than the total tube length. Then you may have a rubber foot on the bottom that will compress under weight. Or, you may simply sink into the soft sand and pole goes below ground level. People often ignore these small allowances until they get a pole that looks great on paper but fall short in reality.
The length also makes you consider the material. Steel tubes is rigid and don’t bend very far. They maintains their stiffness to hold up to wind load. Aluminum is lightweight for transport, but thinner aluminum walls will flex and reduce your effective taut height. Wood poles have an old-school appearance and offer a bit more shock absorption. However, you should of be cautious when trimming because you can’t resize them after cutting.
The chart on the page has the most common size sections and diameters so you can get a starting point for what will fit in the back of your pack/boot and not catch the door jamb.
Remember: A canvas shelter is also a breathing material. When wet, new canvas will shrink and then expand back out as it dries. The result? Your perfect pole length depend on the weather. If you’re camping in a rainy climate, it’s smart to build in some slight slack so that the roof remains tight even after getting soaked. On the flip side, if you’re pitching on dry desert sand, you may prefer the added inch or two for maximum headspace protection (rather than having the summit dip down too far).
Another sneaky variable is section overlap. The telescopic sections loses some length where they glide into each other and lock. When having custom cut tubes made, make sure to account for this when figuring out final desired pole length. For example, if each joint takes away 2cm, on a three section pole it quickly becomes a lot of lost centimeters. To get an accurate measurement, start from the middle of the locking mechanism.
When you’re finally ready to pitch the tent, take note of how the guylines connect from the top down to each stake point. They need to be taut (but not stress-strain your seams). Is it loose in the middle? Did you calculate wrong for the cap stack? Is it too short of a pole? Is the tent trying to bow outward? Maybe you’ve guessed wrong about wind resistance or you over-compensated on height. You can tweak these variables with experience. However, knowing what the pieces do will help you troubleshoot without being out there in the rain with a sopping wet floor.
The bottom line is that a well-fitted pole turns a flimsy shelter into a secure room. If it is straight as a board, water drains off easy. Your head also stays out of the canvas over top. And you achieve that when you respect its geometry and include the hardware that hides it in plain sight. Measure twice, cut once, and let the center hold the sky where it belongs.