Lashing Cordage Length Calculator
Estimate rope or cord for camp furniture, tarp frames, tripods, shelter poles, and bundle lashings.
Camp Lashing Presets
Lashing Inputs
Reference Tables
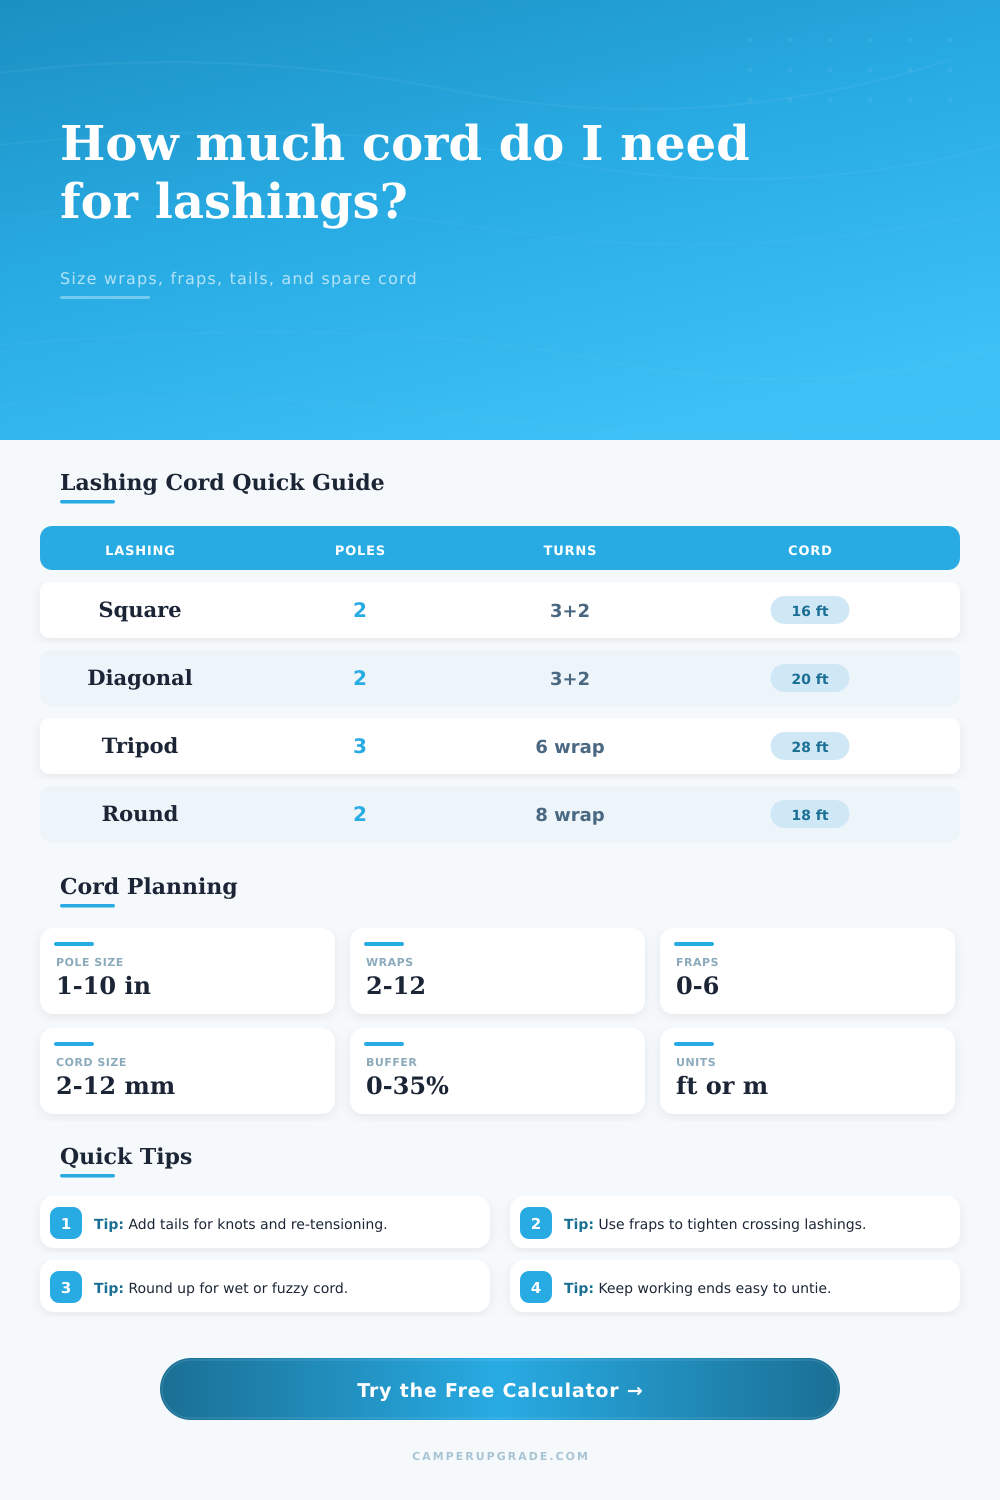
| Lashing type | Typical use | Starting turns | Path factor | Field note |
|---|---|---|---|---|
| Square lashing | Right-angle pole joints | 3 wraps + 2 fraps | 1.00x | Good for table legs, frames, and rails. |
| Diagonal lashing | Loose cross braces | 3 diagonal pairs + 2 fraps | 1.18x | Uses more cord because turns cross both diagonals. |
| Round lashing | Parallel pole extension | 7 to 10 wraps | 0.92x | Usually no fraps; use two lashings for long splices. |
| Shear lashing | A-frame or bipod legs | 6 to 8 wraps + 1 frap | 1.10x | Leave room for the legs to open after tying. |
| Tripod lashing | Cooking tripod and signal tower | 6 to 8 wraps + 2 fraps | 1.35x | Wrap all three poles, then frap between pole gaps. |
| Continuous lashing | Ladder rungs and decking | 2 to 4 turns per bay | 0.85x | Crossing count should match the number of bays. |
| Pole diameter | Square 3+2 | Diagonal 3+2 | Tripod 6+2 | Round 8 wrap |
|---|---|---|---|---|
| 1 in / 2.5 cm | 5 to 7 ft | 7 to 9 ft | 9 to 12 ft | 8 to 10 ft |
| 2 in / 5 cm | 9 to 12 ft | 11 to 15 ft | 16 to 21 ft | 13 to 17 ft |
| 3 in / 7.5 cm | 13 to 17 ft | 16 to 21 ft | 23 to 30 ft | 19 to 25 ft |
| 4 in / 10 cm | 17 to 23 ft | 21 to 28 ft | 31 to 40 ft | 25 to 33 ft |
| 6 in / 15 cm | 26 to 34 ft | 32 to 42 ft | 46 to 60 ft | 38 to 50 ft |
| Cord size | Best use | Approx strength class | Handling note | Calculator input |
|---|---|---|---|---|
| 2 to 3 mm | Models, light tying, tarp sticks | Light utility only | Hard on hands under tension | 2.5 mm |
| 4 mm | Small camp gadgets | Light to medium | Good for learning lashings | 4 mm |
| 5 to 6 mm | Most scout and camp furniture | Medium utility | Easy to frap and untie | 6 mm |
| 8 mm | Heavy poles and repeated use | Medium-heavy | Bulky but comfortable | 8 mm |
| 10 to 12 mm | Large tripod or gateway poles | Heavy utility | Needs longer tails and knots | 10 mm |
| Project | Typical lashings | Average pole size | Starting cord | Planning note |
|---|---|---|---|---|
| Cooking tripod | 1 tripod | 2 to 3 in | 22 to 32 ft | Add heat-safe clearance from the cooking chain. |
| Camp table frame | 8 square | 1.5 to 2.5 in | 90 to 140 ft | Cut each corner separately for easier tightening. |
| Simple ladder | 8 to 12 continuous bays | 1.5 to 2 in | 80 to 150 ft | Use equal rung spacing before final tightening. |
| Tarp ridge support | 2 shear + 2 square | 2 in | 55 to 85 ft | Keep spare cord for guyline tie-offs. |
| Pole raft bundle | 4 round | 3 to 4 in | 85 to 140 ft | Wet natural fiber stretches; re-tighten after launch. |
The dreaded bushcraft situation: You’ve got your poles laid out, ready for a camp table, and then look at the rope, you’ve realized you only brought thirty feet of cord. You’ve got four poles, three rails and the confidence to get started, but no rope to complete it. That’s the classic bushcraft trap. Too many people just estimate their cordage needs based off what they think they need or what’s leftover from last summer. They grab the biggest spool they can find, hoping there is still some left over.
With the calculator above, all you do is enter how long each of your poles is and how many joints, and let the calculator do the work. You won’t run out of material halfway through wrapping the final pole, and it makes your trip to the store a solid plan instead of a wild guess.
How to Choose the Right Rope
It’s typically not the type of knot as much as the circumference of what you’re trying to tie that varies. For instance, you’ll use far more cord tying a square lashing on two-inch poles then you will on half-inch dowels, since each wrap covers much greater distance. This is why the tool allows you to enter diameters; it adjusts accordingly so that its estimation reflect your hardware size. It also takes into account fraps, those cinched-down wraps that secure primary ones. What many tend to overlook is that fraps don’t get wrapped around the poles; they get wrapped over the existing cordage. So again, you need to add length there and it adds up fast over several joint.
What about the material? That determines the feel of the rope and how tight it gets. Traditional materials (sisal and manila) is somewhat fuzzy, which helps them grip well and prevents them from loosening due to rubbing when tightened. Moddern synthetics such as paracord or nylon are smooth and strong but must be pulled down super-tight each time (so watch out for the slippage!). A handy guide table on the page links rope sizes with handling notes. This can help you determine whether 4mm will saw at your hands after a hard tug or if 8mm will be just too chunky to comfortabley hold. For anything big (like a shelter frame), you’re looking for something that combines strength while still remaining comfortable.
Because there’s a third pole, not two, ropes want to eat a tripod lashing: the route has more twists and turns and it’s longer. Plan well so that when you begin the ties you have all three legs matching in height, but a little wiggle room in case one post is shorter than another. Cut a bit long and nothing rise. That’s why we include a buffer %, a little more rope in case you miscount or need to adjust for crooked posts. And then there’s the issue of wetness; rope stretches if wet from dew or rain. Fifteen% additional rope length for wet weather is insurance against this, no waste on dry days.
If you’re tying a ladder or decking that gets continually lashed in and out from one rung to another, there are other considerations. Because the cord will be moving back and forth many times along the same stretch of material, it’s not necessarily a matter of how strong a single joint is. Rather, it depends on how many bay you have and whether they’ll be subjected to an even tension load or whether some parts will carry heavier loads then others. In this case, make sure you have good spacing beforehand and then tighten up one bay at a time… I.e., don’t cut off too much slack so that you can still reach down to every bay and adjust as necessary. Precise cuts in advance save the headache of searching for a few feet of tail later on.
Don’t scrimp on tails When tying your lashings with a square knot or a clove hitch, leave yourself enough slack so that it’s easy to tighten again (or even loosen slightly) should any of the wood settle or shift while in use. Two feet or more will do the trick. And this excess helps with clean-up time too. When breaking down camp, those long tails come in handy.
It’s a geometry thing. And it’s a rope-respect thing. The more you understand what length of rope will be necessary, the less you’ll worry about running out or carrying extra weight in your pack. Your objective is to construct something solid but without too many leftovers. Don’t find yourself out of luck when darkness sets in. You should of done some prep work.