Iodine Dose by Water Temperature Calculator
Estimate 2% tincture drops, tablet equivalents, container batches, and cold-water contact time for camp water treatment planning.
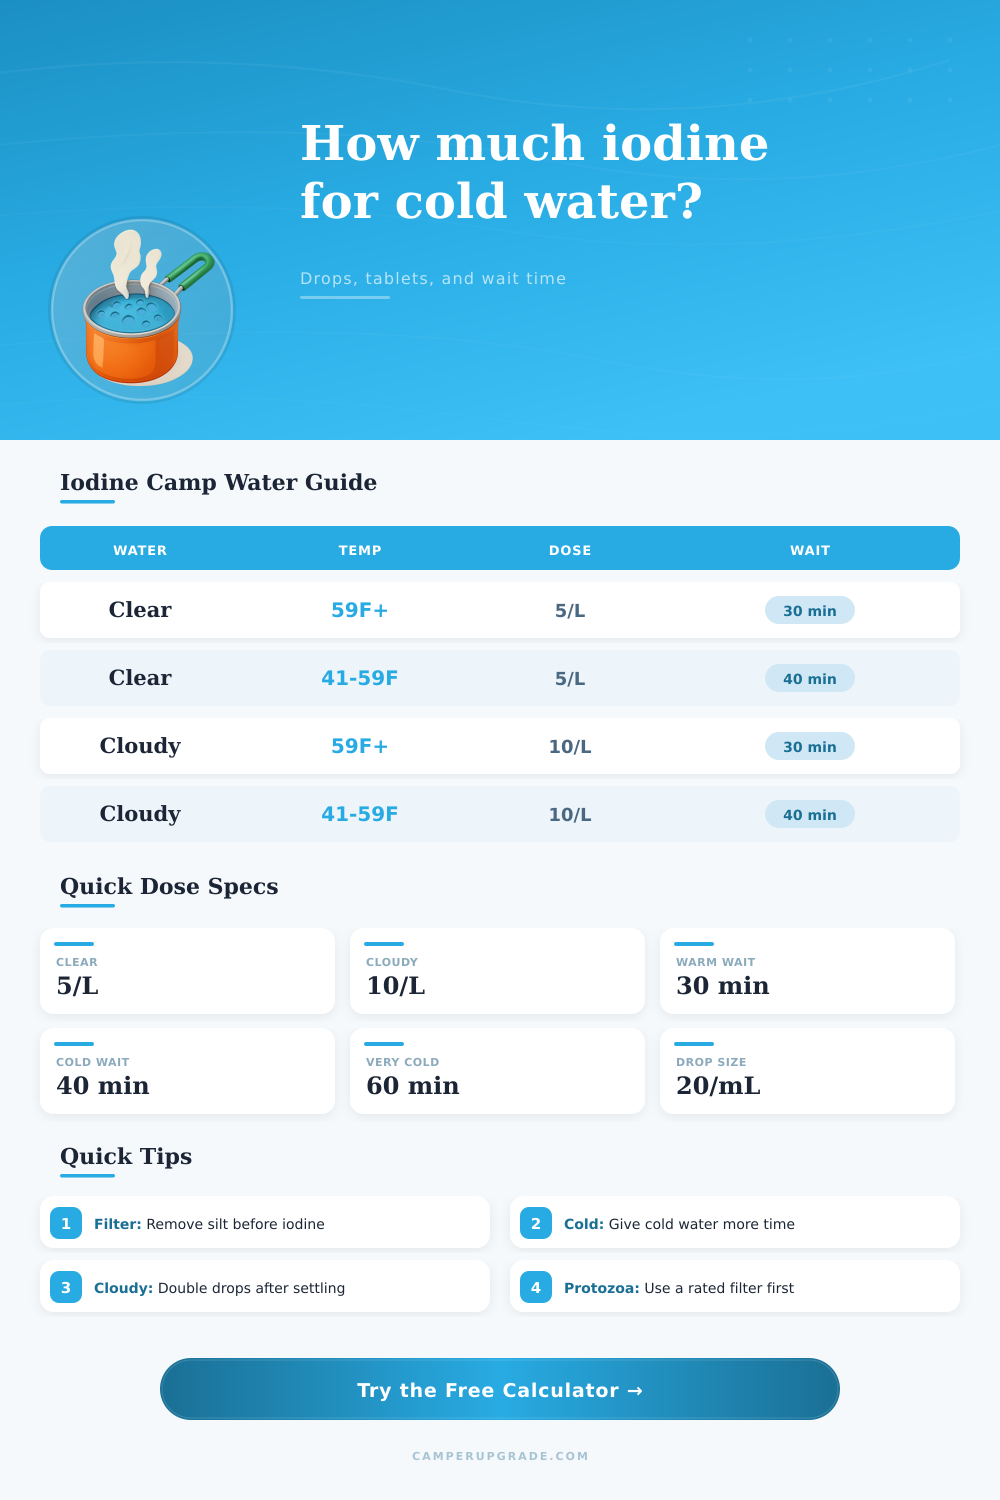
| Water temperature | Clear water dose | Cloudy water dose | Minimum contact time |
|---|---|---|---|
| Warm, above 59°F / 15°C | 5 drops 2% iodine per L or qt | 10 drops per L or qt | 30 minutes after mixing |
| Cold, 41-59°F / 5-15°C | 5 drops per L or qt | 10 drops per L or qt | 40 minutes after mixing |
| Very cold, 33-40°F / 1-4°C | 5 drops per L or qt | 10 drops per L or qt | 60 minutes; warm bottle if possible |
| Slushy or partly frozen | Treat only liquid water | Prefilter, settle, then treat | 90 minutes planning margin |
| Iodine type | Calculator basis | Best field use | Important limit |
|---|---|---|---|
| 2% tincture iodine | 5 drops per L clear; 10 cloudy | Emergency or backup bottle dosing | Strong taste; not for routine long-term use |
| 1% iodine drops | Double 2% drop count estimate | Only when label supports water use | Drop size varies by bottle |
| 7% iodine drops | Scaled down from 2% by iodine content | Only if label directions allow | Easy to overdose; measure carefully |
| Quart tablets | 1 tablet per quart before multipliers | Simple bottle-by-bottle treatment | Follow package contact time |
| Liter tablets | 1 tablet per liter before multipliers | Metric bottles and hydration bladders | Old tablets can lose reliability |
| Custom mg tablets | Compares tablet iodine to target mg | Planning nonstandard kits | Not a substitute for label directions |
| Container | Approx volume | Clear 2% drops | Cloudy 2% drops |
|---|---|---|---|
| Small trail bottle | 0.5 L / 0.53 qt | 3 drops | 5 drops |
| Standard bottle | 1.0 L / 1.06 qt | 5 drops | 10 drops |
| Hydration bladder | 2.0 L / 2.11 qt | 10 drops | 20 drops |
| Camp pot | 3.0 L / 3.17 qt | 15 drops | 30 drops |
| RV jug | 1 gal / 3.79 L | 19 drops | 38 drops |
| Group can | 5 gal / 18.9 L | 95 drops | 189 drops |
| Condition | Calculator multiplier | Field action | Reliability note |
|---|---|---|---|
| Clear | 1.00x dose | Treat directly if source is not chemical-risk | Best case for iodine |
| Slightly tinted | 1.25x dose | Filter if practical, then mix well | Useful buffer for tea-colored water |
| Cloudy or colored | 2.00x dose | Settle and prefilter before iodine | Matches common double-dose guidance |
| Very turbid | 2.50x planning dose | Do not rely on iodine alone | Use filter, boiling, or safer source |
| Protozoa concern | Time warning added | Use a rated cyst filter first | Iodine is weak for Giardia and Crypto |
Here’s the scene: You’re at a creek in the backcountry, and it appear safe to drink. The water’s clear, enough to spot bottom rocks. It’s cold, meaning it is full of mountain snow melt. You know you should use your iodine tincture to play it safe, but what dose? You’ve got bottle in hand. The directions say to put drops according to volume, but no one explains that temperature change how fast those drops work.
That’s why we created this calculator: to fill the space between straight-forward dosing directions and real-world conditions that never match textbook. So what’s going on? It all comes back to chemistry and the physics of a plastic bottle. Viruses and bacteria is killed when iodine breaks apart structure inside them. However, rate of reaction decreases a lot as water cools. Fewer molecules will collide with pathogens, and they’ll do it at a slower pace. In other words, pour iodine into freezing water like you would warm tap water and you might be drinking semi-treated water. That is not exactly a bet any camper should make.
Why Cold Water Needs More Iodine
Enter the volume, estimate the temp and let the tool up top do the math for you. Let’s just get dinner started instead of fussing over contact time. We all know we’re supposed to wait at least half an hour for disinfectant to work, but not everyone knows that you have to start over if the water is cloudy or cold. Temperature isn’t everything; cloudiness (suspended particles) also plays a role by preventing microbes from contacting the iodine. Essentialy you’re building microscopic fortresses where germs can protect themselves from chemical attack. For cloudy water, most people are told to add twice the dosage, but with this calculator, you can actualy see how many extra drops that is for whatever size bottle you use. Suddenly, instead of ten drops, you may be adding twenty. That sounds like a lot, but those drops only cost pennies and will still taste worse then Giardia.
The second misperception I find among people is that they don’t understand capabilities of iodine. Iodine is great at killing bacteria and viruses, but horrible at killing protozoa such as Giardia or Crypto (Cryptosporidium). Because those cysts are protected by a thick wall, they can withstand any amount of chemical disinfectant, short of a very high dose or a really long contact time. A better bet if you’re hiking in regions prone to parasitic cysts is to physically filter them out. Then, add iodine as an insurance policy just for good measure since it works well against both virus and bacteria. That way you can rely on two different method instead of assuming that either will work flawlessly by itself.
The calculator includes pre-sets to cover some typical scenarios where you may be exposed to creek or snowmelt water, so you don’t have to assume which pathogens you’re fighting. Another common source of confusion in the wilderness pharmacy aisle is deciding on product strength. Two percent tincture is standard fare in most first aid kits. But then there’s people who grab generic iodine supplements or tablets that are labeled for different volumes. If he use one percent instead of seven, it all adds up. Too strong and the stuff is undrinkable (that medicinal aftertaste will ruin even your thirstiest sleep). Too weak and the treatment is useless. A little goes a long way. And this time around, you don’t need much more than enough to knock out the threats. Just enough iodine so that you can drink your water down without imagining yourself walking through halls of an old hospital.
Planning your batch size help avoid fumbling with droppers in the dark or rain. While it’s annoying to treat only a liter at a time if you’ve got group to feed, treating ten liters at a single go also raises the possibility of sloshing expensive disinfectant onto your clothing. If you use more conventional containers such as half-gallon or two-liter jugs, you’ll find the process goes easier and there’s less fiddling with droppers in the rain or dark. Pre-measuring drops into smaller bottles (or using tablets that dissolve uniformly) minimizes errors in the field. As the reference tables shows, breaking down common containers allows you to skip performing mental math while clutching an increasingly-slippery bottle.
Precision isn’t as important as patience when it comes to cold water treatment. Tossing the treated bottle into your sleeping bag pocket will keep the water warm through the night (for a morning pick-me-up) and increase its temp just enough to speed up the reaction. It’s an easy way to solve two issues with one solution if you plan ahead. At the end of the day, safe water is less about remembering each and every coefficient in the handbook and more about knowing how to apply a bit of basic science with a few practical habits. Once you know the “why” behind the weather-dependent wait-time, you’ll no longer be guessing and can treat with confidence. That creek water you thought was safe to drink because it looked clear actually has a proven safety margin rather than just being a guess.