Ski Crampon Width Calculator
Match touring ski waist, crampon size, binding play, sidecut clearance, and firm-snow terrain so your crampons bite cleanly without excess drag.
Calculation breakdown
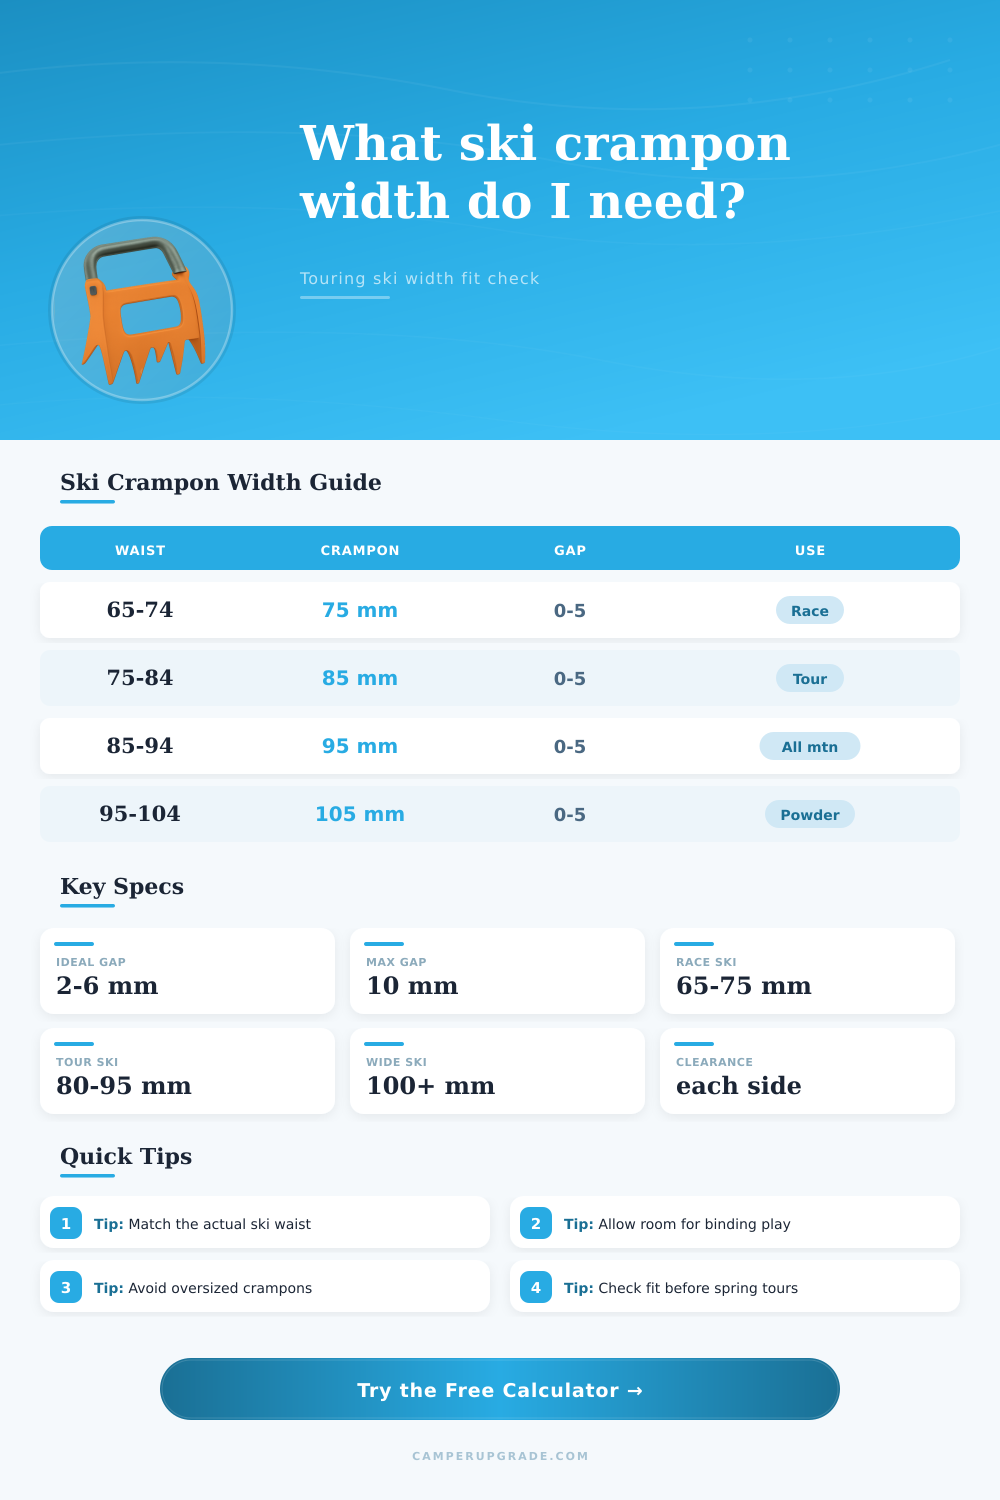
| Marked width | Best ski waist range | Typical clearance | Common use |
|---|---|---|---|
| 70–75 mm | 60–72 mm | 1.5–7.5 mm each side | Race and narrow mountaineering skis |
| 80–85 mm | 73–82 mm | 1.5–6 mm each side | Fast spring touring skis |
| 90–95 mm | 83–92 mm | 1.5–6 mm each side | Classic touring and volcano skis |
| 100–105 mm | 93–102 mm | 1.5–6 mm each side | All-mountain touring skis |
| 110–115 mm | 103–112 mm | 1.5–6 mm each side | Freeride and powder touring skis |
| 120–130 mm | 113–127 mm | 1.5–8.5 mm each side | Very wide powder skis and splitboard ski halves |
| Condition | Clearance target | Width strategy | Reason |
|---|---|---|---|
| Refrozen skin track | 2–4 mm each side | Choose the closest clearing size | Precise teeth placement gives better bite on hard snow. |
| Long firm sidehill | 2–5 mm each side | Avoid oversized models | Wide arms can scrape or lever on the uphill edge. |
| Mixed crust and soft patches | 3–7 mm each side | Balanced standard width | A little room helps when snow builds underfoot. |
| Spring corn laps | 3–8 mm each side | Normal or one-size-up fit | Softer surfaces tolerate more side clearance. |
| Shared group gear | 5–10 mm each side | Use only when drag is acceptable | Extra width fits more skis but feels clumsier. |
| Spec type | Fit behavior | Width caution | Best calculator input |
|---|---|---|---|
| Pin tech touring slot | Usually centered with minimal slop | Small offset allowance is enough | 0.5–2 mm binding play |
| Hybrid frame interface | Can sit higher or slightly off center | Add room for adapter movement | 2–4 mm binding play |
| Race toe mount | Very direct and narrow | Do not oversize for steep firm tracks | 0–1 mm binding play |
| Splitboard bracket | Often needs extra width tolerance | Confirm actual ski-mode half width | 3–6 mm binding play |
| Aluminum alloy arms | Light and common for touring | Can bend if forced too narrow | Use exact waist plus clearance |
| Steel teeth or steel body | Durable and bite-focused | Weight and drag matter more | Keep fit tighter when possible |
| Setup | Ski waist | Likely crampon | Fit note |
|---|---|---|---|
| Skimo race setup | 65 mm | 70 or 75 mm | Tight, fast, low drag on firm race tracks. |
| Light spring touring ski | 78 mm | 85 mm | Enough room for crust without sloppy width. |
| Classic volcano ski | 88 mm | 95 mm | Common match for firm morning approaches. |
| Daily touring ski | 95 mm | 100 or 105 mm | Choose by actual binding play and sidecut. |
| Freeride touring ski | 102 mm | 110 mm | Better clearance than a forced 105 mm fit. |
| Powder touring ski | 112 mm | 115 or 120 mm | Use the smaller clearing option for sidehills. |
| Splitboard ski half | 130 mm | 135 mm | Measure the half in ski mode before choosing. |
It’s a Tuesday morning in late March and you’re standing at the bottom of steep approach. It’s snowed overnight and stuff is firm enough to bounce a basketball off, but still soft enough to give way beneath you if you slip. You clip in your crampons and begin walking. Immediately, you notice that familiar pull. Your boots twists just a bit with each step, and because the attachment point isn’t quite lined up with ski edge, it’s scraping across one side.
That annoyance stems from purchasing gear by a single number and not understanding relationship among terrain, width, and binding shape. The calculator above does all that math for you when you plug in your waist size and binding play; no more guesswork on conversions and coefficients. But it’s knowing the “why” behind those numbers that will make the difference between a frustrating ascent and a smooth one.
Why Crampon Fit Matters
In most skier’s minds, crampon fit is a straight forward width issue; get a crampon that matches the width of your ski. If you have an eighty-eight-millimeter ski, get a ninety-five-millimeter crampon. Sounds good, except that there is physical width to the slot where you insert your toe piece when you mount binding. When you engage your heel risers on steeper terrain, they lifts your boots up and back, which moves the center of rotation for the crampon arm. Unless you factor in that left/right change, teeth dig into the side wall rather than biting down into the crust.
The secret is knowing what measurement really represents, which is primarily what I’m talking about here. You’re measuring how much room the metal arm has to move before it bumps into something made off plastic or wood. So there you have it: A tool that forces you to think about what you’re putting into it, specifically the binding interface type.
Because pin tech slots are precise and narrow they don’t really give any margin for error. The tighter the better, as crampons stays centered. Bindings with hybrid frames has more play, especially if you’ve packed out the snow underneath your feet on a lengthy tour. The toe piece will also rock back and forth inside binding slot slightly. That increased movement require increased clearance on both sides of the ski.
So that’s why you want some wiggle room there, so when the binding moves inward the arm doesn’t rub against the ski. It might only be a millimeter, but that’s all it takes to go from a perfect bite to an annoying rub.
Is it loose or tight? Drag matters: Some terrain tolerates more; some doesn’t. You’ll want precise placement of teeth directly below your toe and heel for best grip on hard snow, as on a refrozen skin track. A crampon that’s oversized will spread the teeth further apart, sacrificing bite efficiency. The table at right (on the page) spells it out, pairing conditions with desired clearance. Use tight fits for hard snow. Spring corn is more forgiving; allow a bit more gap, since the softer snow yields and wraps around equipment instead of fighting it.
Shared group gear demands compromises. You may opt to share a larger size among several skiers but pay price in increased edge drag when climbing firm sidehills. Material selection matters here too. Touring is generally done on alu for its lightness and steel for its durability. Forcing alu too thin and narrow against a wider ski will see it bend out of shape. It should of been more careful with material choice. Hiking longer? The weight matter compared to how much extra grip you get from a deeper bite.
That’s where the calculator comes into play to suggest fit grades given what you input. If you have lots of sidecut flare under foot then a tighter fit with alu could be problematic. Slightly looser won’t do much to impact accuracy but won’t harm the furnitures either. So it pays to try it out beforehand. Clip-in with the ski flat on the ground. Flex up and down like you’re heading uphill. Note where teeth sit relative to the binding edge. Are they too low? Visualize them being further apart.
When you feel good about the fit, you won’t even know the thing’s there until snow grabs your boot and holds fast. That’s the magic of mountain travel. That’s why we do it.