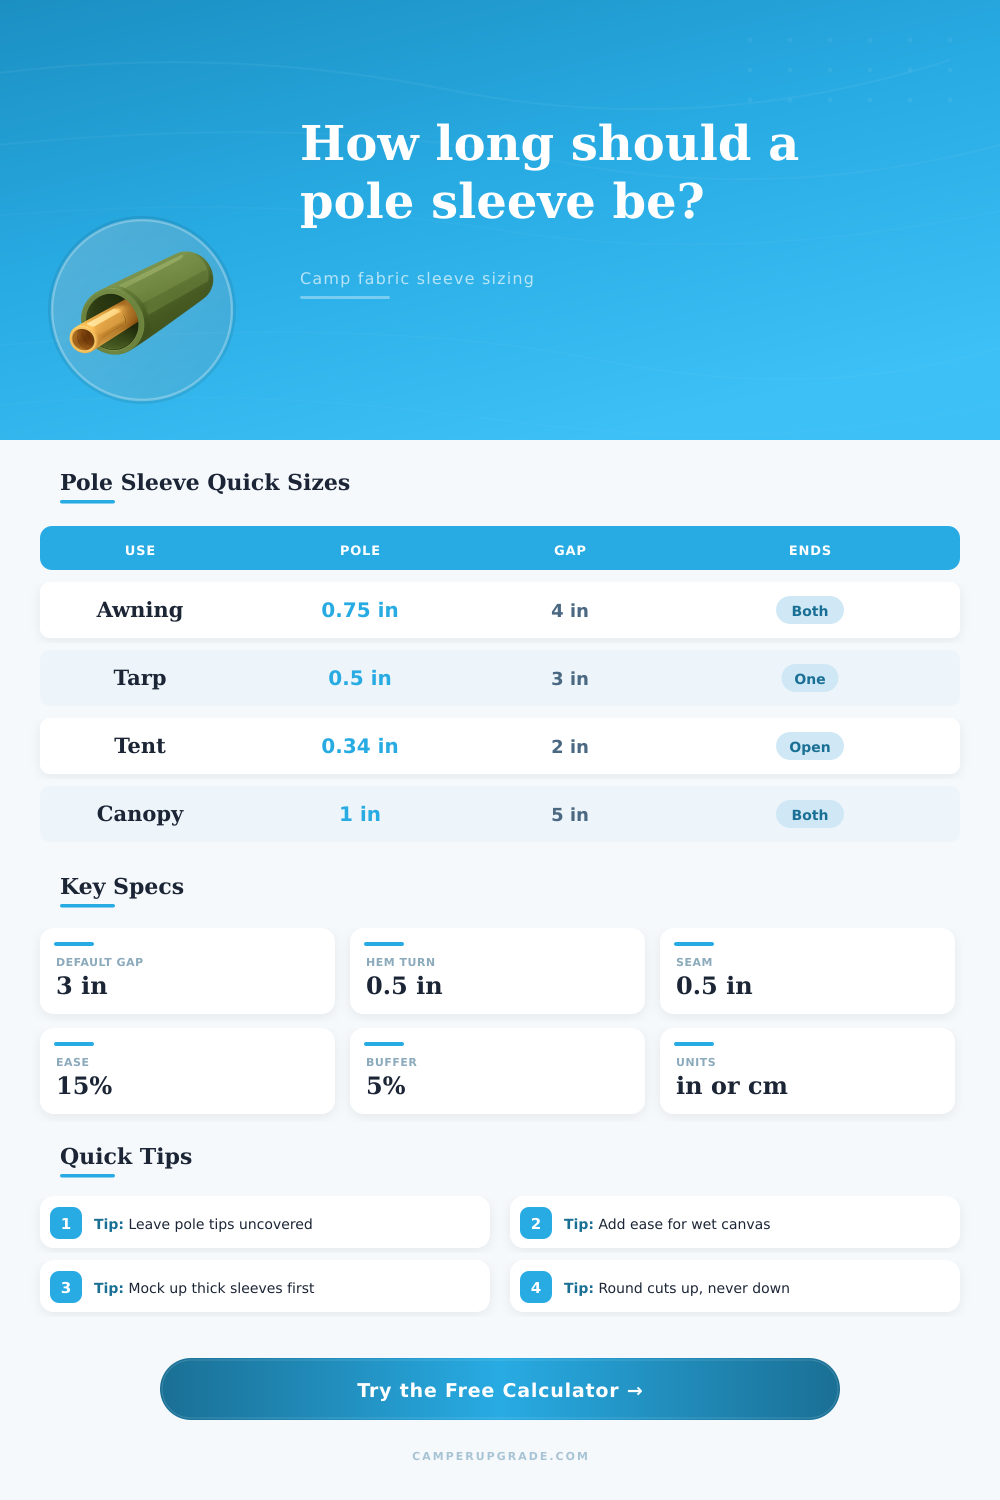
Pole Sleeve Length Calculator
Size sewn fabric sleeves for RV awnings, tarp poles, tent hoops, canopy legs, and replacement pole channels with realistic clearance, hems, and shrinkage allowance.
⛺Real Camp Gear Presets
📏Sleeve Inputs
Sleeve Cut Results
🧵Material / Spec Comparison
📊Pole Diameter Sleeve Width Table
| Pole diameter | Snug sleeve cut width | Standard sleeve cut width | Loose sleeve cut width |
|---|---|---|---|
| 0.34 in / 8.6 mm tent pole | 2.25 in / 5.7 cm | 2.38 in / 6.0 cm | 2.61 in / 6.6 cm |
| 0.50 in / 12.7 mm tarp pole | 2.70 in / 6.9 cm | 2.81 in / 7.1 cm | 3.10 in / 7.9 cm |
| 0.75 in / 19.1 mm awning pole | 3.54 in / 9.0 cm | 3.71 in / 9.4 cm | 4.12 in / 10.5 cm |
| 1.00 in / 25.4 mm canopy leg | 4.39 in / 11.2 cm | 4.61 in / 11.7 cm | 5.14 in / 13.1 cm |
| 1.25 in / 31.8 mm heavy support | 5.24 in / 13.3 cm | 5.51 in / 14.0 cm | 6.18 in / 15.7 cm |
📐End Treatment Allowance Table
| End treatment | Length added | Best for | Field note |
|---|---|---|---|
| Open ends | 0 hems | Continuous sleeves | Fastest pole feeding, least reinforcement. |
| One hemmed end | 1 hem turn | Single-stop pockets | Useful where one pole tip should register. |
| Both ends hemmed | 2 hem turns | Most awning pockets | Neater edges and less fraying on camp fabric. |
| Closed stop pocket | 2 hem turns plus pole radius | Tent hoops | Adds a soft stop without covering the whole tip. |
🏕Common Camp Sleeve Builds
| Project | Typical span | Pole diameter | Suggested cut setup |
|---|---|---|---|
| RV awning front sleeve | 96-144 in | 0.75-1.00 in | Both ends hemmed, 4-6 in total tip gap. |
| Tarp ridgeline pole sleeve | 72-120 in | 0.50-0.75 in | Open or one-hem end with 15% ease. |
| Tent vestibule hoop sleeve | 52-84 in arc | 0.30-0.38 in | Curved sleeve with low bulk seam allowance. |
| Canopy leg wrap sleeve | 48-72 in | 1.00-1.25 in | Wrap style with high clearance and extra buffer. |
| Privacy screen pole pocket | 60-96 in | 0.50-0.75 in | Two hems and a tidy 3% cutting buffer. |
🔧Fabric Behavior Reference
| Material | Sleeve feel | Suggested ease | Cutting note |
|---|---|---|---|
| Ripstop nylon | Slick and light | 8-15% | Works with narrow seams and compact hems. |
| Polyester oxford | Stable and firm | 15% | Good all-purpose awning sleeve fabric. |
| Cotton duck canvas | Bulky when folded | 22% | Add more width for wet or waxed fabric. |
| Vinyl-coated polyester | Stiff and grippy | 22-30% | Round up width so poles do not bind. |
| Solution-dyed acrylic | Outdoor stable | 15-22% | Allow for thick folded edges and topstitching. |
💡Calculator Notes
If you’ve tried to pitch a tent by feel in the dark, you know what I’m talking about. You poke and prod until pole pokes through. The fabric sleeve is an inch too short, then it’s all wonky and your tent resembles a failed do-it-yourself project. But it’s not just an eyesore; improperly cut sleeves is weak spots where stress concentrates, causing tears at precisely the time you don’t want one. Pre-measure, pick up scissors, and save yourself some fabric, and a lot of sanity come dusk.
On paper, the math look easy: Measure it out and cut hole for the pole tips. Reality includes layers of complexity that your intuition might not account for. First, there’s seam width along the length of the tube. Second, there’s the hem allowance you fold over each end to keep from fraying. Third, there’s the matter of actual fit between the pole and its channel. This is called the ease, or the amount of clearance between the pole and the channel.
Why Measuring Tent Sleeves Is Important
Most folks gets tripped up here, as if fabric were a piece of rigid plastic. Fabric isn’t. It stretch ever so slightly when held taut. It becomes thicker when folded over in a hem. You can measure out a perfect sleeve for bare pole but have no way to use it once it is made into a tube.
After entering your diameter and span, the calculator do all that math for you (saving you having to convert, multiply, add, subtract, and do any other guessing about coefficients). It also understands your projects specific geometry. A tarp ridgeline is different than an RV awning front pole, which is different than a tent hoop. You need one inch of gap at the end of each pole for an awning (to account for wind flex) and only half that for a tent hoop.
The calculator also takes into account how material will behave. A sleek ripstop nylon behaves quite differently than heavy cotton duck canvas. When wet, canvas becomes bulky and stiff, and thus requires a little more width and clearance to ensure the pole slides through without binding. Nylon, on the other hand, is thin but slick. It won’t require as much ease, but exacting seam allowances is needed.
A little goes a long way: Selecting an appropriate ease percentage matter. Too much and installation becomes a battle; you’ll end up stretching the material, twisting it to one side, or ripping the stitch line as you try to force in the pole. Too little and what’s the point? The whole structure collapse into itself like a deflating balloon, leaving the pole nowhere to go and your awning looking like someone poked a hole in the center of your tent.
For general camp gear, 15 percent ease… Enough to be easy to install while still holding firm, is standard. For thicker acrylics or vinyl coated fabrics, I’d bump it up… Those don’t pack down so well and a nice snug fit quickly turns into a stuck fit.
The other thing that has a big effect on the eventual cut length are end treatments. Open ends are quick, but they do nothing to prevent the pole from slipping or edges from fraying. Hemmed ends (both ends) add additional inches to what you need to cut, but provide a nice clean edge that will last season after season. This chart on the page makes it clear how much each type of treatment will add in inches to the overall amount of fabric required. Take a little more time up front to decide this, changing your mind mid-stream requires a new cut and a new sew. It is a waste of material and a waste of time!
Another silent killer of good projects are fabric shrinkage. Many outdoor fabrics shrinks slightly when exposed to heat or moisture for the first time. Cut the sleeves precisely to length today, and by the first rain storm they’ll be half an inch shorter. This naturaly settling should of been accounted for in the amount of wiggle room you leave on your cuts. Better to leave a little extra fabric that can be tucked out of sight than to leave hole that defeats the weatherproofing.
In the end, sewing outdoor gear is a balancing act of variables. The weather (i.e. Rain, wind) will always be out of your hands, but you do have some control over the cut. Measure carefully the true outside diameter of the pole, accounting for any joints and ferrules that increase bulk. Always round up, not down, your calculations. It’s easier to trim/roll up a sleeve than it is to make it shorter. If it is too short, it is useless. Get the math squared away on paper/screen and the rest comes together on the trail.