Deadman Anchor Size Calculator
Estimate buried deadman face area, trial anchor capacity, embedment ratio, and safety margin for campsite awnings, tarps, tents, and recovery planning.
| Ground type | Base allowable pressure | Best burial depth | Field warning |
|---|---|---|---|
| Loose dry sand | 120 psf | 3.0 to 4.0 ft | Needs large face area and careful tamping |
| Damp beach sand | 220 psf | 2.5 to 4.0 ft | Can weaken if saturated or wave washed |
| Packed snow | 180 psf | 1.5 to 3.0 ft | Sintering improves hold after waiting |
| Firm loam | 350 psf | 2.0 to 3.0 ft | Good general campsite condition |
| Stiff clay | 520 psf | 2.0 to 3.5 ft | Cracks reduce predictable resistance |
| Dense gravel | 650 psf | 2.0 to 3.0 ft | Hard to dig but high passive resistance |
| Frozen soil | 800 psf | 1.5 to 2.5 ft | Thawing can quickly lower capacity |
| Deadman material | Shape factor | Typical face | Best use |
|---|---|---|---|
| Round log or branch | 0.70 | Curved contact | Natural camp anchor with reduced bearing face |
| Flat board or plank | 1.00 | Full rectangle | Predictable tarp, awning, and tent loads |
| Filled sandbag | 0.85 | Soft rectangle | Beach and desert shade setups |
| Snow picket buried deadman | 0.95 | Flat plate | Snow camp anchors and winter guylines |
| Steel or aluminum plate | 1.15 | Rigid plate | Compact high bearing face |
| Spare tire anchor | 1.05 | Wide circle | Vehicle recovery planning in soft soil |
| Rock bundle in sling | 0.55 | Irregular | Emergency anchor where contact is uneven |
| Pull angle | Horizontal efficiency | Lift penalty | Deadman note |
|---|---|---|---|
| 0 degrees | 100% | None | Best alignment for buried deadman resistance |
| 10 degrees | 98% | Small | Good for most low camp guylines |
| 20 degrees | 94% | Moderate | Increase face area or burial depth |
| 30 degrees | 87% | High | Use caution in sand, snow, and loose fill |
| 45 degrees | 71% | Severe | Often better solved by changing line geometry |
| Common project | Design load | Suggested starting face | Typical depth |
|---|---|---|---|
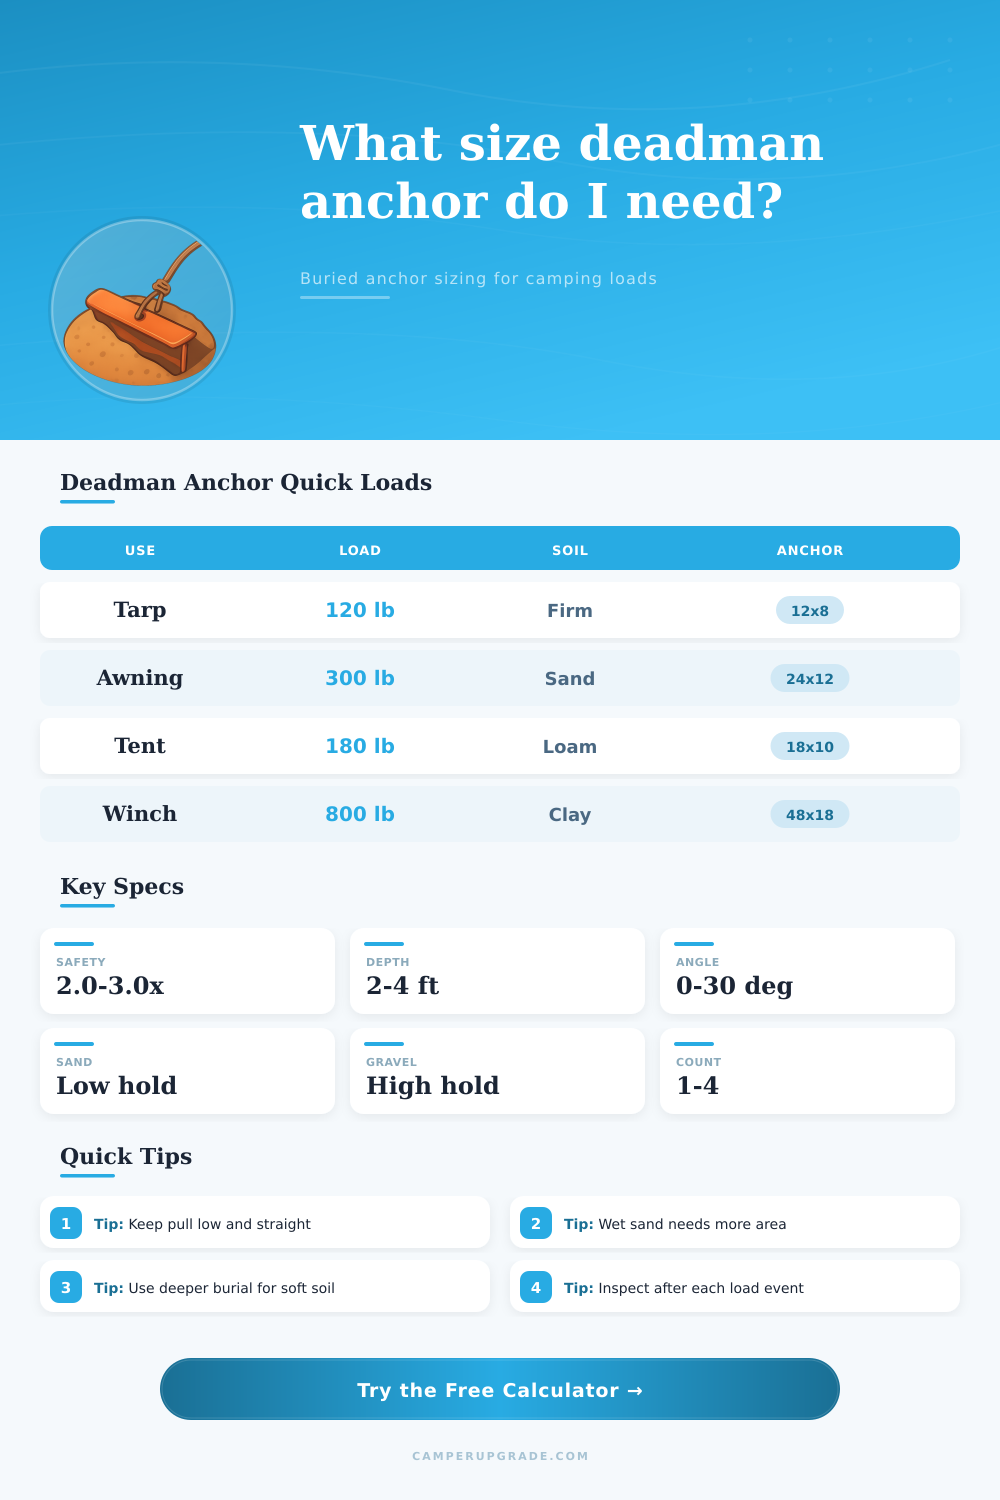
| Small tarp corner | 150 to 250 lb | 12 x 8 in | 1.5 to 2.0 ft |
| RV awning wind tie | 500 to 800 lb | 24 x 12 in | 2.5 to 3.5 ft |
| Wall tent guyline | 300 to 600 lb | 18 x 10 in | 2.0 to 3.0 ft |
| Beach shade deadman | 250 to 500 lb | 30 x 14 in | 3.0 to 4.0 ft |
| Snow camp anchor | 250 to 600 lb | 24 x 10 in | 1.5 to 2.5 ft |
| Light recovery line | 1500 to 3200 lb | 48 x 18 in | 3.5 to 5.0 ft |
Setting up a tarp doesn’t require an engineering degree, but it does requires an understanding of wind behavior and how it will interact with your gear. Wind will hit your shelter with varying force… Sometimes enough to make a calm campsite feel like a hard battle. Although you may confidently stake out three corners, the fourth can fail because surface stakes don’t actualy hold things down. The actual magic occur below ground level.
A deadman anchor use both soil resistance and leverage. You dig a hole, place a heavy object inside, attach a line, and let nature’s gravity keep the load in check against the wind. Sounds easy right? It gets hard when you attempt to figure out what size are needed for high winds in loose sand. You don’t size this anchor by raw power; it’s all about friction and geometry. The math is done for you with the calculator. What changes are the variables you put into equation.
How to Make Your Tent Stays in the Wind
One of them is face area. Face area is the area facing in direction of pull. So what does that mean? Burying a log on its side gives you lower face area then laying down a flat plank at right angles to the tension. The shape factor account for the nuance in that face area. How about the log vs. What about the plank? A log has spaces between it for dirt to fall out. It has less grip. A slab of something solid form a solid wall of earth pushing back on itself.
The more wind speed the faster it can pick up, like in a blow-off squall in the afternoon. The take away: It matters. The second main way to achieve stability is your depth. Digging deeper will increase overburden pressure, which will improve holding power accordingly. But there’s also a limit to how deep you can dig in the wild. You only have your hands and a small trowel, so you can’t dig very deep. This is where the tool comes into play: it balances that constraint by making an estimate of its capacity given both the soil type as well as depth of burial.
For example, soft sand has far lower passive resistance compared to say compact loam, meaning it needs far more volume to create equal amounts of holding power. Without accounting for this, you’re simply guessing. Gravel or frozen earth are dense; they’ll support a lot more load per square foot compared to dry, loose sand (see reference table). So building the anchor needs to be done based off the context of where you are.
There’s yet another wrinkle many casual camper miss: the pull angle. When pulling horizontally on the anchor, you’re pulling with all the resistive power of the buried weight. If the line angles up at a tree or pole, however, you start prying the anchor rather than pushing it. The vertical part of that force diminish efficiency drastically. Much heavier anchors is needed for steep angles to maintain equal levels of confidence.
Sure, you may shrug off a minor lean as insignificant. Physics, however, show that even slight pulls alter the force vector from straight-down compression to a combination of lift and extraction. It’s not just smart practice (it’s structural). There’s good reason there are safety factors. Camping is a dynamic load with unpredictable gusts spiking. A static test may hold a weight immobile without issue, yet a momentary jerk can break through resistance and tear out an anchor that appeared secure a moment prior.
The multiplier to your calculated load gives you room when things go south. This is what separates a morning waking up to a fully-intact shelter versus running around in the dark trying to catch your runaway tarp. There’s more than weight being held, you’re safeguarding your equipment from chaos.
Once you dig the hole, many folks pay no attention to how they backfill. Just tossing the dirt into a heap doesn’t make it any more stable. Soil has to be packed down in layers to make it tight and remove air pockets. This also creates more friction against the anchor face. Some moisture also helps, but not if it turns to mud and washes out. It’s really what happens at the interface between the piece and the surrounding ground, however, that contributes to the holding power.
When you have loose soil, the board simply floats. With packed soil, the ground is part of the system. This will save you some sweat, some stress, and some planning time if done ahead of time. It makes all the difference between a nice night’s sleep and having to run around repairing things once the sun sets.
You should of planned for this. The objective here is to have something that sinks into the ground so well that now all you have to think about is whether the weather will hold. It is true anchoring.