Tent Seam Sealer Amount Calculator
Estimate seam length, coating volume, tubes, and buffer for rainfly, floor, vestibule, door, and repair seams.
| Sealer profile | Best fabric match | Planning coverage | Typical cure window |
|---|---|---|---|
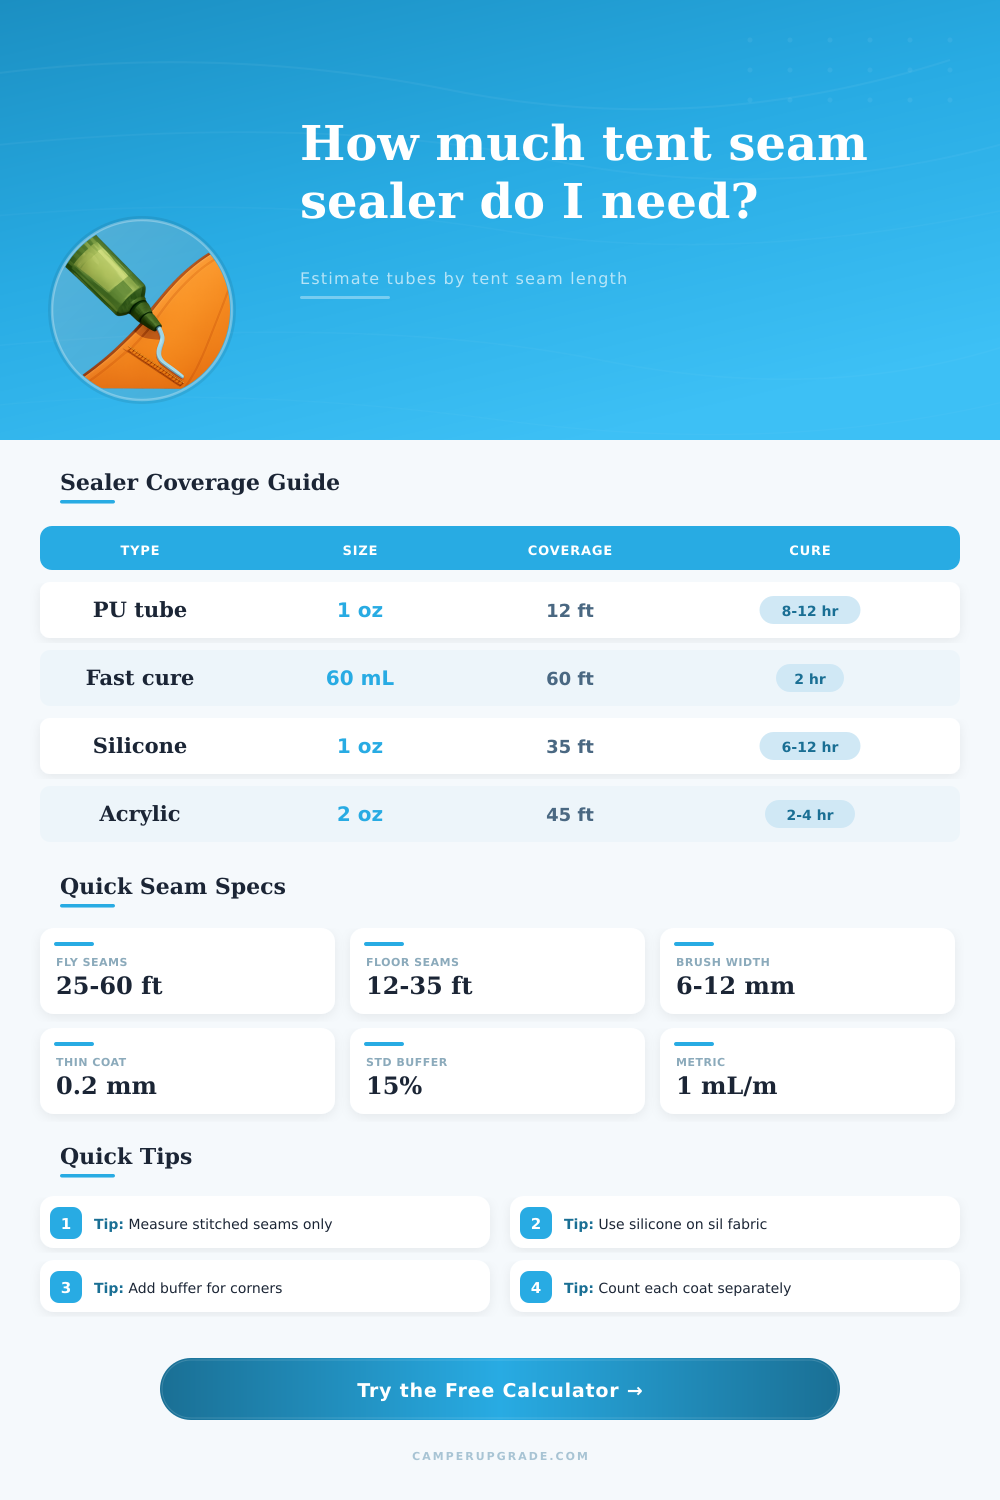
| PU adhesive sealant | PU-coated nylon, polyester, repair patches | 12 ft per 1 oz tube | 8-12 hours |
| Flowable urethane | Tent floors, rainflies, narrow stitched seams | 20-30 ft per 1 oz | 4-8 hours |
| Fast-cure water-based urethane | Nylon, polyester, canvas, vinyl blends | 60 ft per 60 mL bottle at 1/4 in width | About 2 hours |
| Silicone seam sealer | Silnylon and silpoly shelters | 30-40 ft per 1 oz thin coat | 6-12 hours |
| Acrylic canvas sealer | Canvas wall tents and cotton blends | 35-55 ft per 2 oz depending on weave | 2-4 hours surface dry |
| Coating width | Wet thickness | Volume per meter | Volume per 10 ft |
|---|---|---|---|
| 6 mm narrow bead | 0.20 mm | 1.2 mL | 3.7 mL |
| 8 mm standard brush | 0.25 mm | 2.0 mL | 6.1 mL |
| 10 mm wide stitch cover | 0.30 mm | 3.0 mL | 9.1 mL |
| 12 mm canvas bead | 0.40 mm | 4.8 mL | 14.6 mL |
| Container | Metric volume | PU adhesive coverage | Fast-cure coverage |
|---|---|---|---|
| 0.25 oz mini tube | 7 mL | 3 ft | 7 ft |
| 1 oz tube | 28 mL | 12 ft | 28 ft |
| 60 mL bottle | 60 mL | 26 ft | 60 ft |
| 4 oz bottle | 118 mL | 51 ft | 118 ft |
| 8 oz can | 236 mL | 101 ft | 236 ft |
| Tent project | Common seam length | Standard 8 mm coat | 1 oz tubes with 15% buffer |
|---|---|---|---|
| Solo trekking tent critical seams | 35-50 ft | 21-31 mL | 1-2 tubes |
| 2-person dome fly and floor | 70-100 ft | 43-61 mL | 2-3 tubes |
| 4-person family cabin tent | 130-190 ft | 79-116 mL | 3-5 tubes |
| Canvas wall tent perimeter refresh | 180-280 ft | 110-171 mL | 5-8 tubes |
When it’s raining hard in the mountains, there’s a certan wet chill you get. It is not like the dramatic tent leak kind; rather, it is the slow-wicked-in kind where your sleeping pad has turned into a sponge by morning. That’s because most budget tents arrive with sub-par seam taping, or at least tape that degrades over time.
A tube of sealant isn’t going to do the trick; you’ll want to know precisely how far it goes on all that hidden length of stitching found in these panels. Use the calculator above. Plug in your seam measurements and let it handle the math for you (no guesswork about whether it’s a full bottle job or just a single tube).
How to Calculate How Much Sealant You Need
So how does it work? It is basicly knowing where one thing ends and another begins. For most folks, it’s just the obvious perimeter that the tent covers. But you’re sealing everything: all the joints in the rain fly, the bathtub floor, the extensions on the vestibules, heck, even the inside sleeve for poles. And each section adds length that consumes volume, so the more there is, the more product you’ll need. With this tool, you break it out into separate measurements for door, perimeter, ridge, etc., and then feed those in.
Then it use a style factor to account for the difference between complex shapes and simple shapes, like comparing a dome-shaped backpacking tent to a cabin tent with many vertical seam. Why does that matter? Although a two person backpacking tent may appear roughly equivalent to a small family cabin tent from the exterior, it can have twice the amount of seam length, and that makes a difference.
The second part of the equation is chemistry. There are no one-size-fits-all sealants; you must use urethane products on polyurethane coated nylons or silicone based products on silicone coated silnylons. When your fabric stretches and contracts with wind they will peel and fail if you mismatch the two. The calculator forces you to choose the type of sealer you’re using because coverage rates vary so much from one chemistry to another. A viscous PU adhesive might only cover twelve feet per ounce, while a thinner silicone spreader can stretch that figure significantly further. It’s not whether a product is better, it’s whether it matches your tent coating and how thick you intend to spread it.
The other mistake people make is about thickness. Most people put on way too thick of a coat. Too much is a waste: you’ll be lugging around extra ounces and wasting materials. You normally just want to put down a thin coat (waterproofs stitches). Usually this means less than 1/4th of a millimeter of wet coating (measured with the tool). With a regular paintbrush stroke, it’s about zero point two to zero point three. Double that, double how much you use immediately. That’s one tiny little factor, but it affects the overall volume needed more then nearly anything else. Sometimes if you’re repairing an older tent with worn tape, you might need a thicker bead to fill the gaps; the calculator takes that into account by letting you increase the buffer percentage. You should of used a bit extra if its very old.
The rest is what I call your “insurance”; your buffer against wastage. Some of it will get spilled on the ground; some will get left in the nozzle; some will be used on reinforcement details and other corners where precise measurement isn’t possible. Because of all these inefficiencies, they add 15% as their standard buffer which covers this inefficiency without having to purchase an additional tube “just in case”. They provide a table of common container sizes and the amount of sealer each size covers to help you decide whether to buy one large bottle or several smaller ones. If your shelter needs require more than a few ounces at once, large bottles will save you money, otherwise go small and enjoy precision application (at higher cost-per-ounce).
It’s tedious but once you learn it’s necessary for dryness, you never do anything else. Because if you measure the seams yourself, you know all the weak spots are covered. You unfold the tent, follow along where the stitches go with your finger and guess how long they are. Then suddenly, what was a vague chore becomes a real plan. And when you get around to sealing it, you’re not doing it blindly, you’ve got a plan in place. A plan makes things feel real. And that sense of reality is priceless. Ten more minutes of measurement work before you even pick up the brush. It is worth it. Worth it.
Tent stitching At the end of the day though, the tent’s wetness depends on its weakest stitch. If you’ve calculated your gear needs correctly, nothing is left exposed to the elements. You purchased precisely what you needed; you packed lighter. When night falls, you drift off confident that the rain will remain where it should. Outside. Instead of a chill in the air, you only feel the memory of one.