Dry Ice Cooler Duration Calculator
Estimate how many hours dry ice will keep a camping cooler cold based on cooler size, insulation, dry ice form, packing style, ambient temperature, and how often the lid opens.
🧭Real Camping Presets
⚙Cooler And Dry Ice Inputs
🧊Cooler Specification Comparison
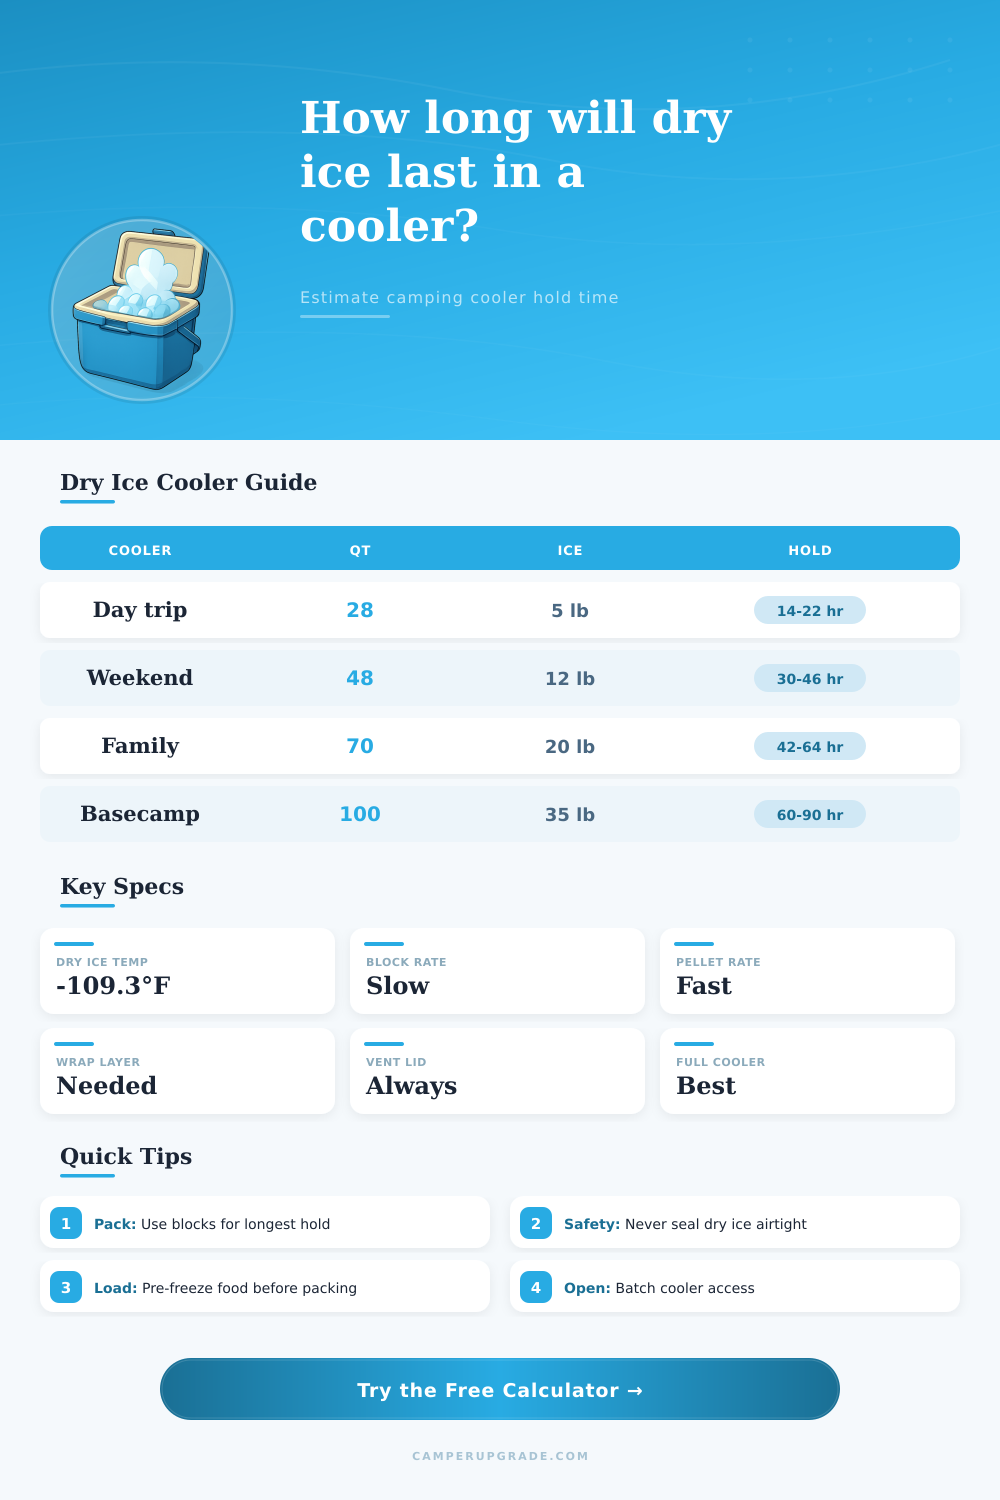
📊Reference: Typical Dry Ice Hold Time
| Cooler Scenario | Cooler Size | Dry Ice Load | Typical Hold Range | Best Use |
|---|---|---|---|---|
| Small day cooler | 20-30 qt | 5-8 lb | 12-24 hr | Frozen desserts, samples |
| Weekend camping cooler | 45-55 qt | 10-15 lb | 24-48 hr | Frozen meals |
| Family basecamp cooler | 65-80 qt | 18-25 lb | 36-72 hr | Multi-day frozen storage |
| Large expedition chest | 95-120 qt | 30-45 lb | 60-120 hr | Meat haul, long overland trip |
| Foam shipper insert | 15-35 qt | 5-15 lb | 24-72 hr | Medicine or sample transport |
🌡Reference: Temperature And Opening Multipliers
| Condition | Multiplier | Why It Matters | Calculator Input |
|---|---|---|---|
| Cool garage, 40°F | 0.73x | Lower heat leak into cooler | Ambient temperature |
| Mild camp, 70°F | 1.00x | Baseline reference condition | Ambient temperature |
| Hot vehicle, 95°F | 1.45x | High heat load through walls | Ambient temperature |
| Quick access | +1.5% each | Less warm air exchange | Opening style |
| Long rummage | +4.5% each | Warm air replaces cold gas | Opening style |
📦Reference: Dry Ice Form And Packing Method
| Dry Ice Form | Relative Loss | Handling Note | Best Cooler Role |
|---|---|---|---|
| Solid block | 0.85x | Lowest exposed surface area | Longest frozen hold |
| Wrapped slabs | 1.00x | Good balance of fit and duration | General camping cooler |
| Nuggets or chunks | 1.18x | More surface area than slabs | Odd-shaped load gaps |
| Pellets | 1.35x | Fast chilling, faster loss | Short transport |
| Rice pellets | 1.55x | Very high surface area | Rapid pull-down |
🧮Reference: Planning Amounts For Common Coolers
| Cooler Size | Conservative 24 hr Load | 48 hr Starting Load | 72 hr Starting Load | Notes |
|---|---|---|---|---|
| 25 qt | 4-6 lb | 8-10 lb | 12-15 lb | Best with block or slab |
| 48 qt | 7-10 lb | 12-18 lb | 20-25 lb | Common weekend size |
| 70 qt | 10-14 lb | 18-25 lb | 28-35 lb | Works well when packed full |
| 100 qt | 15-22 lb | 28-38 lb | 42-55 lb | Use dividers to reduce air space |
| 120 qt | 18-26 lb | 35-48 lb | 50-65 lb | Large lid openings matter most |
Dry ice is not normal ice. Most camping trips fail because someone forgets that dry ice is not regular ice. By midday on day two, you’ll have nothing left but a cooler filled with melted chocolate and warm beer. It all happened because someone forgot about the dry ice. This happened because they lost more than half their carbon dioxide to the environment before there food had a chance to thaw out. It’s all or nothing, really. It is a triumph or a disaster.
But how do you know if you’ve given away too much? You guess. Guessing costs money. You are lugging around twenty pounds of frozen meat up a mountain pass. Now, here’s the beauty of it: The above tool does all the work for you. By entering your exact variables, it converts those inputs into an estimated timeframe.
How to Use Dry Ice Correctly
What other factors does it consider? Weight, sure. But also your packing style, type of cooler used, and frequency of cooler peeks. Believe it or not, that last one matters more then you think. A thick-walled, high-quality rotomolded cooler will retain temp much better than a cheap, thin-walled plastic box from the discount store. To allow for this, the calculator includes loss multipliers based on construction type. Expect a soft-sided bag to lose ice a lot quicker because there’s simply less insulation to combat the ambient heat.
The other invisible variable is form factor. Without considering surface area, many people reach for whatever nugget/pellet is easiest to cram into their pack. Exposing more mass to the air at once causes small pieces to sublime more rapidly than one solid block would. By wrapping a solid block in cardboard or newspaper (as shown below), you create an insulating buffer layer between the warm air within the cooler and the cold carbon dioxide, this slows it way down, allowing you to preserve your precious food. Your goal is to keep the cold in but prevent the ice from transitioning into gas too fast. It’s a balancing act of thermodynamics that plays out in your campsite or trunk.
That’s when all the plans go to crap: When you open up the cooler. Anytime you raise that heavy lid, you’re letting cold air escape and warm air rush in. This changes how you use the calculator: will you open it many times a day (like 10) or just a few? Is it going to be a quick grab or a long dig-around-rummaging session? Digging for that good beer at the bottom of the pile will cost you hours of cooling power in minutes. Batch your access. Get out everything you need for the next six hours; don’t check it every half-hour. Inconvenient? Yes. But ice saving.
Now consider the ambient temperature input. Simple enough, but people mess up on this and plug in the predicted high instead of the average temp. Remember that your cooler isn’t going to be absorbing all the direct sunlight so don’t account for the maximum heat. This average will adjust the rate at which water vaporizes each day. Because hotter air lead to a faster phase change (i.e. Your ice turns into a gas more quickly when the sun shines directly on your tailgate.
Here’s where pre-freezing food makes things easier before packing it. Even if you lose some of your dry ice, having frozen food will help maintain the temperature. This isn’t a do-it-at-your-own-risk situation either. As dry ice turns back into a gas (called sublimation), it expands massively. It becomes carbon dioxide and expand until it reaches gaseous form. When opening the cooler with this much gas in there, it could create a large enough pressure inside to blow open the cooler or injure someone if not careful. Therefore, venting the cooler is a must. Use a lid that’s not completely airtight or keep the drain plug cracked open just a bit. That way the gas escapes safely but the cool air stays trapped inside. The calculator presumes proper ventilation since it’s non-negotiable for safety reasons.
Preparation is always better than panic purchasing last-minute on the trail. Run through the inputs with your own scenario… Does that additional pound or two make sense? Compare your numbers to the reference tables as a starting point. Having a bit of ice left over is preferable to having to stand by while your steaks grow lukewarm out in the wilderness.
Once you understand which factors matter, the math is easy. To keep your cooler cool, you need to manage insulation, air exchange, surface area, and time. The bottom line: If you’re going to keep stuff frozen, it’s less about buying ice than it is about treating said ice properly. It’ll last longer in a well packed cooler with as few lid openings as possible, especially if there’s a nice brick of wrapped dry ice in there. If you have a bunch of pellets in a full, over-stuffed box getting popped open at least once per hour, well… trust the science, plan for the absolute worst case scenario of repeated openings, and your grub’ll stay fresh. Vent that lid before closing it up tight though.