Bikepacking Water Carry Calculator
Estimate ride water, longest dry-stretch carry, bottle and bladder capacity, refill timing, water weight, and electrolyte support for bikepacking routes with changing heat, climbing, terrain, and resupply spacing.
🚲Choose a bikepacking water preset
Your Bikepacking Water Carry Plan
📝Route And Conditions
💧Carry Capacity And Reserve
Planning note: This calculator estimates fluid needs from common outdoor planning ranges. Adjust for your body, altitude, medications, health, weather swings, source reliability, and route consequences.
📊Bikepacking Water Storage Reference
🗺Reference Tables
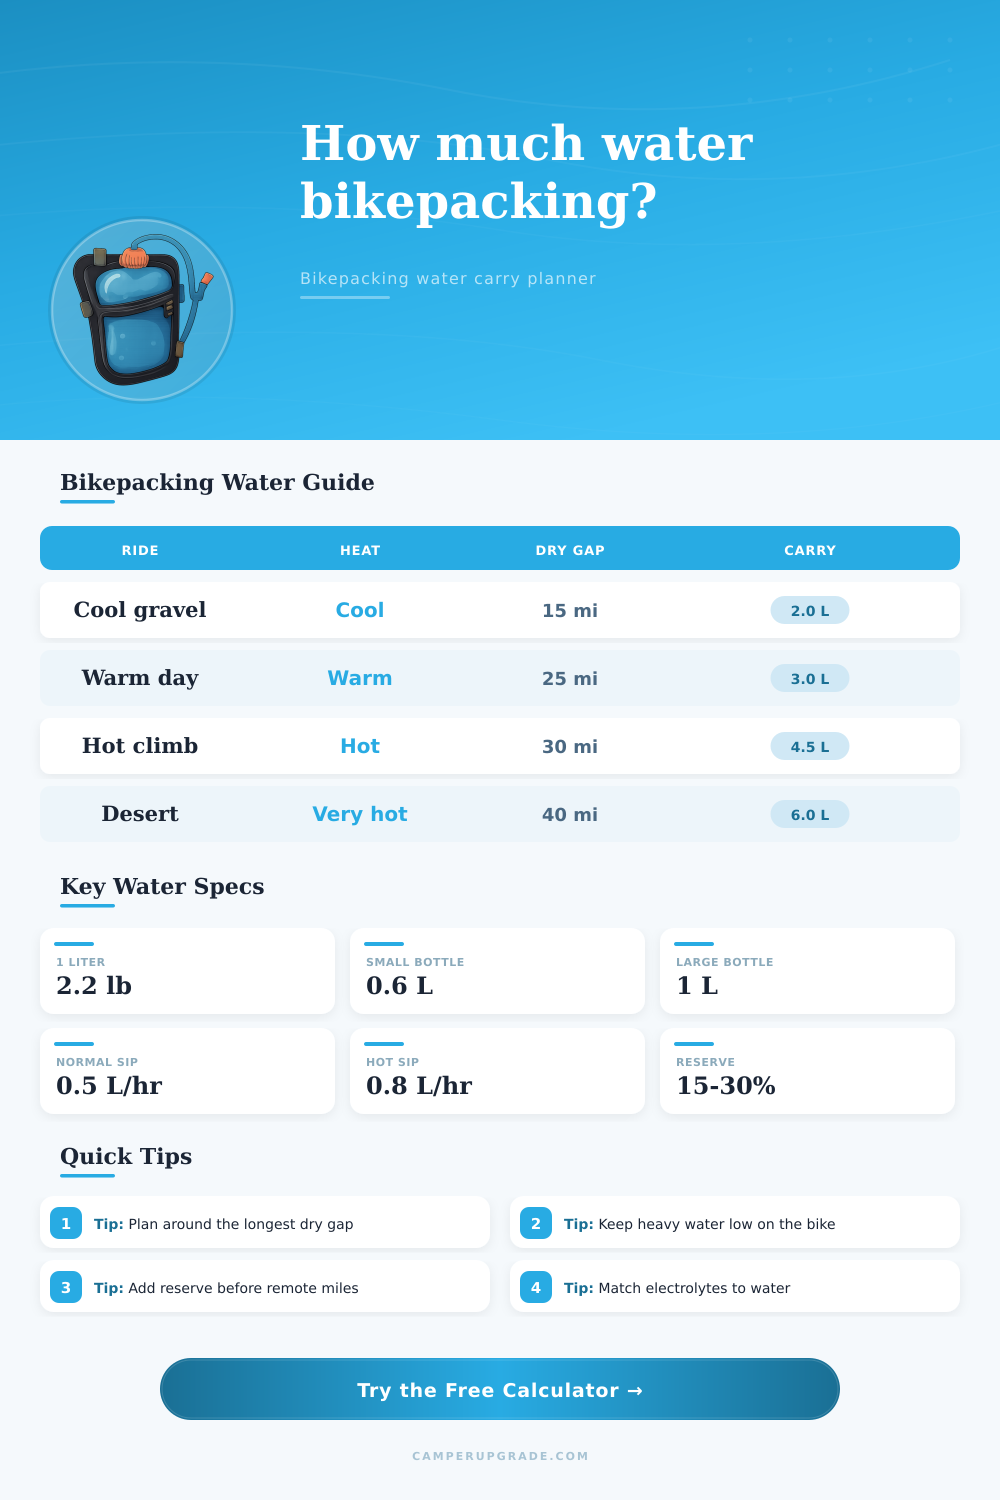
| Condition | Base range | Use when | Planning note |
|---|---|---|---|
| Cool spin | 0.35-0.50 L/hr | Cool weather, light effort | Often enough for shaded rail trails and mellow gravel. |
| Steady bikepacking | 0.50-0.75 L/hr | Loaded pace in mild to warm weather | Good starting range for many mixed routes. |
| Hot loaded riding | 0.75-1.00 L/hr | Warm sun, climbing, dry wind | Plan refills early; carry weight climbs quickly. |
| Very hot exposure | 1.00-1.25 L/hr | Desert, reflected heat, slow climbs | Route timing and source certainty matter as much as capacity. |
| Storage setup | Typical capacity | Best location | Handling note |
|---|---|---|---|
| Two frame bottles | 1.2-2.0 L | Main triangle | Easy access and balanced if the frame has room. |
| Fork bottles pair | 1.5-2.2 L | Low fork cages | Keep left and right roughly even. |
| Frame bag bladder | 1.5-3.0 L | Inside frame bag | Heavy but stable when packed low. |
| Temporary soft bottle | 0.5-2.0 L | Top of load or cage | Best for short dry gaps, then collapse it. |
| Dry gap example | Time | Water at 0.6 L/hr | Water at 0.9 L/hr |
|---|---|---|---|
| 15 mi fast gravel | 1.5 hr | 0.9 L | 1.4 L |
| 25 mi rolling | 3 hr | 1.8 L | 2.7 L |
| 35 mi loaded climb | 5 hr | 3.0 L | 4.5 L |
| 50 mi remote desert | 7 hr | 4.2 L | 6.3 L |
💡Calculation Notes
“Rather than focusing on total miles, think about your water needs based off the greatest distance without assurance of refilling. This will vary based on terrain, effort level, heat and direction (going up versus down). Plug these factors in, and the calculator do the rest. No more guessing; no more unpleasant rides.”
That’s why it has all those inputs. The overall mileage and time required are just a starting point; longer dry stretches matter more. Temperature and humidity changes your water loss rate. Longer climbs increase workload regardless of section length. Surface and effort level modify the baseline; the rougher the trail, the higher your output relative to a smooth path. And exposure and acclimation modifiers takes into account whether it’s open ridge or a shady forest. But nothing happen in isolation: You can’t guess at any single factor alone, which is why the calculator roll them together.
How to Plan Your Water Needs
The same goes for capacity planning. Different tools has different uses, frames bottles, fork cages, bladders. The tool just counts your entries, which leads to this question: how much should I fill these capacities before reaching the hole we know about? Run out of water and you’re screwed. Carry too much and you’ll notice weight of everything climbing every hill.
The table on the page presents this in practical terms: What’s common? And how do they stack up against one another? They don’t require remembering any conversion factors (that would of be overkill), yet make clear how common set-ups compare.
I think most people underestimate how quickly a moderate day turn demanding, particularly if it’s hot (above mid-eighty) or sandy. And they under-remember the difference between “what gets to your mouth” and the amount they started with: camp water, lost in filter, and a safety reserve. That’s where the final “carry” number comes from; it’s based on usable water, not optimistic math.
This is why electrolytes matter, because after a while, any fluids lacking sodium will just make you feel flat, especially on a long climb or a humid day.
As a practical application, calculate for the longest dependable stretch first; see if you have room in your bladder and bottles. Beyond that, it’s all easy: Carry some light weight, flexible flasks, detour to a certain water source, reduce the no-water portion, or concede that heat is going to force you into starting the ride a bit sooner. Data does not need to be perfect for any of those choices. It simply requires data based on what you’re reasonably confident will occur.
Like the rest of bikepacking, you want to plan for water with an approach that works. Measure your biggest limit and build in extra room around it. Keep your pack weight as light and centered as possible while keeping bike’s capacity. The calculator just accelerates and standardizes this effort vs having to do mental math alongside the trail.