Hiking Pole Length by Slope Calculator
Convert trail grade, slope angle, hiker height, pack load, pole plant distance, and surface conditions into practical uphill, downhill, and sidehill trekking pole settings.
🏔Slope And Trail Presets
📐Fit, Slope, And Pole Inputs
Grade is rise divided by horizontal run. A 10% grade is about 5.7°.
This controls whether the slope adjustment shortens, lengthens, or splits the poles.
Use trail sign grade, map profile grade, or elevation gain divided by horizontal distance.
Base length uses height times 0.68, then checks against wrist-to-floor if supplied.
Stand in trail shoes with arms relaxed; leave the default if unknown.
Hybrid is useful when arm length differs from the height chart.
Used only when manual flat length is selected.
Longer reaches make slope changes matter more. Typical hiking plants are 16 to 24 inches.
Style adjusts how strongly slope geometry changes usable pole length.
Heavier loads usually benefit from a slightly longer brace on descents.
Soft surfaces add allowance for tip sink; rocky descents add bracing margin.
Optional extra sink allowance for sand, mud, snow, or deep leaf litter.
Round results to the markings your adjustable poles actually have.
The calculator flags settings outside the selected lock range.
The slope adjustment is a field-fit estimate: base pole length plus a grade-derived reach correction, then pack, surface, and rounding allowances.
Your Slope Adjusted Pole Settings
📊Live Fit Summary
0% grade
before rounding
converted from input
within pole marks
📘Reference Tables
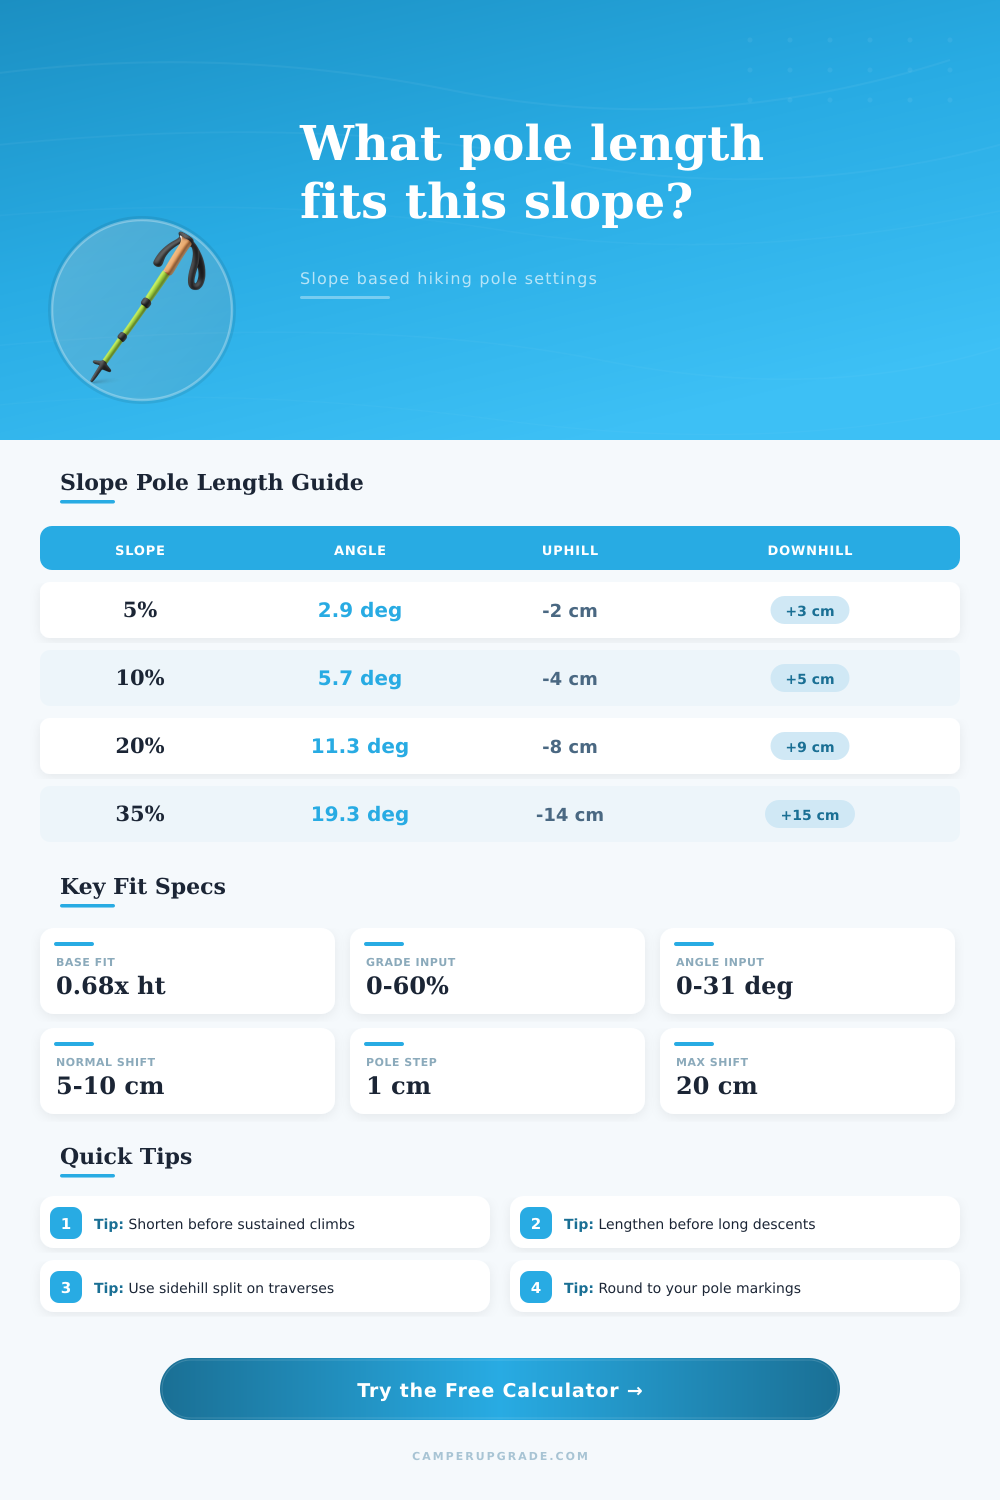
| Slope Grade | Slope Angle | Typical Uphill Change | Typical Downhill Change |
|---|---|---|---|
| 0 to 5% | 0 to 2.9° | 0 to 2 cm shorter | 0 to 3 cm longer |
| 6 to 10% | 3.4 to 5.7° | 2 to 5 cm shorter | 3 to 6 cm longer |
| 11 to 20% | 6.3 to 11.3° | 5 to 9 cm shorter | 6 to 10 cm longer |
| 21 to 35% | 11.9 to 19.3° | 9 to 15 cm shorter | 10 to 16 cm longer |
| 36 to 50% | 19.8 to 26.6° | 15 to 20 cm shorter | 16 to 20 cm longer |
| Hiker Height | Flat Baseline | 10% Climb | 20% Descent |
|---|---|---|---|
| 5 ft 2 in / 157 cm | 107 cm / 42.1 in | 103 cm / 40.6 in | 116 cm / 45.7 in |
| 5 ft 6 in / 168 cm | 114 cm / 44.9 in | 110 cm / 43.3 in | 123 cm / 48.4 in |
| 5 ft 10 in / 178 cm | 121 cm / 47.6 in | 117 cm / 46.1 in | 130 cm / 51.2 in |
| 6 ft 2 in / 188 cm | 128 cm / 50.4 in | 124 cm / 48.8 in | 137 cm / 53.9 in |
| 6 ft 6 in / 198 cm | 135 cm / 53.1 in | 131 cm / 51.6 in | 144 cm / 56.7 in |
| Pole Plant Style | Plant Reach | Slope Sensitivity | Best Use |
|---|---|---|---|
| Compact close plant | 12 to 16 in / 30 to 41 cm | Lower adjustment | Steep climbs, tight switchbacks |
| Normal hiking rhythm | 16 to 24 in / 41 to 61 cm | Balanced adjustment | Most day hikes and backpacking |
| Long bracing plant | 22 to 30 in / 56 to 76 cm | Higher adjustment | Downhill braking and rough steps |
| Nordic push cadence | 20 to 28 in / 51 to 71 cm | Moderate adjustment | Fast rolling trail and dirt roads |
| Surface | Extra Allowance | Why It Matters | Use With |
|---|---|---|---|
| Firm dirt trail | 0 cm | Tip stays near surface | Default routes |
| Loose gravel or scree | 1 cm | Small sink and sliding | Descents and sidehills |
| Rock steps and talus | 2 cm descent margin | More reach for bracing | Technical downhill |
| Mud or soft duff | 2 cm plus measured sink | Tip can bury below tread | Wet forest routes |
| Snowshoe or soft snow | 4 cm plus measured sink | Basket rides below surface | Winter travel |
🧭Field Fit Notes
When the terrain shifts, so too should your pole length. I know it’s a little thing but it makes all the difference when you’re on your feet all day. Most people sets up their poles at parking lot and leave them in place. Except, the ground never remains flat for very long.
A couple cm difference on the way up or down take off some reach that you’ll have to fight for. It also lessen the braking force your arms take downhill. That’s why hikers don’t realize how much slope matter. A few things change with that tilt in the trail. Your plant point is now lower on a slope, or higher. Either your shoulder are lifted or your step crowded. But what if your pole is longer or shorter?
Why You Should Change Your Pole Length
The math’s done for you in the calculator above, which just needs you to plug in your reach distance, height, pack and surface details, and grade. It then spits out the uphill/downhill/sidehill settings so no more guessing how far to lengthen before a drop off or shorten before a climb. Your height provide a reliable way to check if the ground is level. If your arms don’t align with the average on the chart, take a look at wrist to floor as another verification. Then adjust based off pack weight and surface.
Downhill reach help if you’re carrying heavy pack. Soft ground sucks up a couple of millimeters of tip depth. Each adjustment is slight by itself but they accumulate over multiple hours of foot travel. A wider view of this can be seen in the reference tables on page. The bigger jumps from downhill to uphill length are for steeper grades. The more gentle the grade, the tighter you keep the two numbers pegged.
The style of plants also affects sensitivity, the tighter the switchback, the shorter your compact plant will need to go; on the other hand, the looser the rock, the longer your bracing reach should of be. Which is why we ask what style of plants you have, not everyone hikes alike so we don’t assume!
When folks begin to pay attention to slope, many overcorrect. They’ll go up too short the first time climbing and struggle with poles on the next flat stretch. A better habit is to use it as a starting mark and fine tune based off the first few minutes of being on that type of terrain. If your shoulders rises on the uphill, drop another notch. If downhill feels cramped, lengthen one marking before going down again.
The first number come from the calculator. Whether or not it’s the right one comes from your body. Pole length isn’t set in stone. It’s something to vary. Just like trail varies, so can your poles. Use the right length for the slope instead of the wrong length. This will shift the work back down to where it belongs. Your legs (and off of your upper body).