Backpack Torso to Volume Ratio Calculator
Compare pack liters against torso length, trip duration, carried load, frame lift, hipbelt transfer, water carry, bear canister space, and gear bulk before choosing a backpack size.
🎒Backpack Fit Presets
📐Torso, Volume, and Load Inputs
Sets the target liters-per-torso band and load expectation.
Measure C7 vertebra to the line between iliac crest tops.
Use total rated volume, including main bag and listed pockets.
Food volume grows quickly after the first night.
Used for load percentage, not for judging fitness.
Pack, shelter, sleep system, clothing, kitchen, and carried gear before food and water.
Enter the heaviest starting food and fuel load.
One liter of water weighs about 2.2 lb and occupies about 1 liter.
Include bear cans, camera cubes, packrafts, or other hard-to-compress volume.
Adjusts estimated required liters from the same weight.
Positive lift helps load-lifters work on heavier packs.
Framed backpacking packs often transfer 60-80 percent when fitted well.
This is a sizing and planning model. Try the loaded pack in person when possible because torso adjusters, hipbelt shape, shoulder strap curve, and packed stiffness vary by brand.
Backpack Ratio Results
📊Pack Spec Grid
📘Torso and Volume Reference Tables
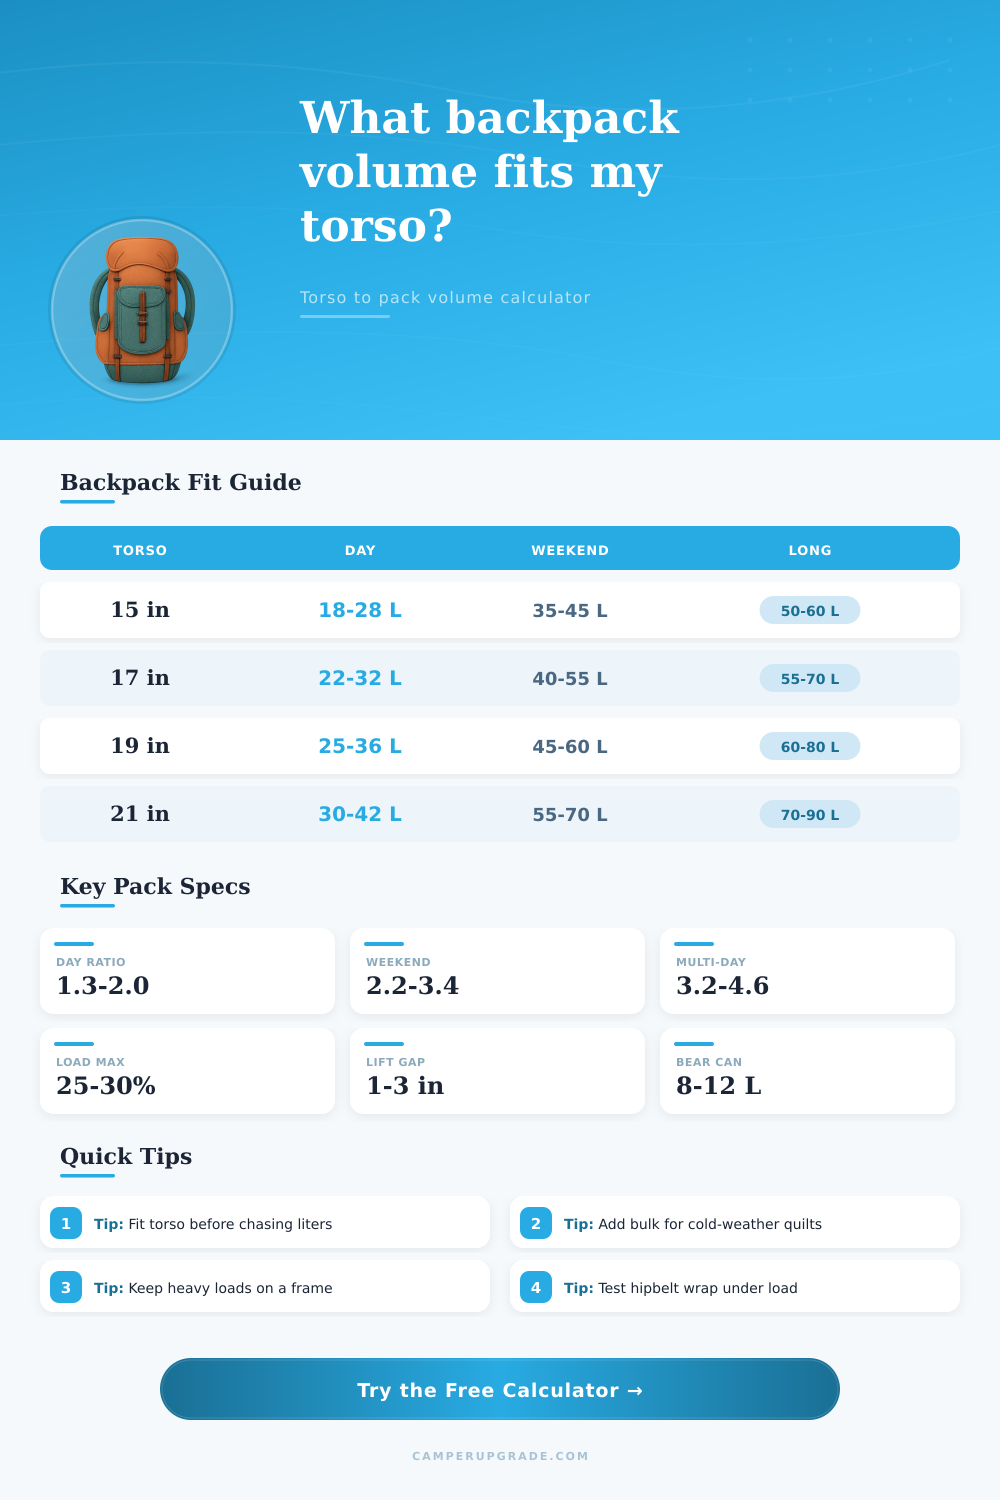
| Torso length | Common pack size | Useful volume band | Fit note |
|---|---|---|---|
| 14-16 in / 36-41 cm | XS to small | 18-55 L | Short frames can feel top-heavy with tall expedition bags. |
| 16-18 in / 41-46 cm | Small to medium | 25-65 L | Many weekend packs sit in the 40-55 L sweet spot. |
| 18-20 in / 46-51 cm | Medium to large | 30-75 L | Good frame lift matters once volume passes 55 L. |
| 20-22 in / 51-56 cm | Large to tall | 35-90 L | Taller hikers can use more volume without the bag towering as much. |
| 22-24 in / 56-61 cm | Tall / extended | 45-100 L | Check shoulder strap wrap because not every tall torso fits the same yoke. |
| Trip type | Typical volume | Ratio target | Load structure |
|---|---|---|---|
| Day hike or summit | 12-32 L | 1.0-2.0 L/in | Low food volume, water and layers drive size. |
| Fast overnight | 25-38 L | 1.6-2.5 L/in | Works best with compact shelter and quilt systems. |
| Weekend backpack | 40-58 L | 2.2-3.4 L/in | Most three-season kits fit here with careful packing. |
| Four to seven days | 55-75 L | 3.2-4.6 L/in | Food volume, water carries, and canisters become decisive. |
| Winter or expedition | 70-100 L | 4.0-5.8 L/in | Bulky insulation and heavier loads need frame support. |
| Gear bulk profile | Volume factor | Examples | Calculator effect |
|---|---|---|---|
| Compact down kit | 0.90x | Down quilt, tiny shelter, minimal cook kit | Reduces required liters for the same base weight. |
| Standard three-season | 1.00x | Common tent, sleeping bag, pad, stove, spare layers | Neutral baseline for most backpacking trips. |
| Bulky synthetic kit | 1.12x | Synthetic bag, roomy tent, larger fleece layers | Adds pack volume without assuming extra weight. |
| Winter insulation | 1.26x | Cold bag, puffy pants, larger pad, snow tools | Raises required liters and load support expectations. |
| Camera or fishing inserts | 1.15x | Camera cube, fly boxes, tripod, awkward protection | Adds rigid space that packs less efficiently. |
| Scout or group gear | 1.18x | Shared pots, troop tents, extra safety gear | Increases volume reserve for uneven group loads. |
| Load signal | Planning band | What it means | Pack feature to check |
|---|---|---|---|
| Under 15% body weight | Light | Frameless and minimal frames can work if packed cleanly. | Shoulder comfort and bounce control. |
| 15-22% body weight | Moderate | Most backpacking loads sit here with good planning. | Hipbelt wrap and back panel length. |
| 22-30% body weight | Heavy | Frame stiffness and load lifter angle become important. | Frame lift, stays, and belt padding. |
| Over 30% body weight | Very heavy | Consider cutting load, adding support, or splitting group gear. | Load rating, torso fit, and pack discipline. |
💡Pack Fitting Tips
The best backpack for you will be the one that fits your body based off the amount of space in liters that matches your torso length. It’s a simple relationship but one we tend to forget. You see a pack and think “yeah it looks like it’d work” but when it’s filled up with gear it feel awkward and ill fitting. That’s because torso size isn’t the same as volume. Enter your trip details and measurements into the calculator above and let it do the math for you so you don’t have to guess at relationship between these two numbers.
A lot of hikers only get out a tape measure once and either buy a pack based on whatever everyone else is using or pick one off a tagline promising it’s “the best.” This fail to recognize actualy limitations. Some objects are inflexible, such as food. Water! A hard bear canister doesn’t squish down like a puffy jacket. And similarly sized sleeping bag (e.g., 1 lb. Synth vs 1 lb. Down) often fit very different inside packs. By letting you pick a gear bulk profile and adding any rigid pieces individually, the calculator take all this into account.
How to Choose the Right Backpack Size
After entering everything, the output tell you if the pack you’ve selected will fit or if your stuff will need to be crammed in/cut back. For another reason, a tall person’s torso can handles more volume before the pack gets up too far over their head or shifts center of gravity too high. Short people has shorter torsos that hit the practical limits earlier.
The tool asks you to measure your torso. Then it asks how much stuff you intend to carry. It shows how your ratio compare to the kind of trip you’re planning. Too low a ratio could leave you feeling cramped when you add water and food. Too high a ratio? That’ll work, as long as you pack carefuly enough to keep load near your back.
Then it’s time to factor in Load Percentage. This is how much you estimate yourself to weigh at the start and what fraction that is of your own bodyweight. Hikers tend to be comfortabley anywhere from 15% to 25%. Beyond that, frame lift and hipbelt transfer matter more than straight up volume. Enter how much weight you expect to put on your hipbelt and your body size to see if a pack can absorbs that load.
A real trip has variables that no model could of really capture. Maybe it gets cold and you need an extra insulating layer. You go through more water than expected on a desert stretch but the weight of all that food remain unchanged. Someone in camp have a shared shelter or group gear so now one pack exceeds its target size.
While the calculator will get you started, ultimately, try the loaded pack on for size. It help to plug numbers in before hitting the store and then make adjustments once you have the loaded pack on your back. That mix of math and real-world fit keep the ratio more realistic than just optimistic.