Diamond Tarp Coverage Calculator
Estimate projected ground cover, dry sleeping zone, diagonal ridge length, drip-line buffer, and fit margin for corner-to-corner diamond tarp pitches.
⛺Diamond Tarp Pitch Presets
📏Tarp Size, Pitch, And Rain Inputs
Use the finished fabric length from edge to edge before pitching.
A rectangular tarp becomes a diamond when the ridge runs corner to corner.
Shortening the diagonal can improve weather seal but reduces usable length.
Measured from flat ground. Steeper panels shed rain but project less area.
The profile adjusts coverage for uneven sides, raised porch edges, or storm overlap.
Keep sleeping bags and gear inside the wet edge, not directly below the tarp edge.
Higher edges need more horizontal margin when rain is blown sideways.
Calm rain is near 0 degrees. Gusty rain often needs a larger inset.
Adds realism for fabric sag, corner stretch, uneven ground, and splashback.
Use zero when checking only shade, gear, or cooking coverage.
Include pad length plus extra room at head and foot.
A wide pad, bivy, dog, or side-sleeper setup needs more width.
Pack vestibule, boots, cookware, bike bags, or dog sleeping space.
A ratio above 1.0 means the dry zone is larger than the protected footprint.
The calculator models a rectangular tarp in a corner-to-corner diamond pitch. Final shelter performance still depends on tie-out placement, campsite slope, wind direction, and fabric tension.
Diamond Tarp Coverage Results
📊Pitch Spec Grid
📐Common Diamond Tarp Sizes
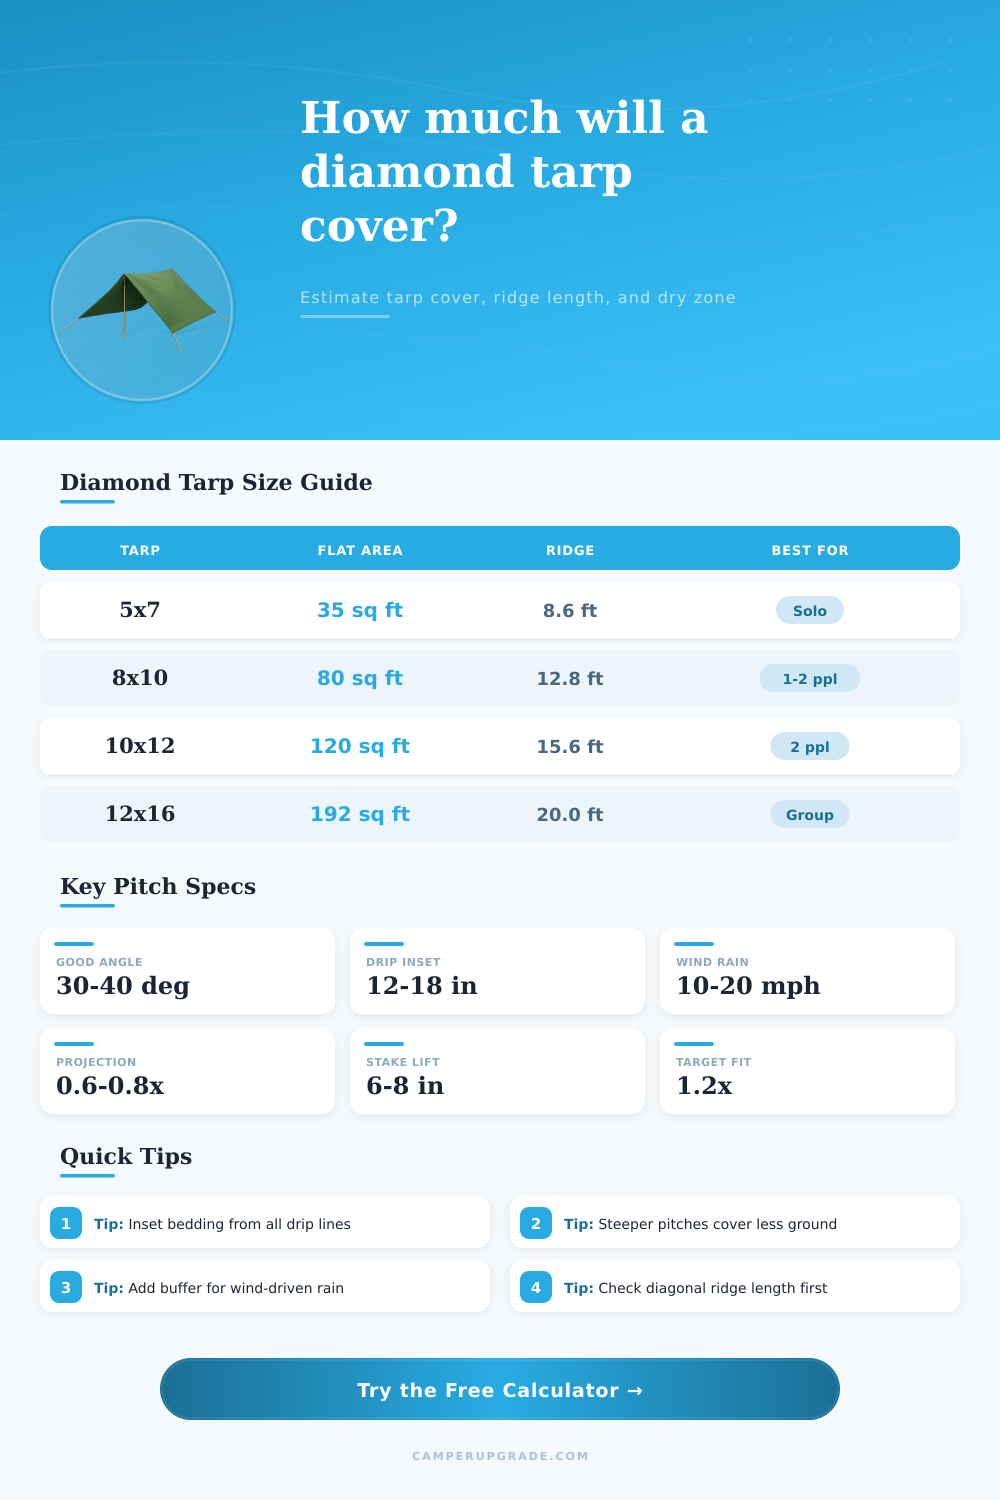
| Flat tarp size | Flat area | Diagonal ridge | Typical diamond use |
|---|---|---|---|
| 5 x 7 ft poncho tarp | 35 sq ft | 8.6 ft | Emergency solo cover or gear shade with little storm margin. |
| 7 x 9 ft backpacking tarp | 63 sq ft | 11.4 ft | Solo ground sleeper or compact hammock fly in mild rain. |
| 8 x 10 ft camp tarp | 80 sq ft | 12.8 ft | Balanced solo luxury pitch or tight two-person cover. |
| 10 x 12 ft tarp | 120 sq ft | 15.6 ft | Two-person sleep zone, hammock coverage, or broad gear space. |
| 12 x 16 ft tarp | 192 sq ft | 20.0 ft | Group kitchen, picnic table, or large fair-weather porch pitch. |
🌬Pitch Angle And Coverage Tradeoffs
| Panel angle | Ground projection | Weather behavior | Best calculator use |
|---|---|---|---|
| 15 to 25 degrees | High projected cover | Broad shade, weaker runoff, more sag risk. | Fair weather porch, picnic shade, calm camp kitchens. |
| 26 to 35 degrees | Moderate-high cover | Good general balance between runoff and protected footprint. | Most diamond pitches for one or two sleepers. |
| 36 to 45 degrees | Moderate cover | Better rain shedding and lower splash exposure. | Storm-ready ground pitch or hammock fly in steady rain. |
| 46 to 60 degrees | Lower cover | Fast runoff, narrower dry zone, stronger side protection. | Windward storm pitch where ground coverage is secondary. |
🌧Rain Buffer Reference
| Condition | Rain angle input | Edge height note | Suggested inset |
|---|---|---|---|
| Calm vertical rain | 0 to 5 degrees | Low edges can stay close to the ground. | 8 to 12 in plus any splash allowance. |
| Light breeze rain | 6 to 12 degrees | Raised porch corners need more bedding inset. | 12 to 18 in for sleeping gear. |
| Wind-driven rain | 13 to 25 degrees | Average edge height strongly affects drift distance. | 18 to 30 in, lower the windward side. |
| Gusty exposed camp | 26 to 40 degrees | Coverage becomes direction-sensitive. | Use storm profile and keep gear centered. |
🛌Sleep Footprint Fit Guide
| Protected setup | Typical footprint | Dry zone target | Diamond pitch note |
|---|---|---|---|
| Solo pad and pack | 7 x 3 ft plus 6 sq ft gear | 35 to 45 sq ft | Usually fits under 7 x 9 or larger if edges are low. |
| Two narrow pads | 7 x 5.5 ft plus 10 sq ft gear | 60 to 75 sq ft | Needs careful centering under 8 x 10 in rain. |
| Two wide pads or dog | 7.5 x 7 ft plus 12 sq ft gear | 80 to 100 sq ft | Works better under 10 x 12 with balanced angle. |
| Hammock and ground gear | Ridge length plus side buffer | Length margin matters most | Check diagonal ridge first, then dry side width. |
💡Diamond Tarp Coverage Tips
A diamond tarp pitch is a geometry problem. It is a cord and stake solution. Take rectangular piece of fabric, fold it on one corner and hope that you’ve constructed a shelter that will keep your stuff dry. When wind grabs ahold of edge or rain beats down from an angle, the usable interior gets smaller rapidly. Tension make the fabric sag. Guessing what margin is safe is common practice for most. Then they discover in dark that their pad’s beneath the drip line.
Those estimates get fed to the calculator here which makes them a workable design. First it requires flat size inputs, as that’s one variable under your direct control (prior to pitching). Next is desired ridge type. If you shorten the ridge to a diagonal or even a storm beak, the length-to-span ratio will change. Lastly is pitch angle. Steeper means more effective at shedding water but less area covered. The calculator use the cosine function with that number. Finally, an optional profile factor if you’ve got asymmetric sides or a raised porch. That output provide estimated footprint before buffering.
A Tool for Planning Your Tarp Shelter
Here’s how it worked out: Then we have wind and rain inputs. Wind-driven rain: simple enough, but the wind angle turns that drip-line inset into a moving target. The higher the edge, the bigger the sideways drift. And then there’s water splash and fabric stretch to consider. This is all added using some trigonometry based off how high the edge is. The final total buffer lets you overlay your gear footprint on the dry zone. If the dry area are less than the amount you require, the tool informs you by how much.
It doesn’t promise comfort that isn’t actualy there. But that is not what it measures, not the actual ground. With a little slope, when the rains come, your good margin becomes a river. And the trees make the ridge run off kilter from best line. Soft soil pulls stakes. These variables don’t get fed to the machine but determine whether or not the dry rectangle remain dry. The calculator provides a solid place to start. Then you walk it, keeping the numbers in hand.
A lot of campers forget to measure the diagonal distance across the ridge. They go with a tarp based on flat area. Then they realize that it won’t reach from one side to the other, corner to corner. If you run the ridge first, you avoid that surprise and can see why something like a 10 by 12 tarp looks generous on paper but tight when the ridge is shortened for weather. That is why I included the reference tables.
It will show you how various size perform under different buffer and angle conditions without having to test all of them yourself. You might think that a 5×7 poncho tarp is adequate for solo use but when you factor in another pack and wind it starts looking inadequate. Then there’s the middle ground with a balanced 8×10. Seeing the relationship between these tents/tarps will help you decide if you’re good or need to upsize.
And finally, there’s the fit ratio: the calculated dry zone compared to the space you require for your gear and sleepers. A high ratio indicates you have space to breathe. A low ratio indicates the set-up is too small for the conditions. And a ratio close to one indicates it will work only when weather cooperates and everyone keeps their stuff centrally located. That one ratio takes measurements and makes them a no-brainer long before the first stake is driven.
Thinking in triangles (and rectangles) that turn into triangles are part of the reward of diamond tarps. Seeing the arithmetic is what the calculator does. It eliminates the guesswork of geometry.