A Frame Tarp Width Calculator
Estimate finished tarp width, raw cut width, side panel run, pitch angle, roll-panel count, and edge clearance for an A-frame camp tarp.
⛺A-Frame Tarp Presets
📐Tarp Geometry Inputs
Used for the recommendation note and pitch rating.
Dry interior width between the two drip lines before side overhang.
Extra horizontal coverage beyond sleeping pad, hammock, or gear width.
Height of the ridgeline before sag and fabric stretch settle in.
Ground clearance at each side edge after staking or pole setup.
Subtracts from ridge height before the side-panel run is calculated.
Raw cutting reserve for rolled hems, reinforcement folds, and side tie-outs.
Adds fabric for side pullouts, slight catenary edges, or reinforcement patches.
Use a small positive buffer for coated fabric, seams, and measuring tolerance.
Usable width after selvedge trimming, not the printed nominal width.
This calculator models a centered A-frame tarp with equal side panels. Confirm your finished size against pole height, tree spacing, tie-out positions, and fabric manufacturer instructions before cutting.
A-frame tarp width result
🧭Current Setup Spec Grid
📊Pitch Angle Reference
| Pitch style | Angle range | Typical edge height | Width effect |
|---|---|---|---|
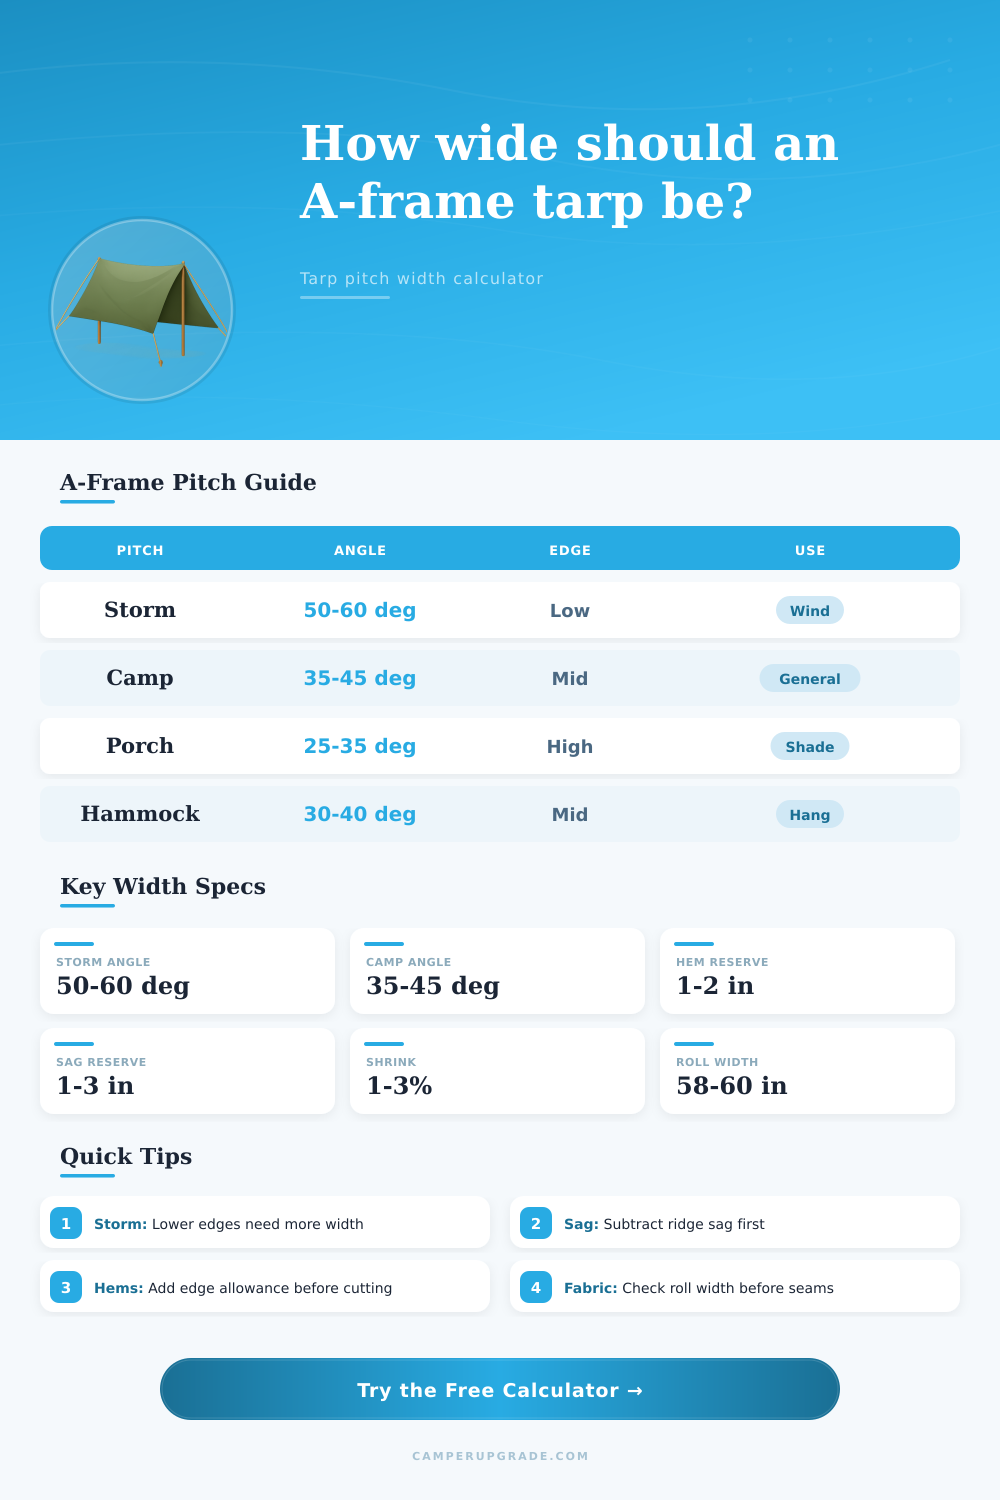
| Low storm A-frame | 50 to 60 degrees | 2 to 10 in / 5 to 25 cm | Needs the most tarp width for a narrow dry zone. |
| Balanced camp pitch | 35 to 45 degrees | 8 to 20 in / 20 to 51 cm | Good coverage without extreme fabric demand. |
| Hammock rain cover | 30 to 40 degrees | 18 to 36 in / 46 to 91 cm | Often wider because suspension clearance raises the edges. |
| Porch shade pitch | 25 to 35 degrees | 30 to 50 in / 76 to 127 cm | Uses less width but gives weaker wind protection. |
🧵Fabric Roll Planning Table
| Usable roll width | Metric width | Best for | Planning note |
|---|---|---|---|
| 54 in | 137 cm | Small solo tarps | Expect seams on most full A-frame builds. |
| 58 in | 147 cm | Common coated fabric | Works well for compact storm tarps and panels. |
| 60 in | 152 cm | Standard tarp fabric | Often the cleanest baseline for two-panel layouts. |
| 72 in | 183 cm | Wide awning fabric | Can reduce seams on porch and family fly setups. |
📏Common Width Benchmarks
| Finished tarp width | Metric width | Common use | Geometry clue |
|---|---|---|---|
| 6 ft | 1.83 m | Minimal bivy or gear cover | Best with low ridges and narrow protected width. |
| 8 ft | 2.44 m | Solo backpacking A-frame | Works for many 4 to 5 ft dry zones. |
| 10 ft | 3.05 m | Two-person ground tarp | Allows useful edge height with storm coverage. |
| 12 ft | 3.66 m | Hammock or group shelter | Better for raised edges and wider dripline span. |
🏕Preset Comparison Table
| Preset | Dry width | Ridge / edge | Why it matters |
|---|---|---|---|
| Solo low storm | 4.0 ft | 38 in / 5 in | Narrow footprint, steep sides, strong rain shedding. |
| Backpacking 8x10 | 5.0 ft | 48 in / 10 in | Balanced pitch for one person plus gear. |
| Hammock cover | 5.5 ft | 66 in / 28 in | Higher edge clearance changes the width need. |
| Family cook fly | 8.0 ft | 84 in / 40 in | Large dry zone with raised edges for movement. |
💡Practical Tarp Width Tips
It was an A-frame tarp. With an A-frame tarp, you learn exactly how wide a tarp needs to be so that it will work throughout the trip. Too wide and you’re carrying around unnecessary weight and fabric; too small and the edges hang over your sleeping pad where they splashes rain when wind shifts. Once you have the fabric tight, you also know what the tarp covers and how it all fits together.
What’s important is the protected ground width: That’s the dry area between the two drip lines. It is not just how wide your pad is. You need to account for some elbow room when you are settled in with your elbows out, your boots on, and pack by your side. And if there’s a low edge, there’s the splash zone inside it, too.
How to Size Your Tarp
Once you input that width and the overhang on each side, the calculator do the math. It will spit back out what finish end-to-end length the tarp needs to cover. Everything else changes with your choice of height. Steeper sides depend on ridge height. How far does the edge drop vertically? Lower edges is better for wind protection, but they require wider fabric to reach a similarly dry patch of ground. Higher edges open up your standing room and make inside feel bigger, but flatten the pitch. Wind driven rain has furtherer to go underneath the shelter. Here’s where that tiny drop affects the usable height before the sides start running.
Fabric will settle when pitched, so there’s always some sag allowance. It’s very simple: If you’re going to be cutting a hem, don’t forget to add it in! Tied out reinforcement material, small amounts of catenary curve, rolled hems; those eat away at the fabric. Coated fabrics will also cinch down a bit; this is why we have the “shrink buffer”. Add to all of this the fact that nothing measures or cuts precisely every time… The allowance is baked into the raw width that the calculator outputs. When your final panels comes up a little short on the ridge, there’s no shock and awe factor.
These decisions have a visual outcome: pitch angle. A steeper angle sheds water fast, resists wind well and pulls the edges inward. It sacrifices interior space. Shallower angles offer easy entry and more headroom; they catch water and flap in bad weather. The reference table show how those options work for common setups. Match your angle with anticipated conditions.
The last limitation is fabric roll width. Coated fabrics is available in usable (trimmed of selvedge) widths from fifty-four to seventy-two inches. Anything wider than one roll? You will need multiple panels or a center seam. Plan for that seam position upfront. You won’t need seams later. There will be no weak point along the ridge, and it saves time too.
The actual choice involve a tradeoff between setup, speed, weight, and coverage. For example, one hiker gets great coverage in a rainstorm with his narrow, steep storm pitch. But he can’t stand up under there to change clothes or cook. Another has a wide, low pitch because she wants space and can breathe easy, but that extra space requires more fabric. And then there’s getting that sucker right: it’s always a tradeoff between coverage, weight, and setup speed.
Before you pull out the scissors, the calculator tests your tradeoff options. It avoids the most common trail mistakes.